Website Settings
Website Settings
Here, you can configure website-related settings including the homepage page and global theme.
Go here: to access website settings.
Home > Website > Setup > Website Settings
1. Landing Page
Set the Home Page field to the route of that page to set your website's default landing page. Any route, including common ones like home, about, contact, login, all-products, and blog, can be added here.
A web page can also be designated as the landing page.
You must designate the ERPNext Homepage as your default home in order to use it.
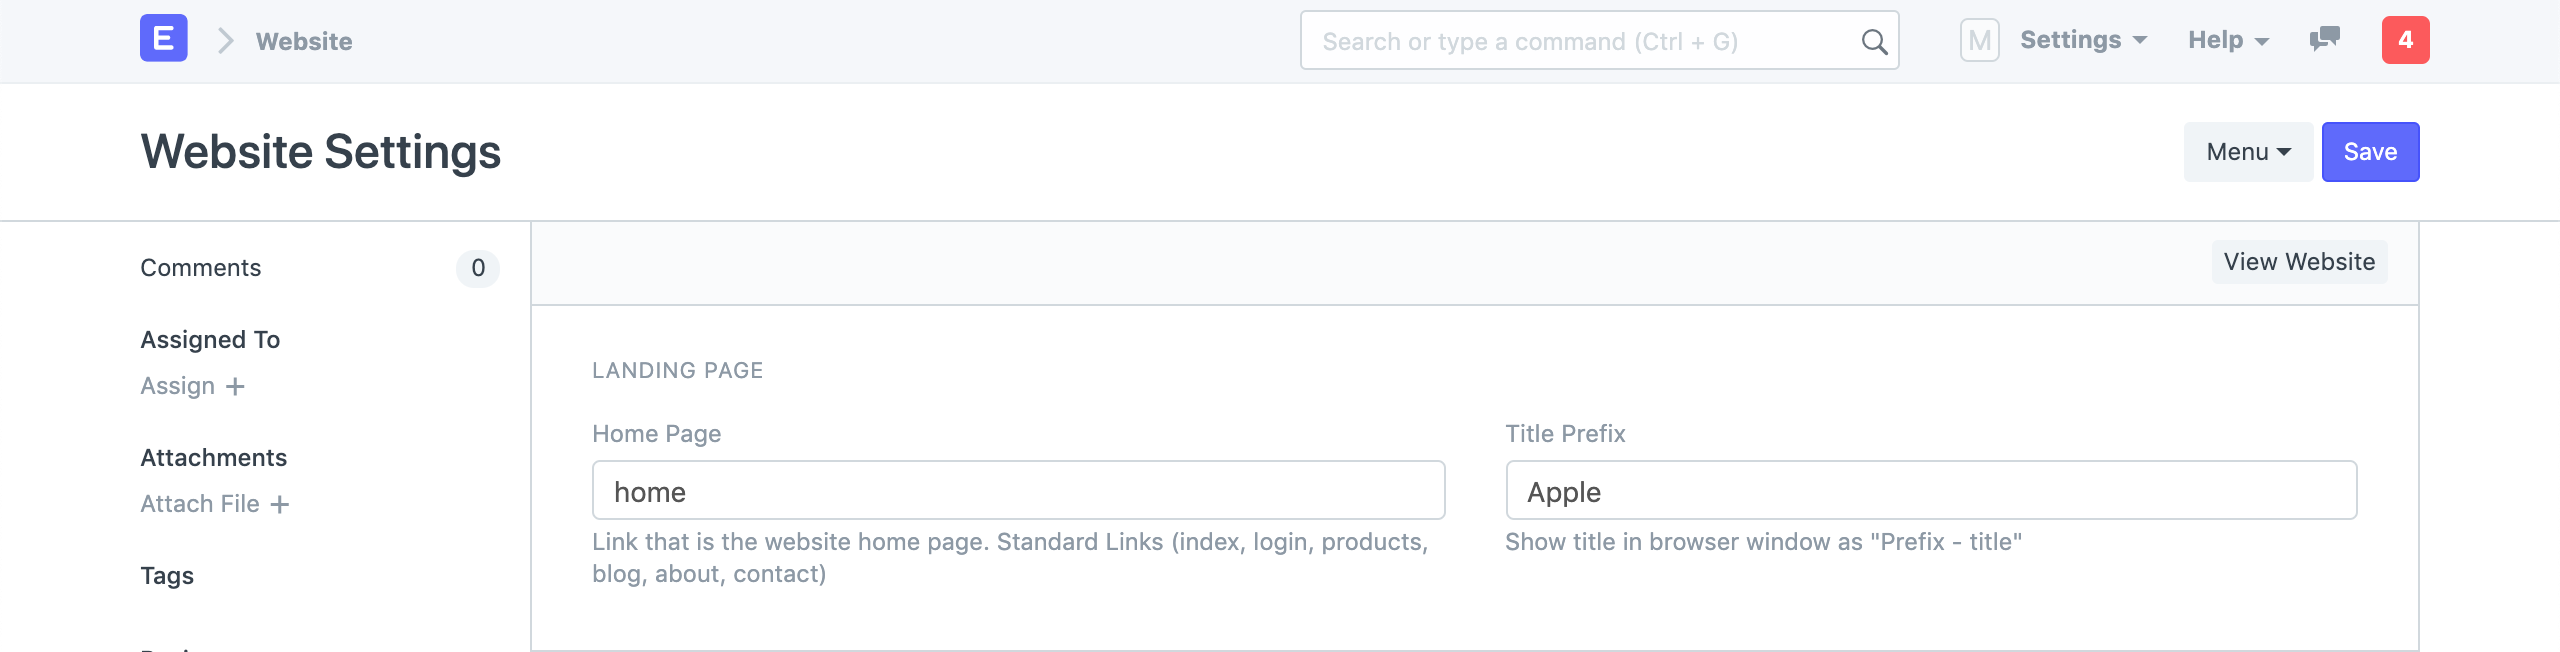
Moreover, the Title Prefix can be specified here. On every page, it will be added to the browser title. Your business name may be entered here.
2. Website Theme
Build a unique theme and put it here for your website. Here is more information on setting up a website theme.
3. Brand
3.1 Brand Logo
In this section, you can set the website's brand logo. Before clicking "Set Banner from Image," upload the brand image. With your uploaded logo, it will produce a Banner HTML.
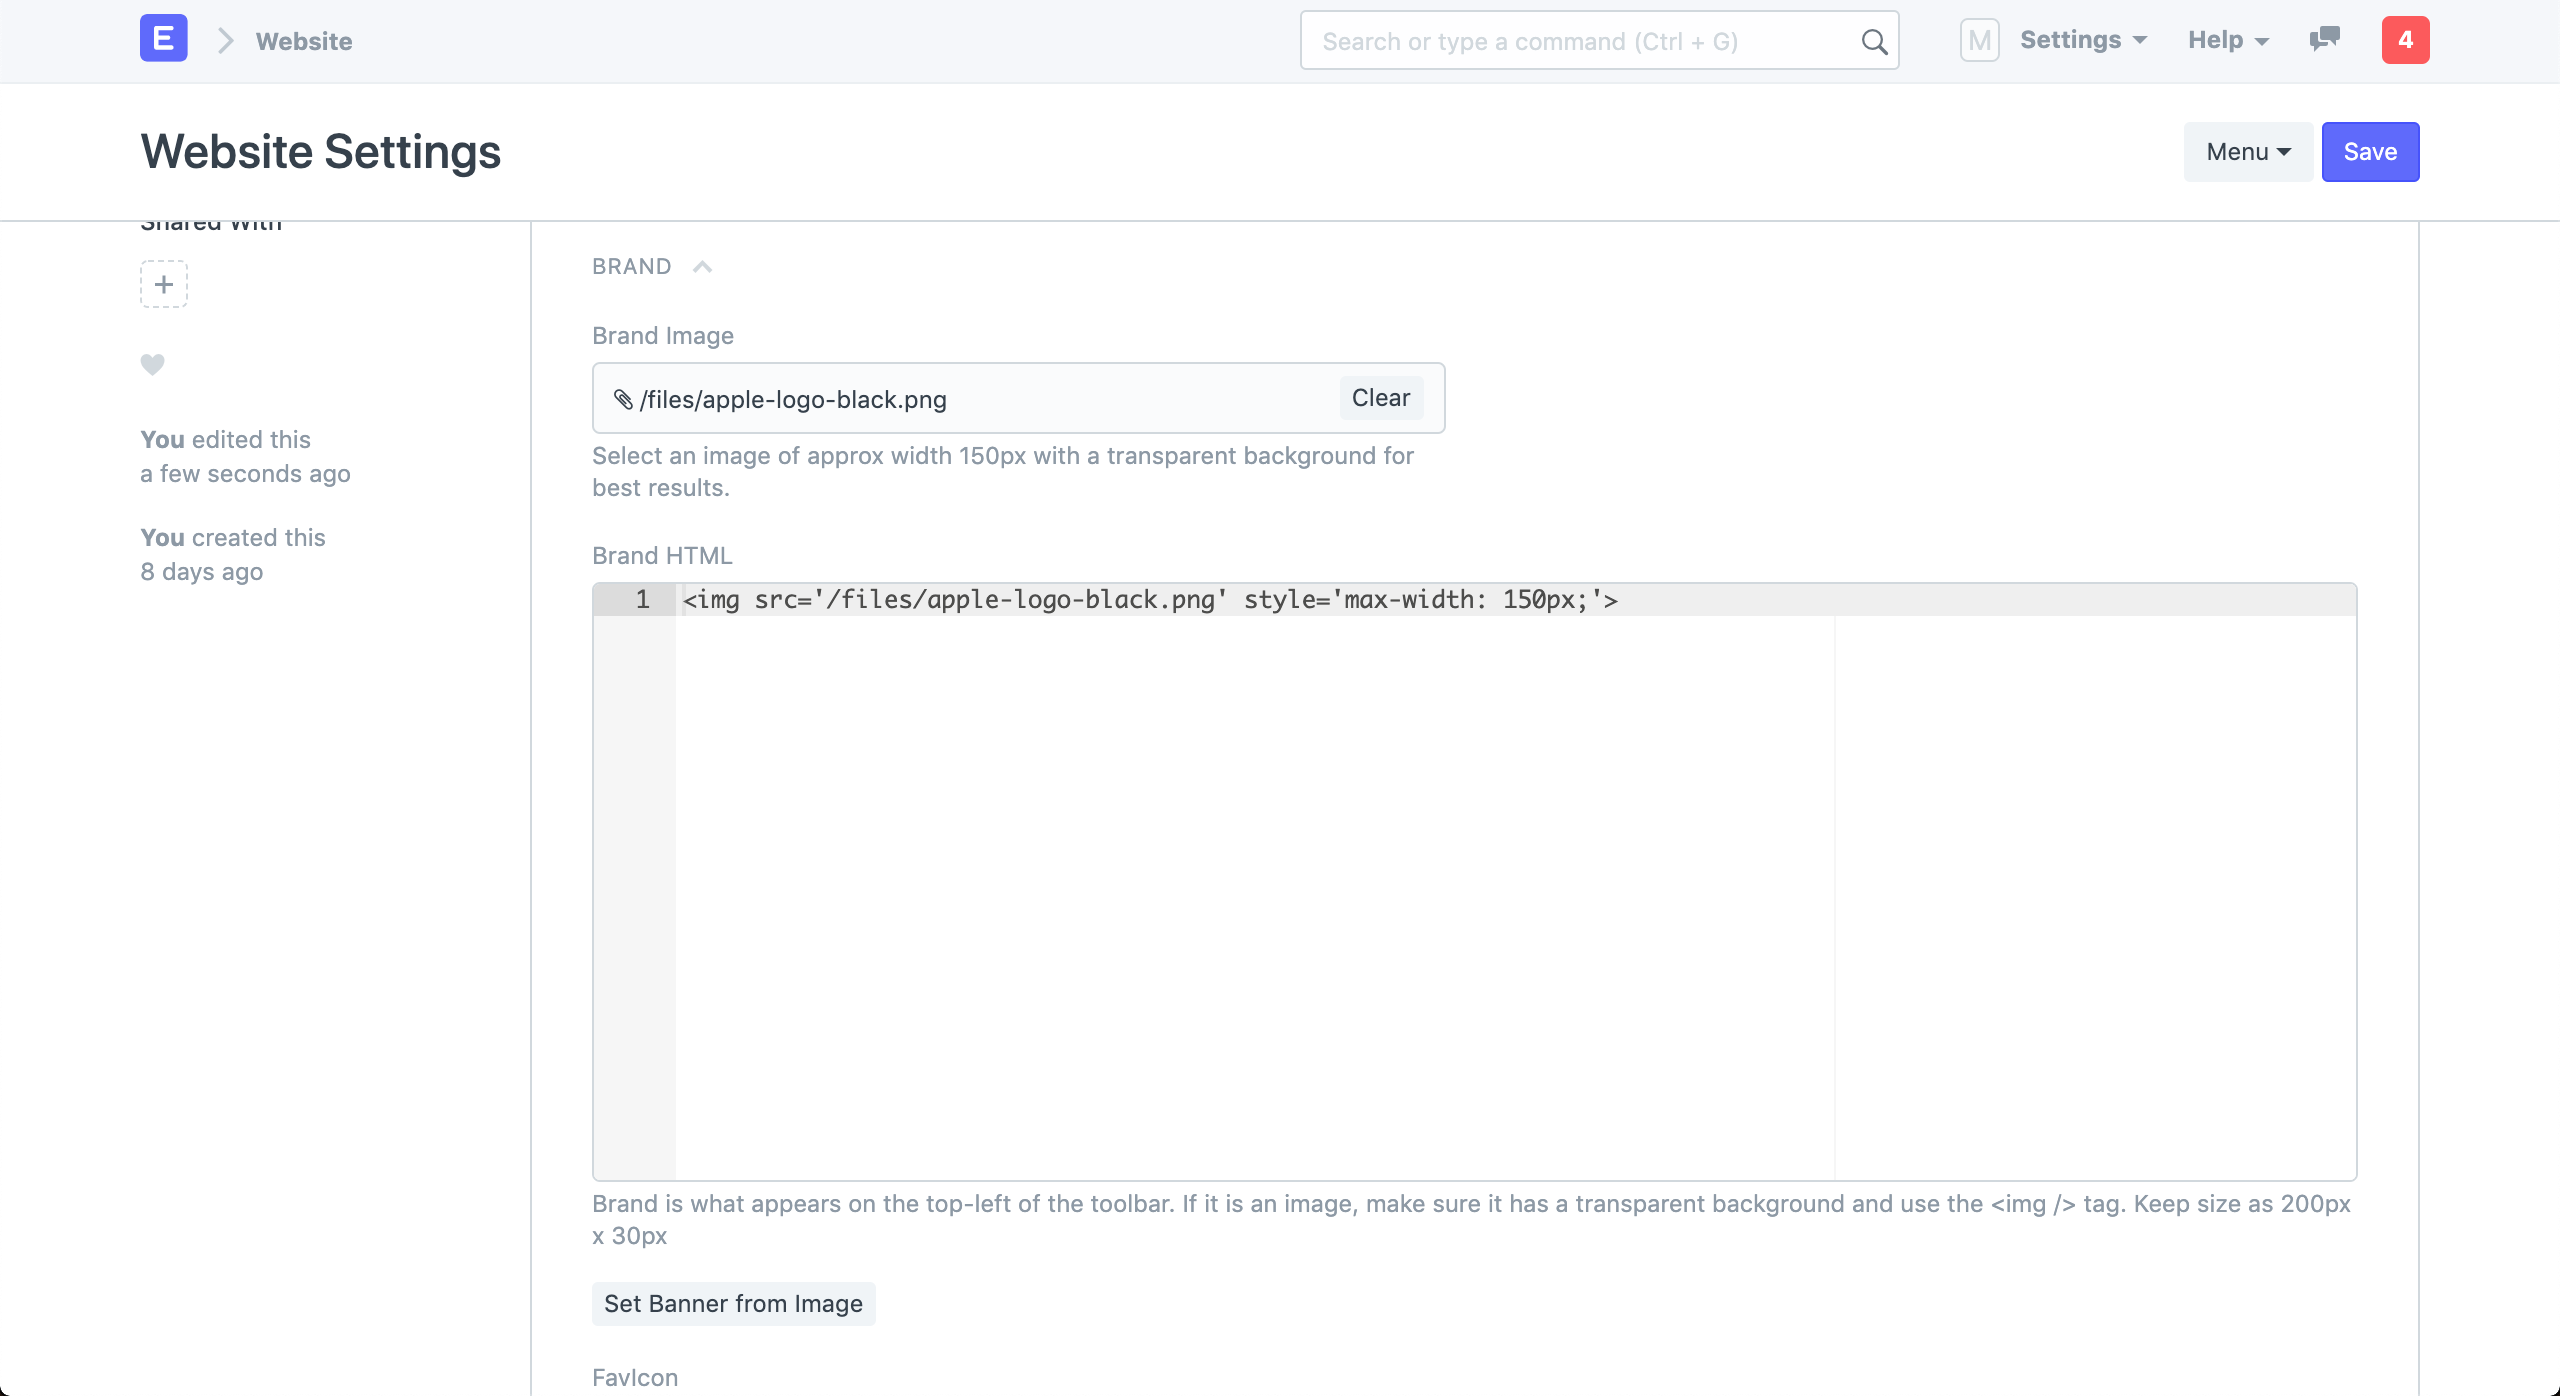
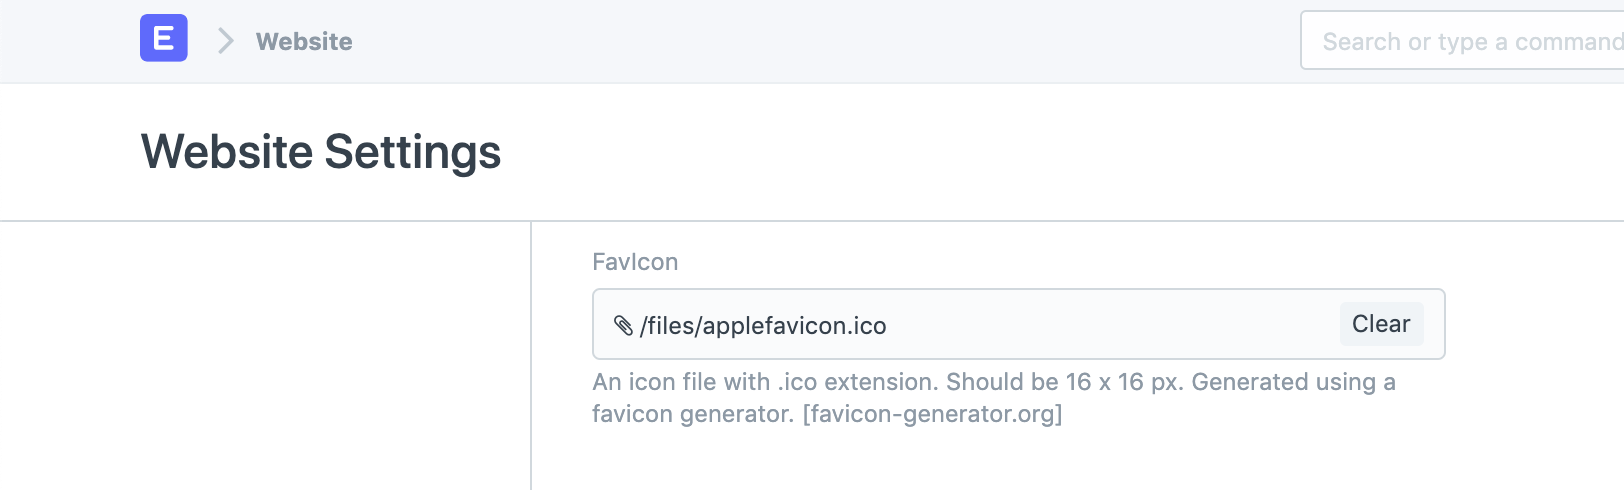
3.2 Favicon
In this section, you can also change your website's favicon. It can be seen on the browser tab's left side.
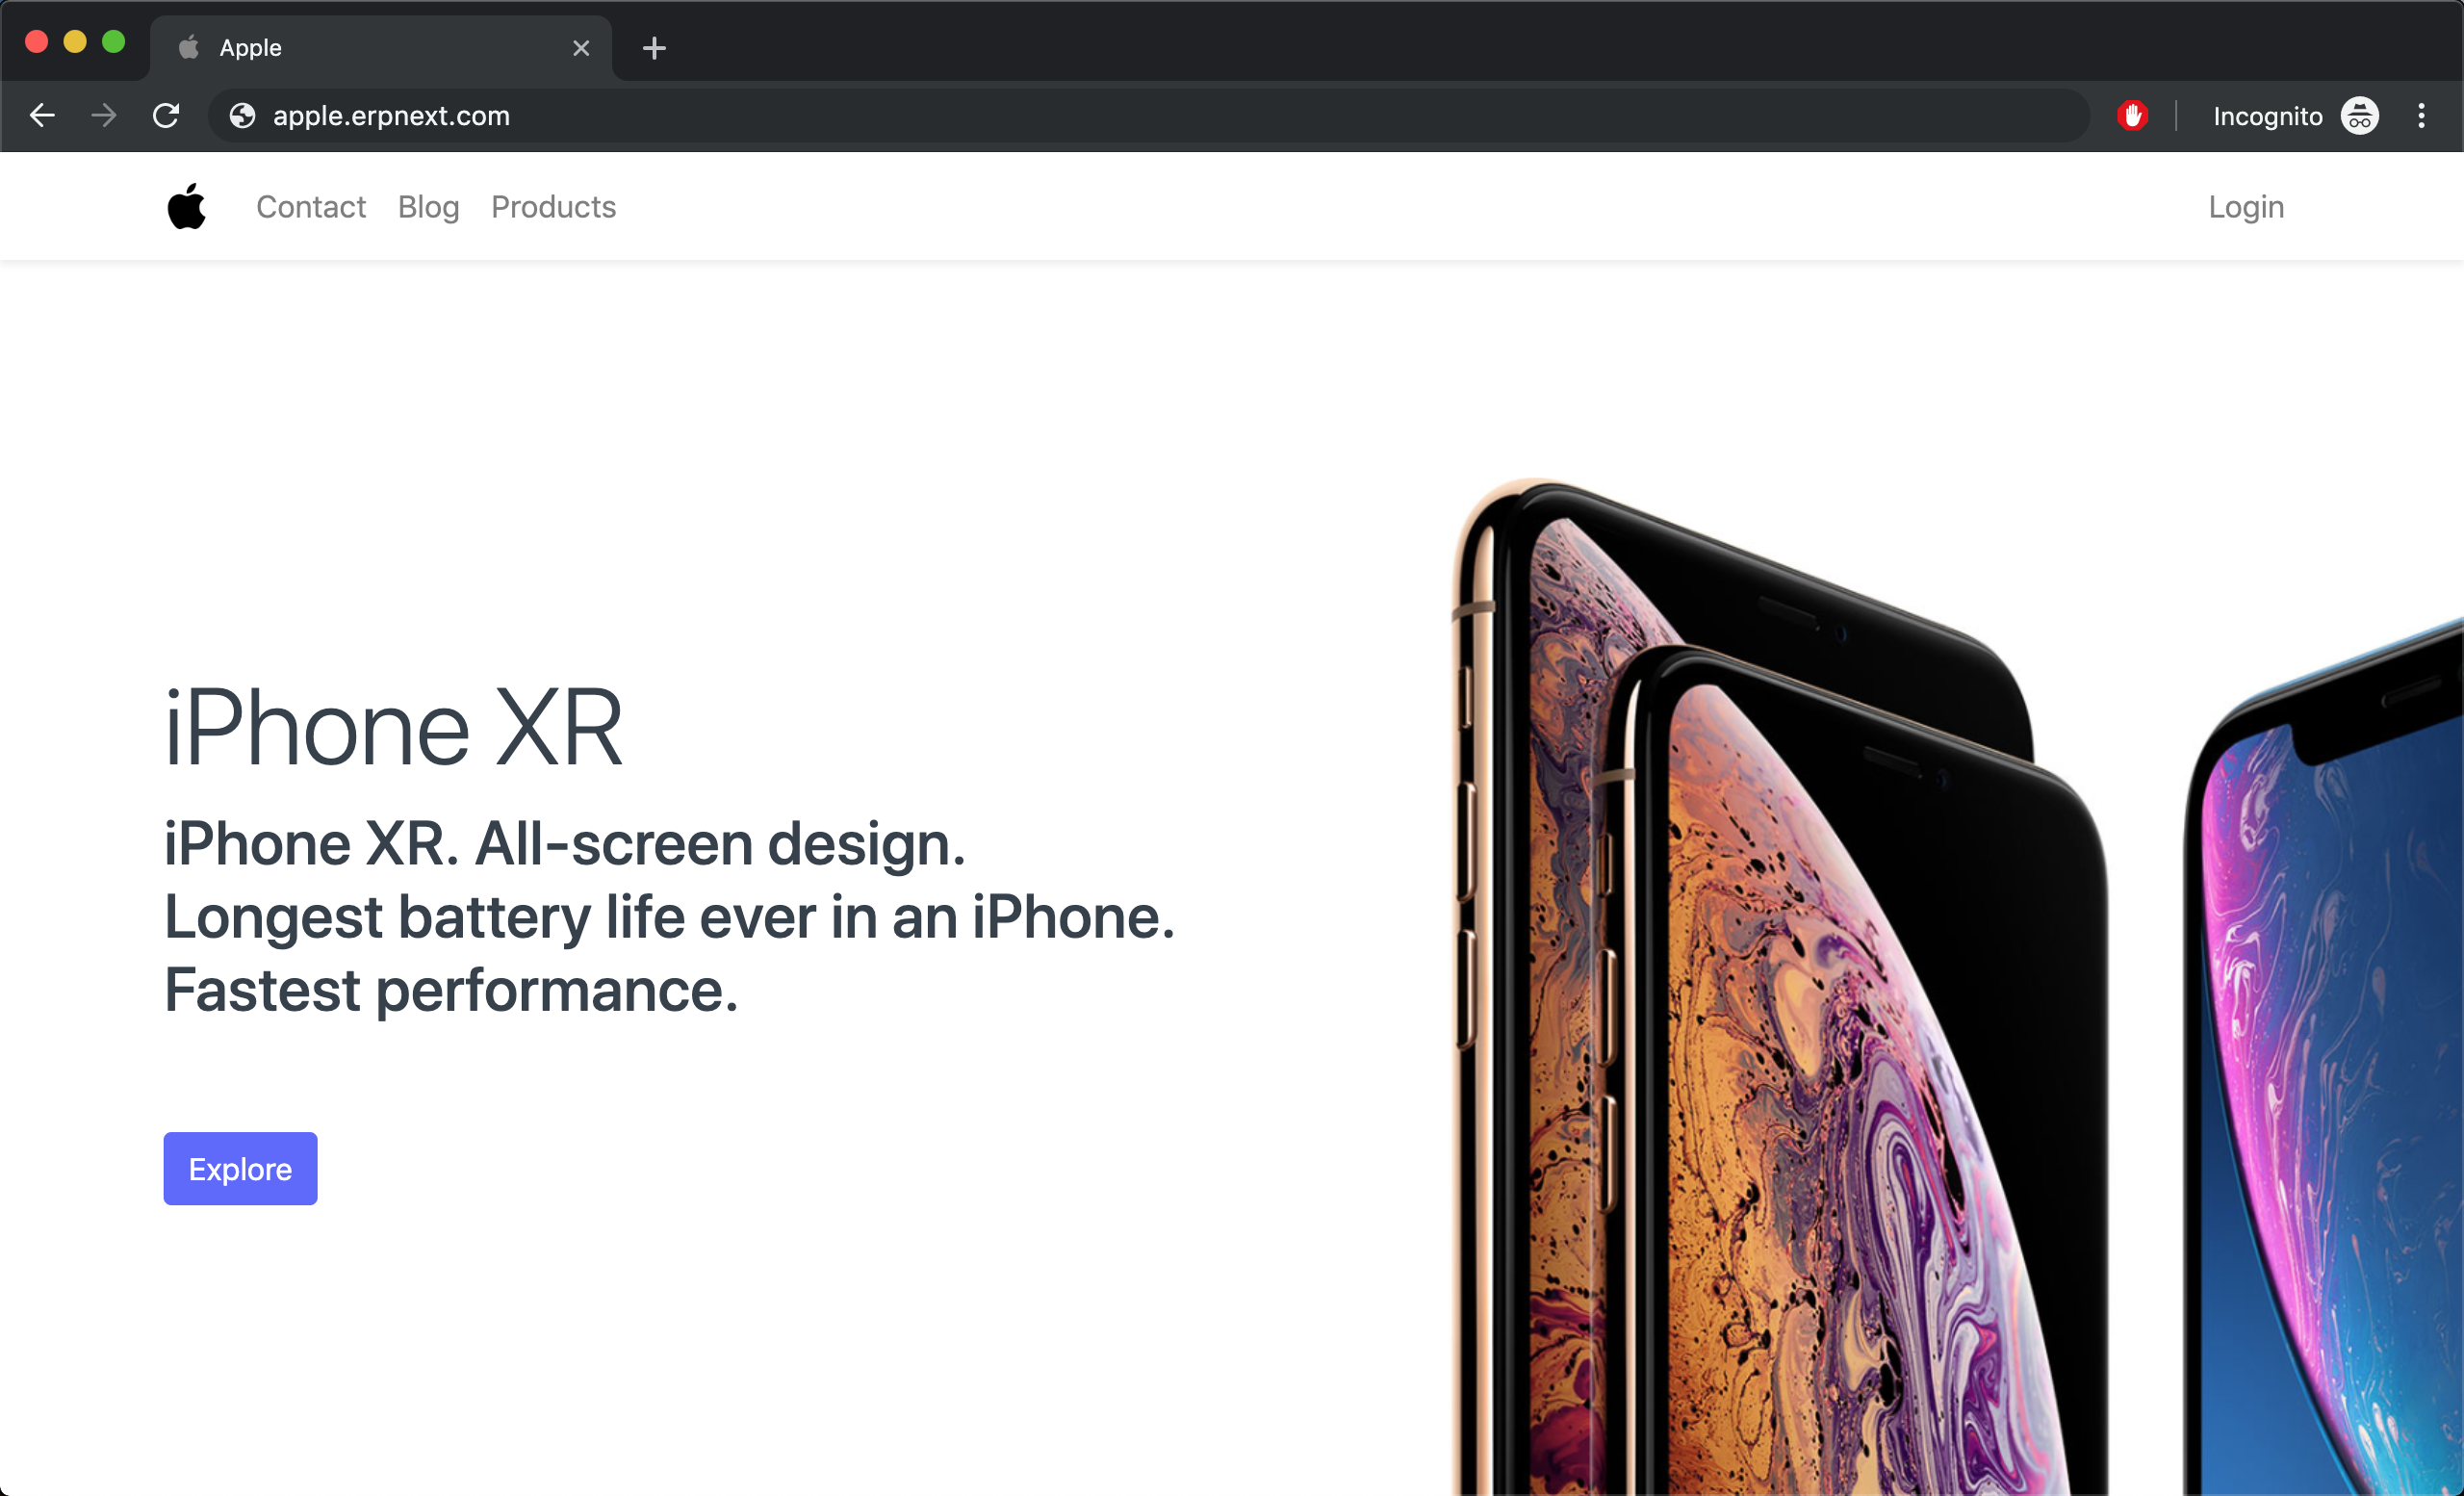
Click See Website in the action bar at the top right to view your website.
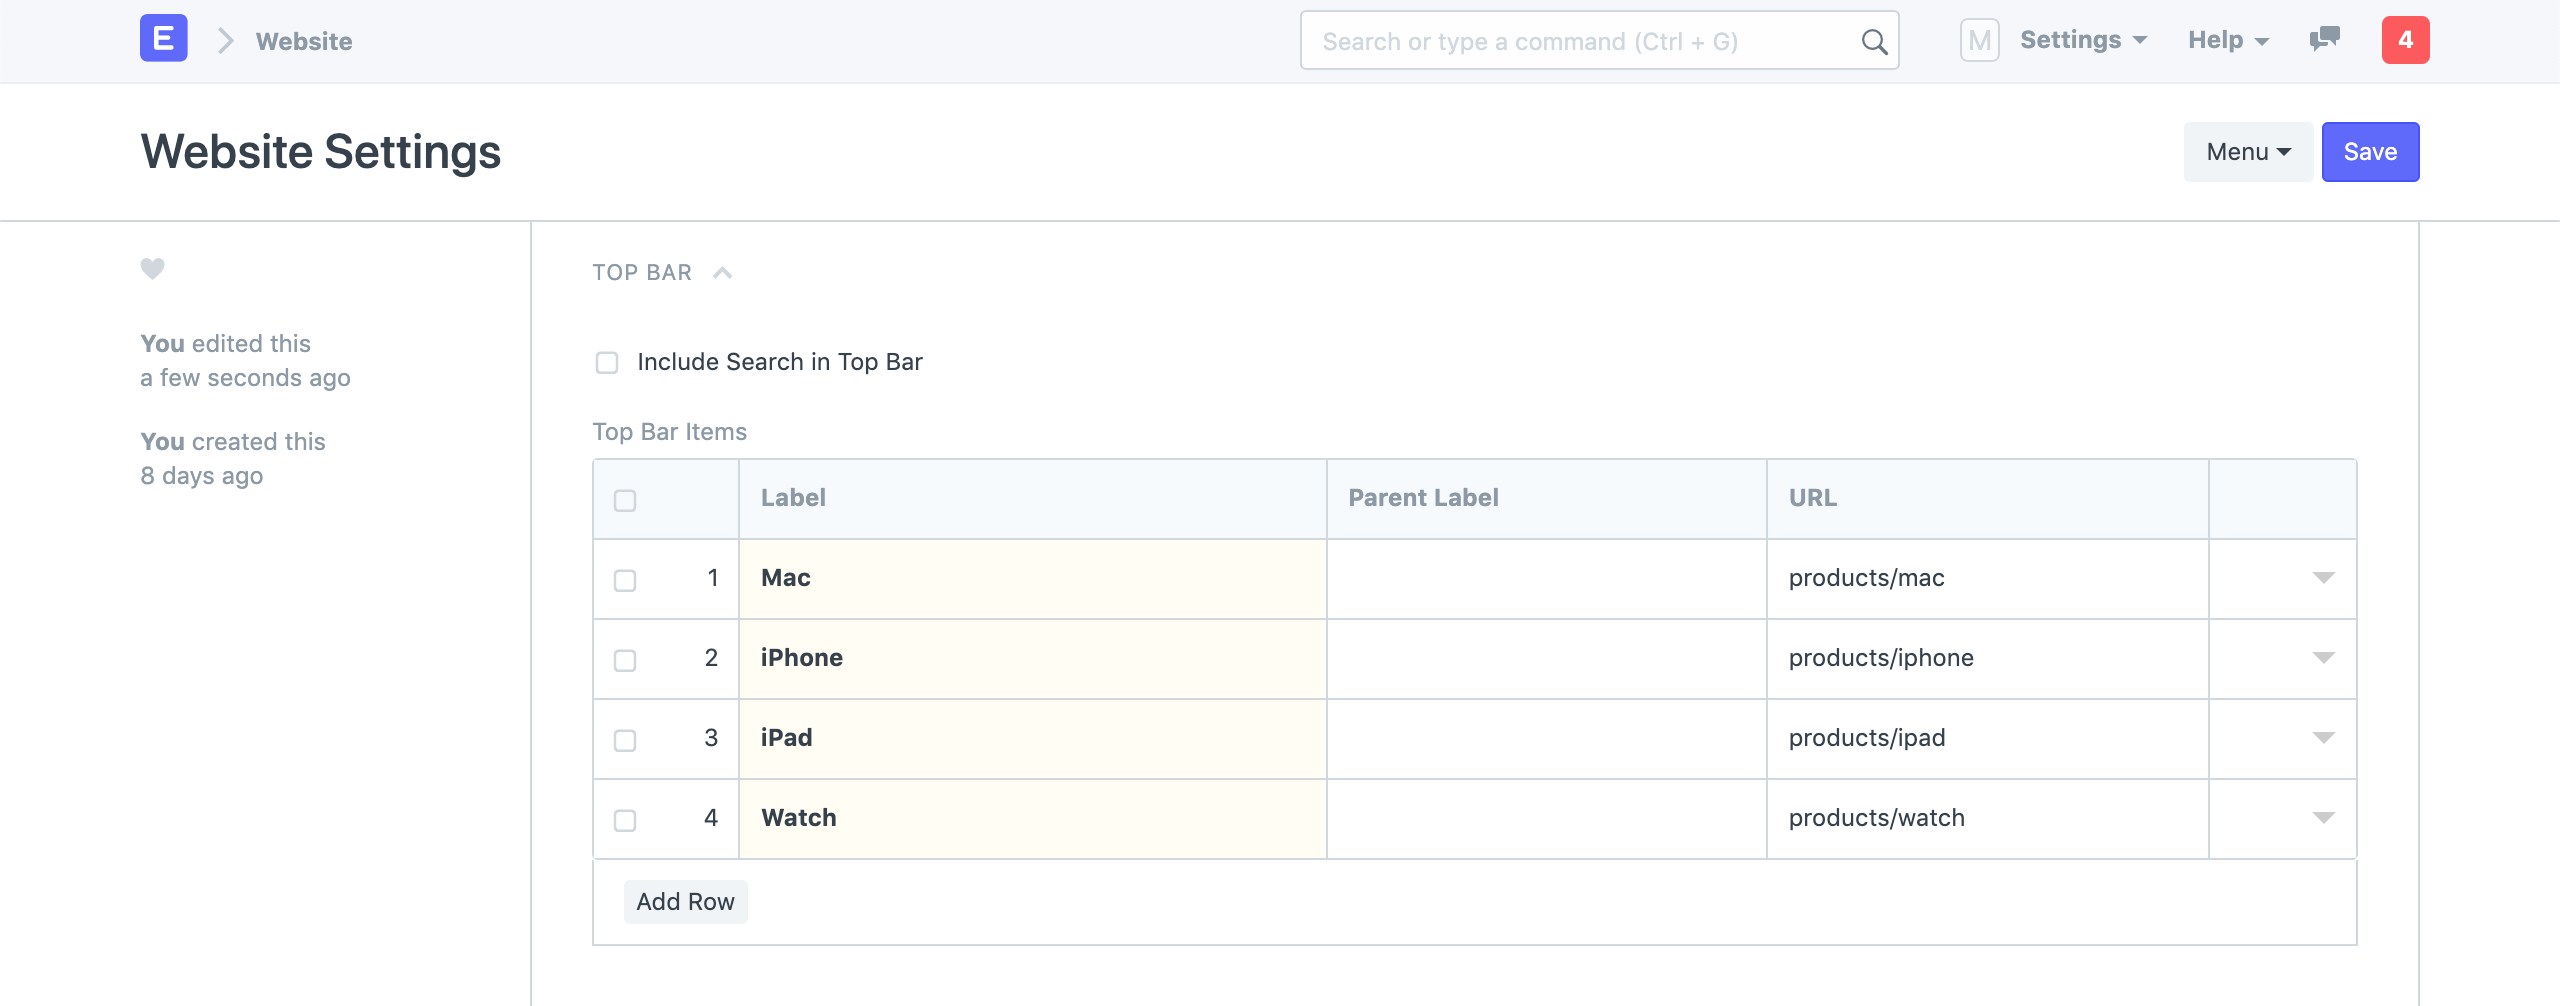
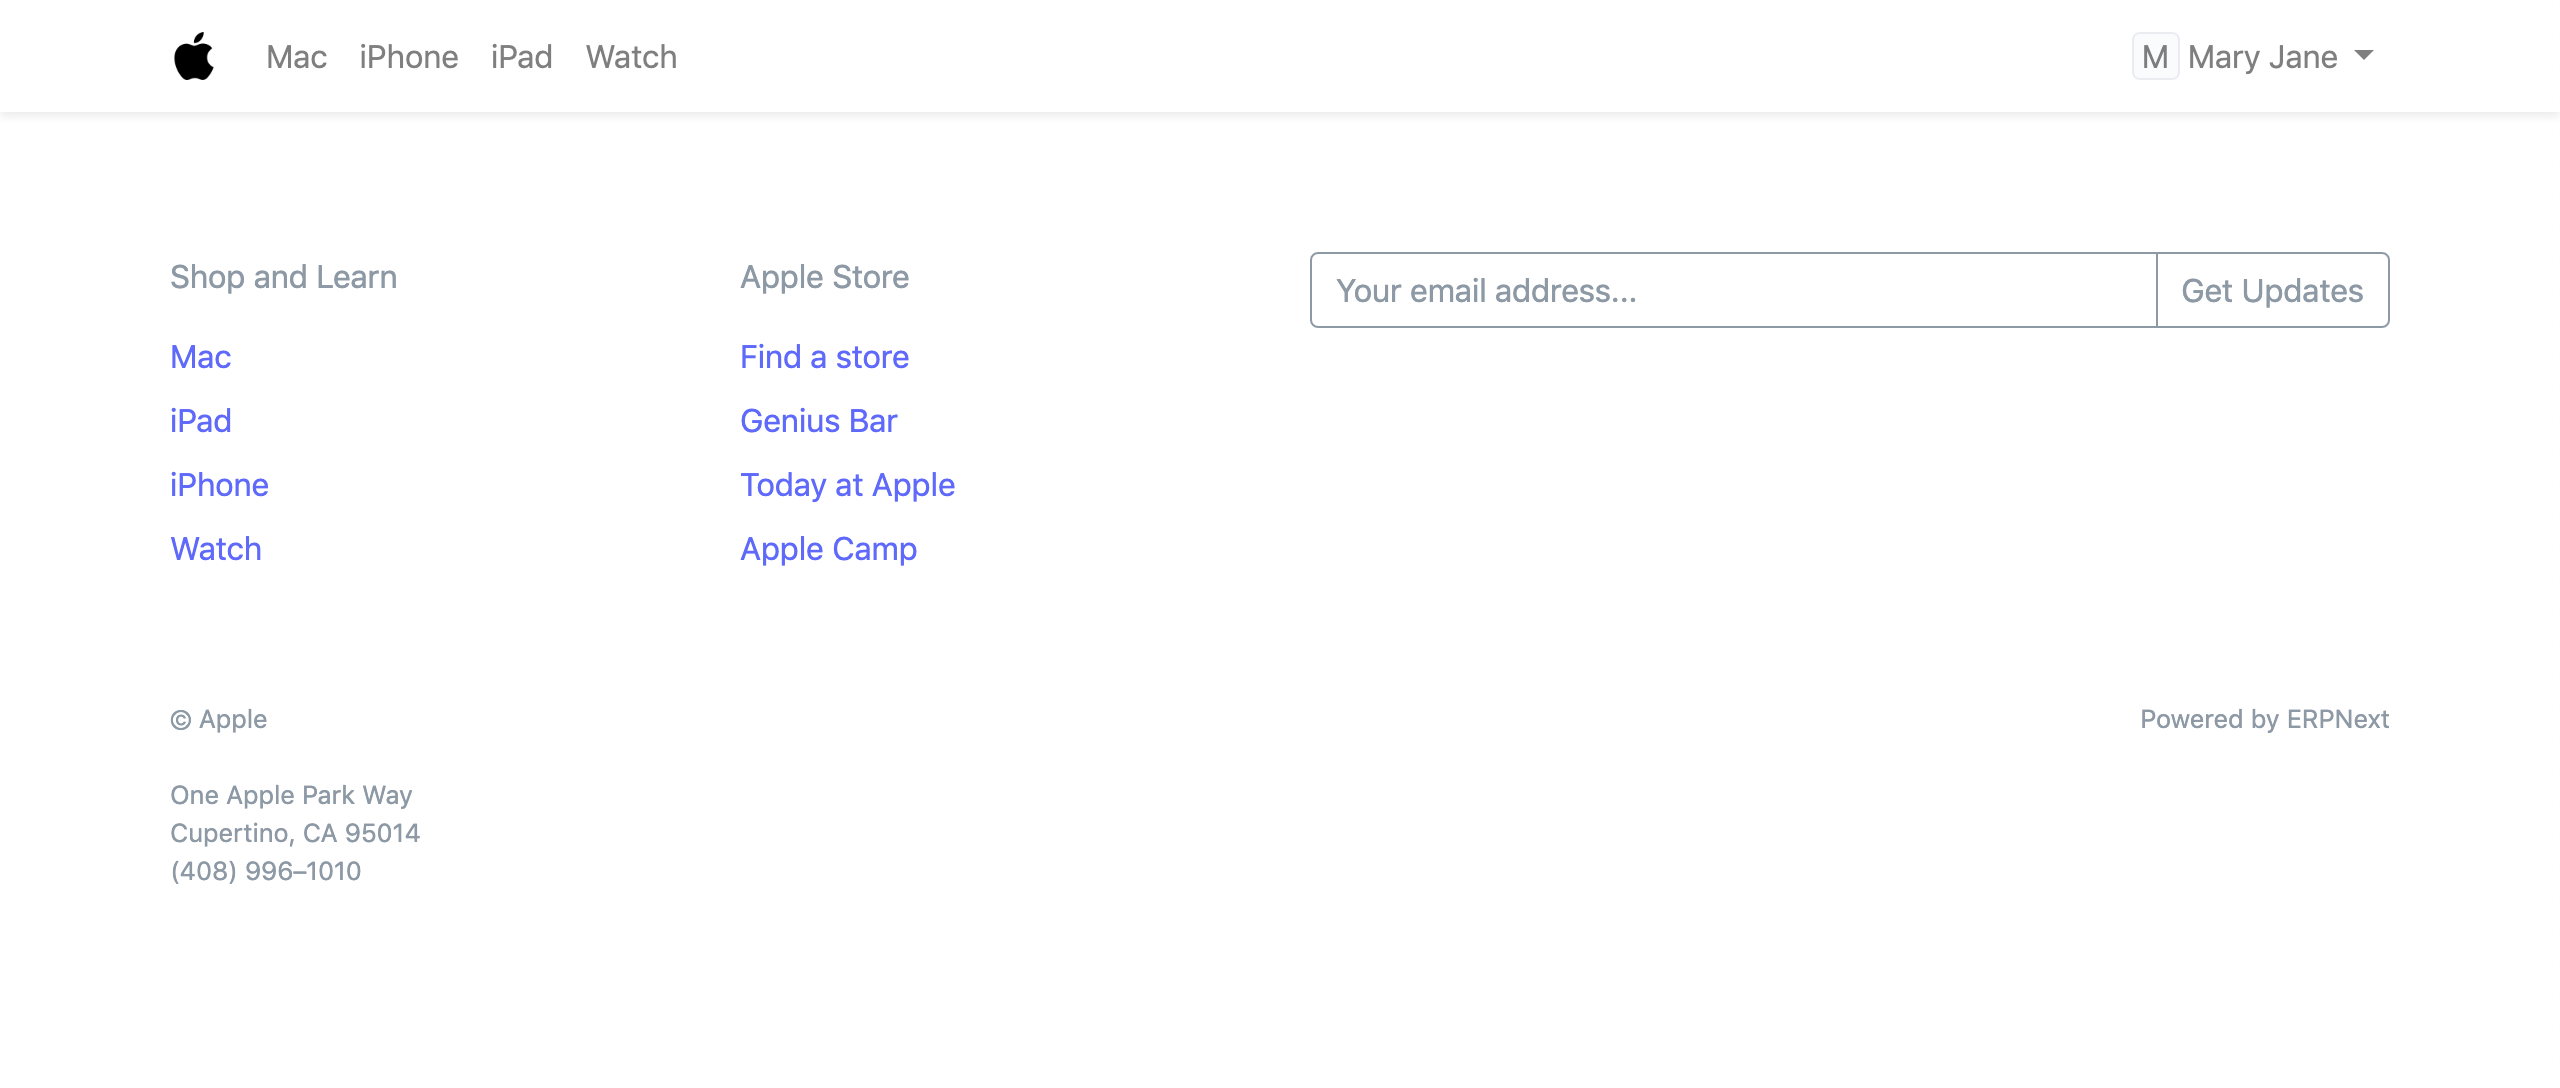
4. Top Bar
Using the Top Bar area, you can change the menu items on your website's navigation bar.

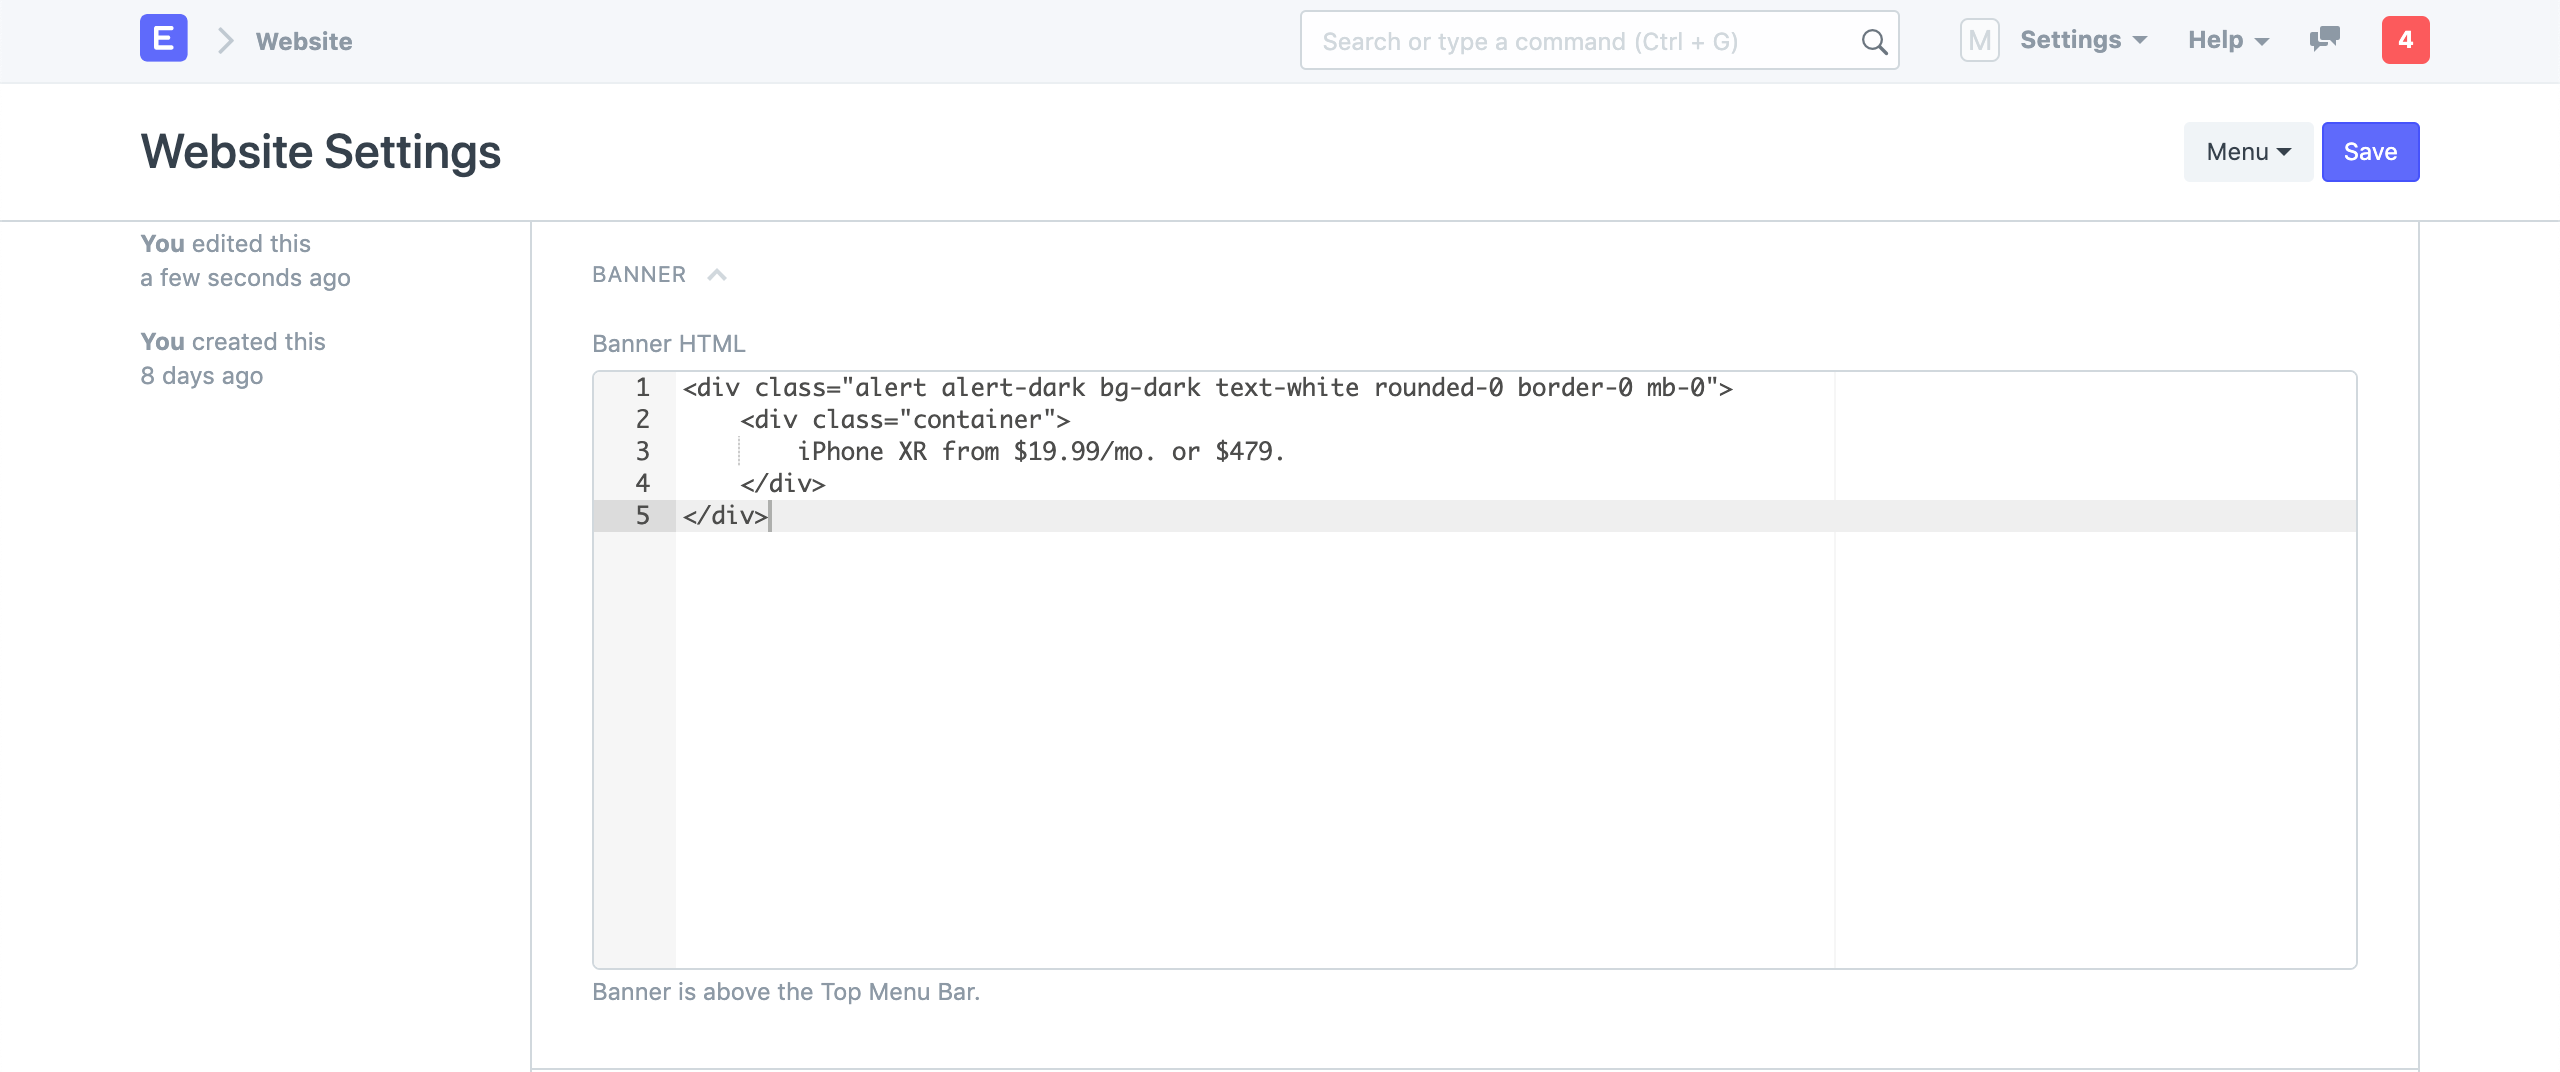
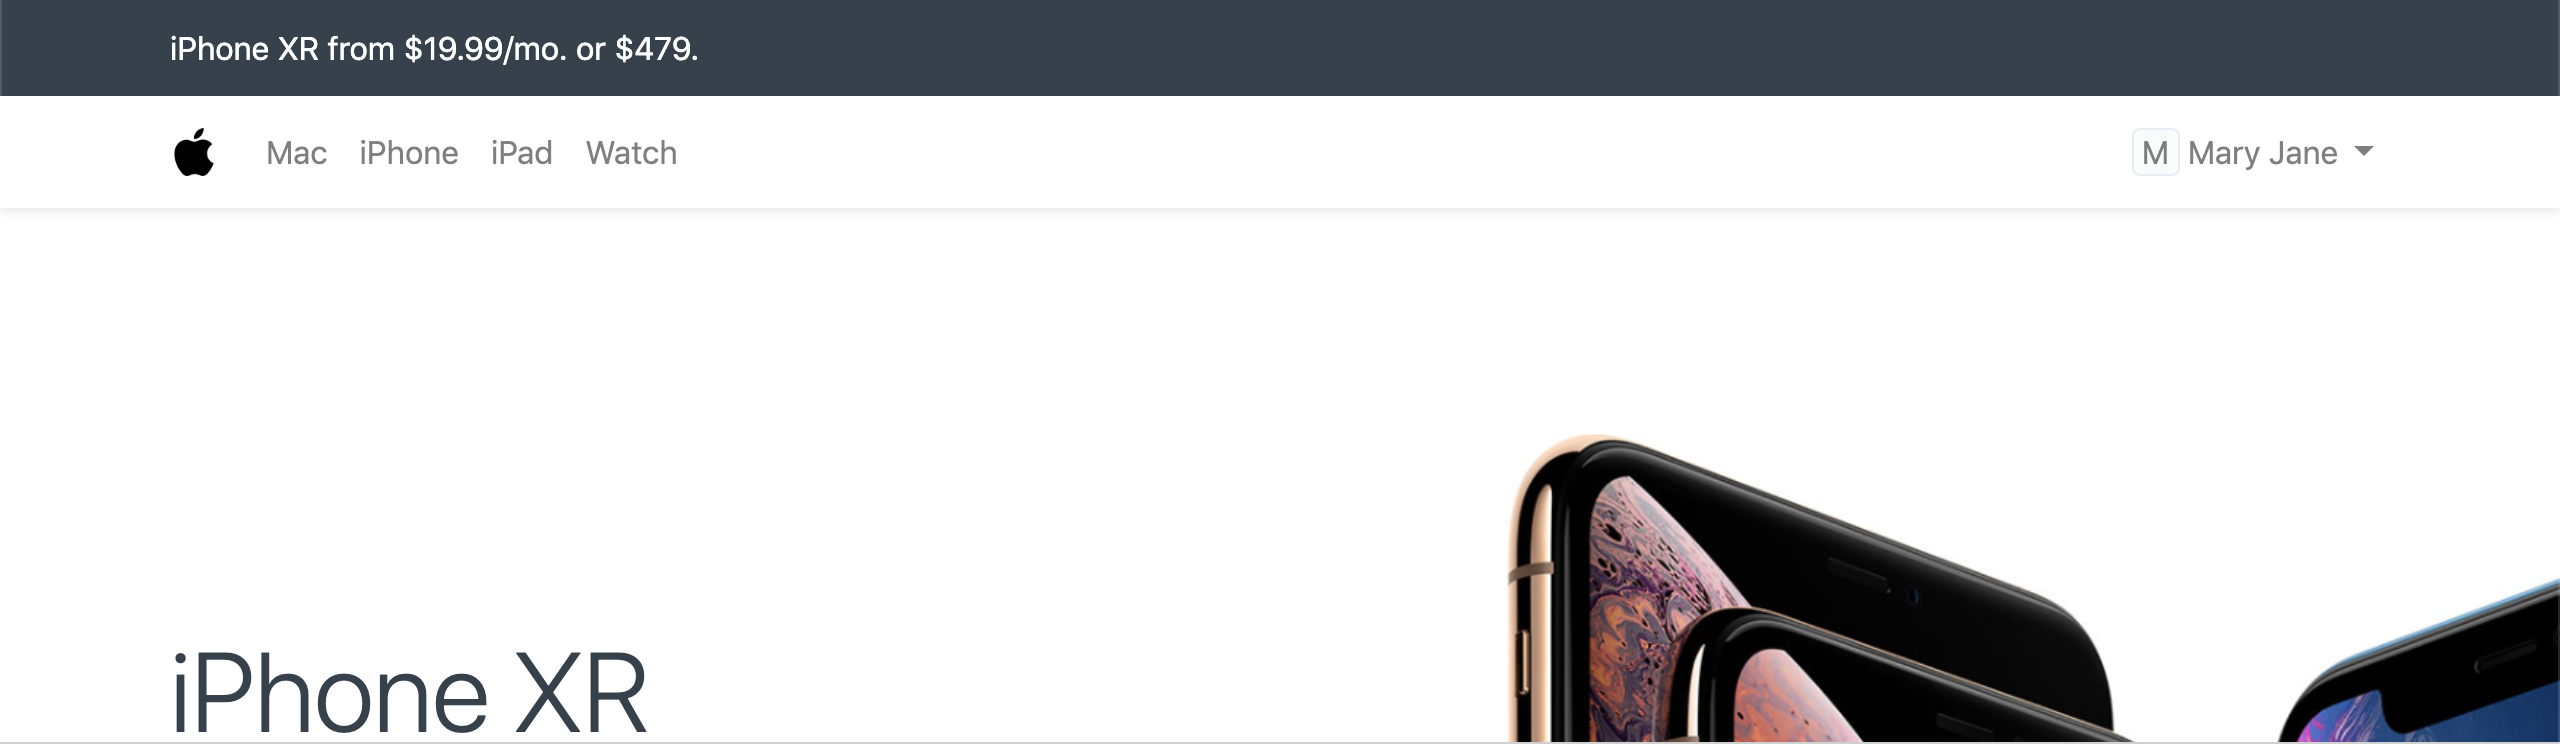
5. Banner
A persistent banner that appears above the navbar on all web pages can be added to your website. Any legitimate Bootstrap 4 markup is allowed here.
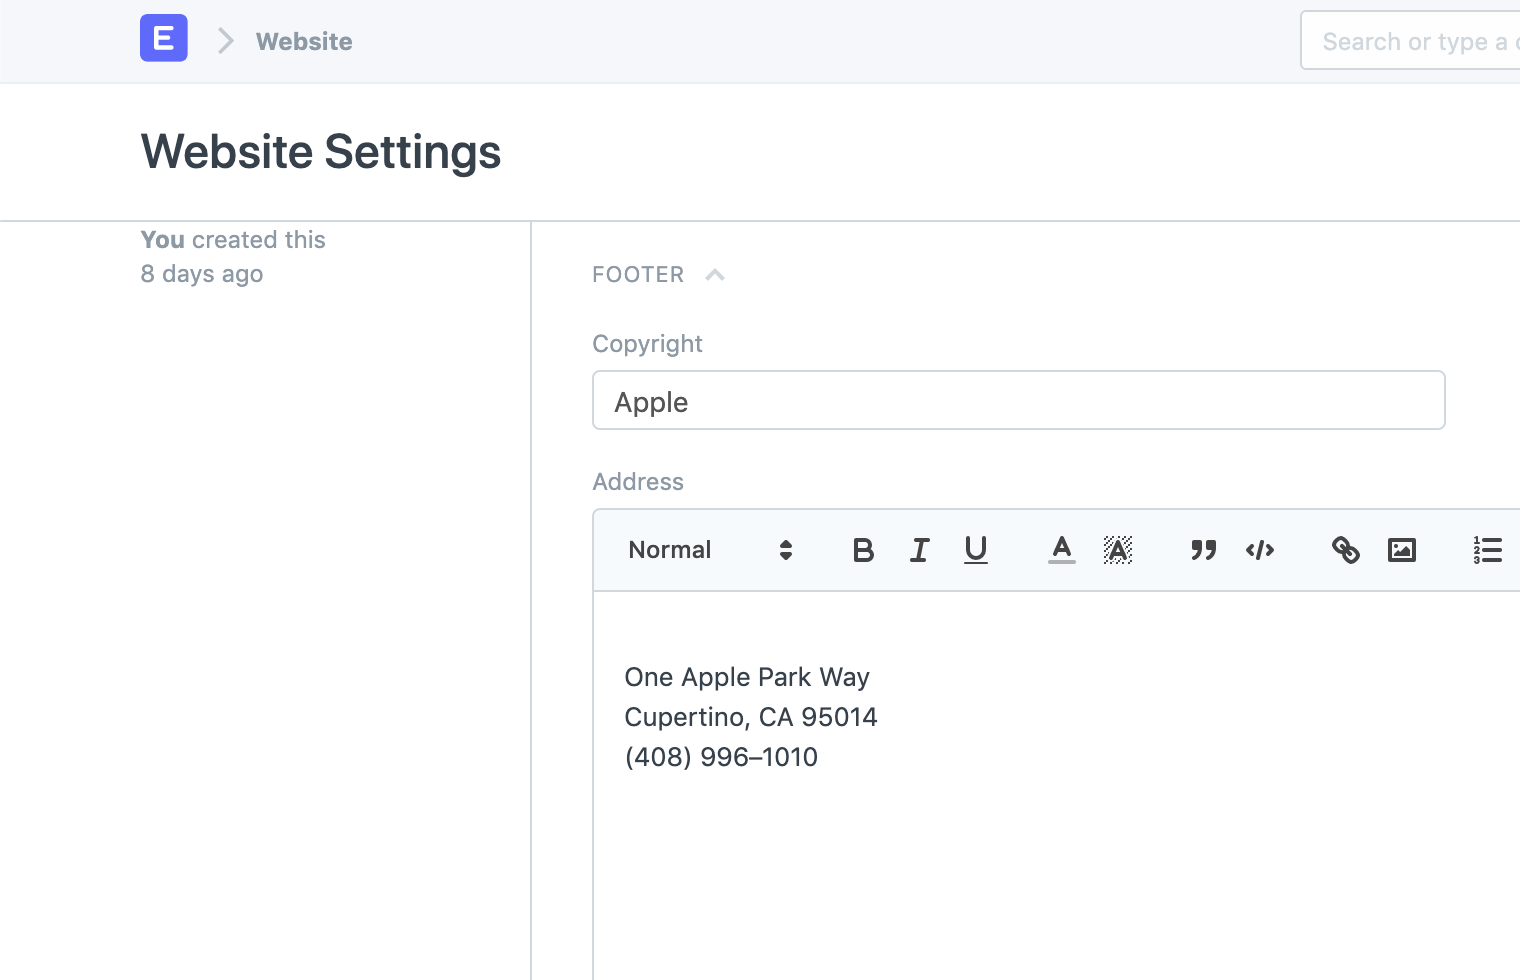
6. Footer
Under the Footer area, you can add your address and many categories of links to your footer.
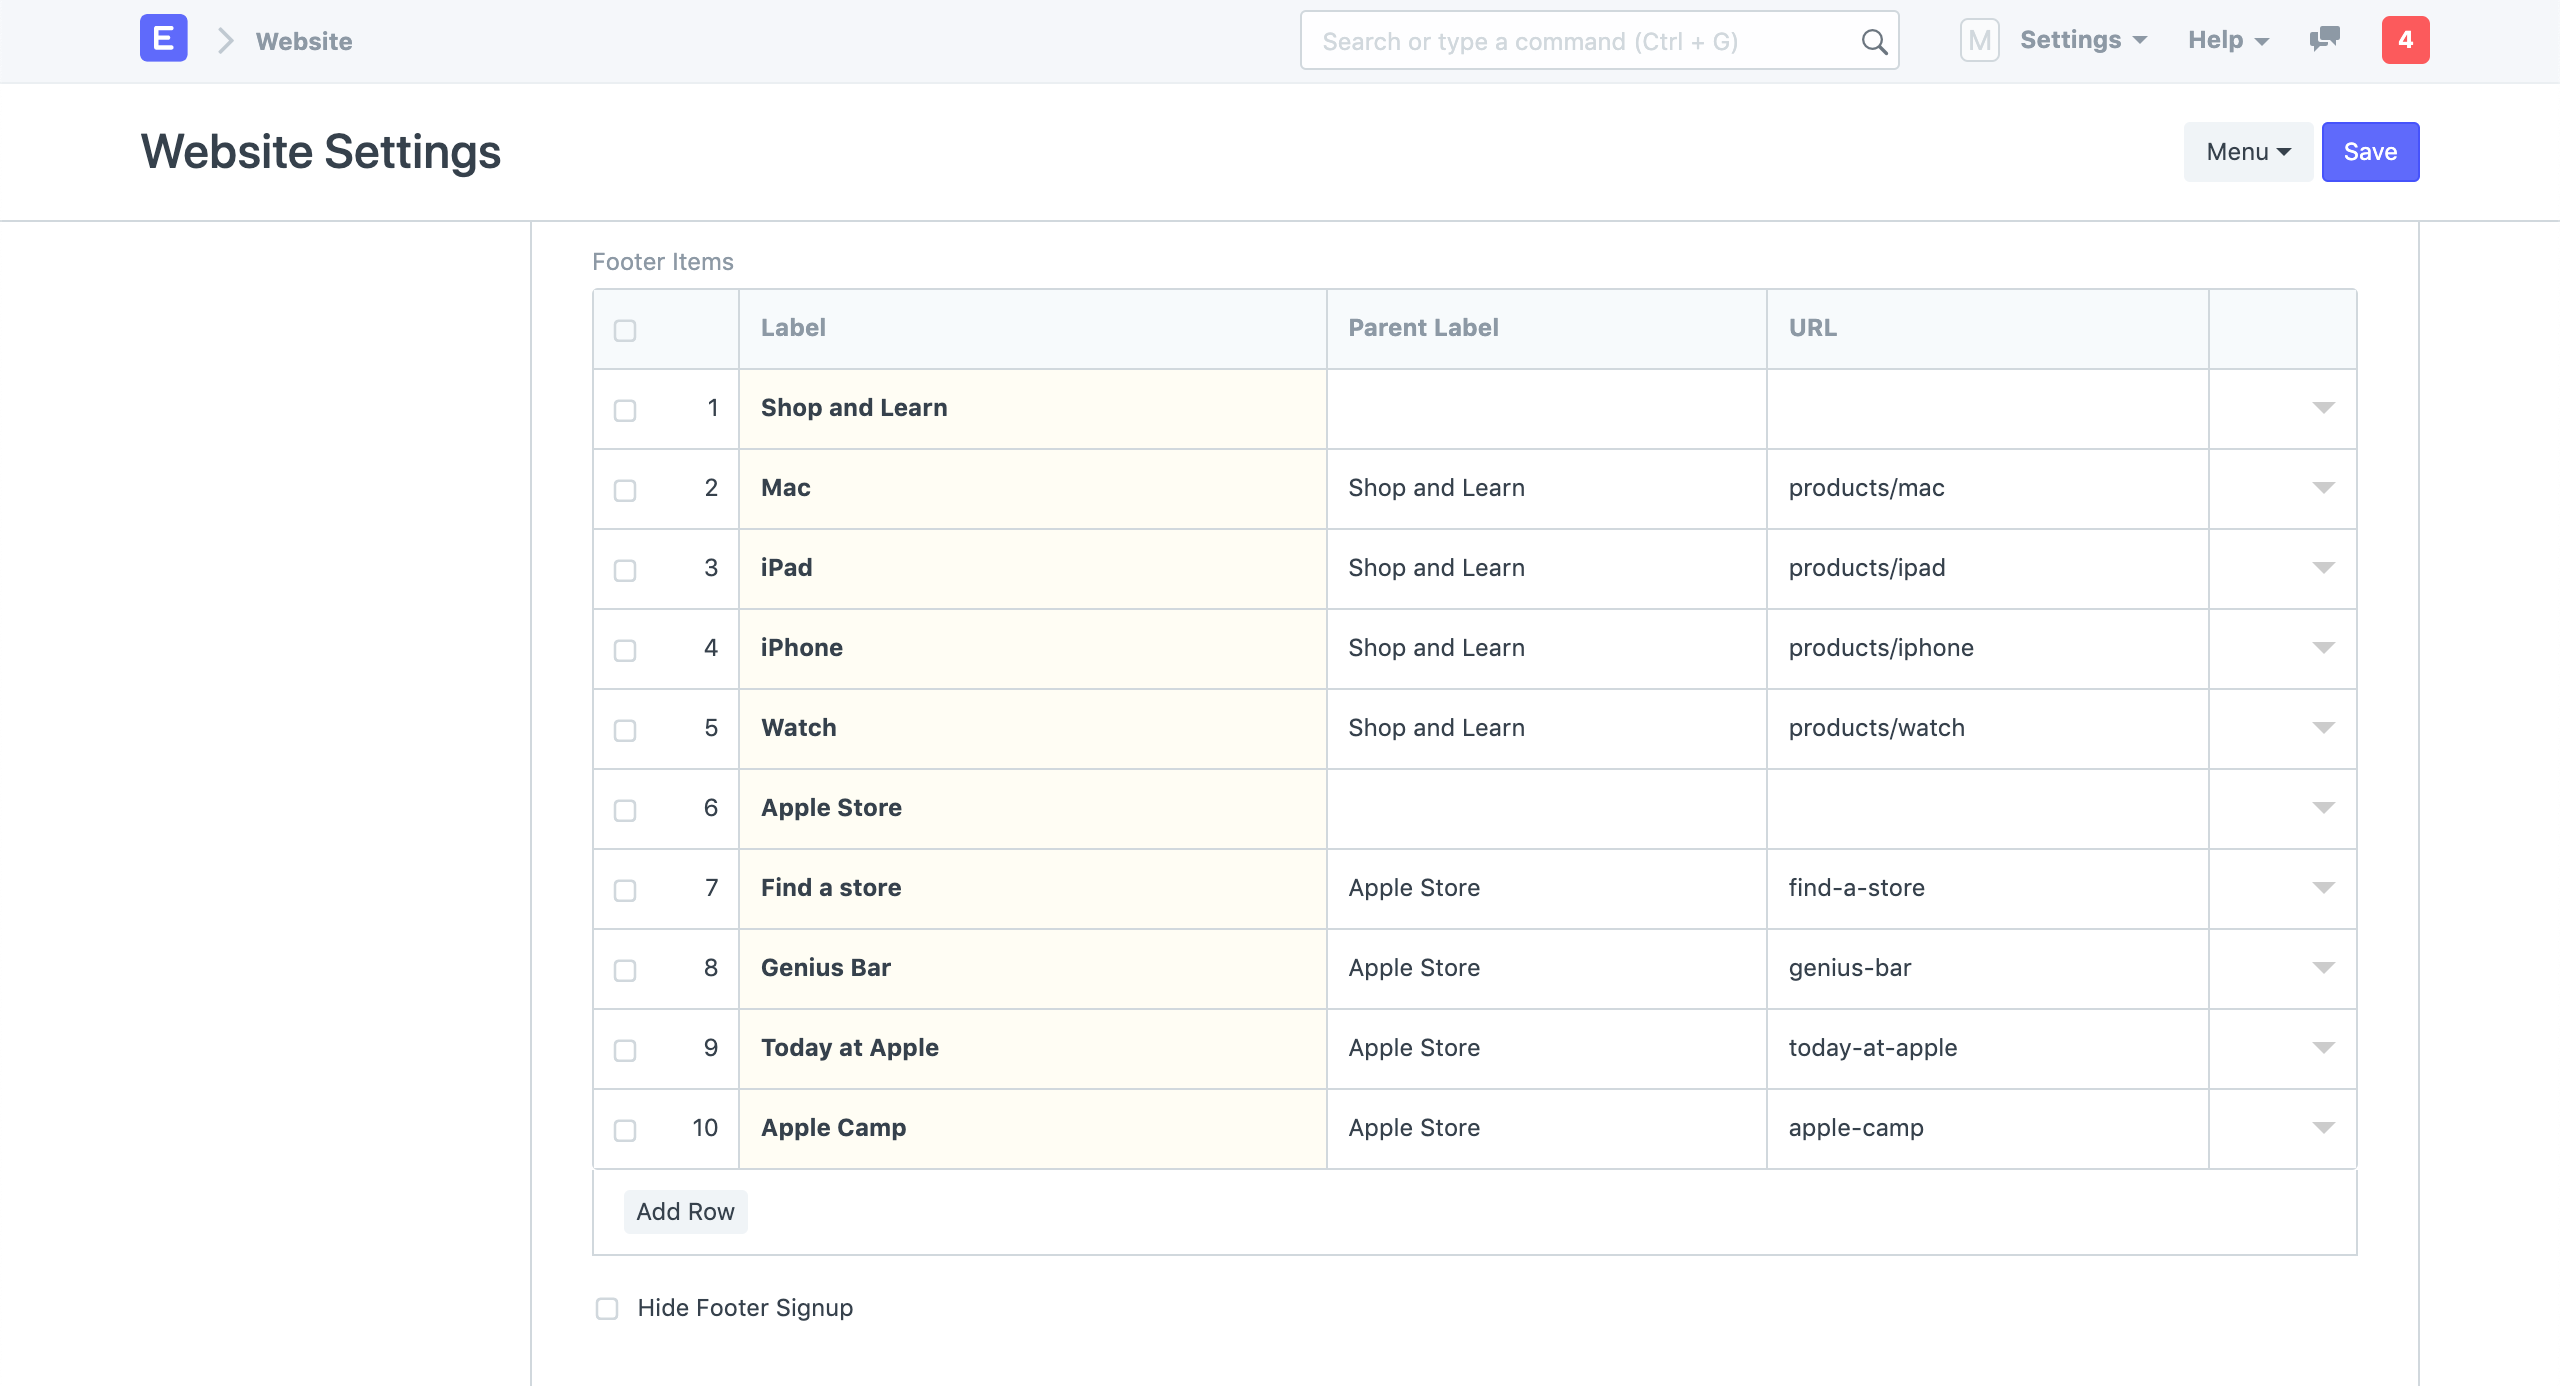
Configuring "Powered by" Section
By altering "Footer Powered By," you may customize the "Powered by" part.
7. Google Integrations
7.1 Google Indexing
How to set up automated Google Indexing
You must give ERPNext permission to send a request each time a user requests the data in order for it to ask Google crawlers to index a web page. The following steps are used to set up Google Drive Integration:
Using Google Settings, create OAuth 2.0 credentials.
Change the website settings to index.
To permit ERPNext to make a publish request, select Authorize API Indexing Access.
Once authorized, any new blog posts or web pages published by the user will automatically send an indexing request upon creation, update, or trash.
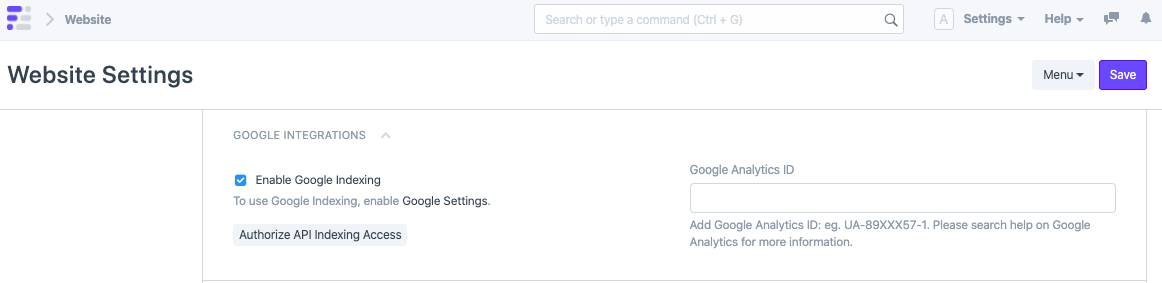
7.2 Google Analytics
On your website, Google Analytics can be enabled. Simply obtain your Google Analytics ID from the Google Console and enter it here.
Google Analytics will automatically record each visitor's complete IP address. ERPNext will advise Google Analytics to anonymize the IP address before it is delivered to Google servers by selecting the "Google Analytics Anonymize IP" checkbox. In Google's documentation, you can read more about how this setting will operate.
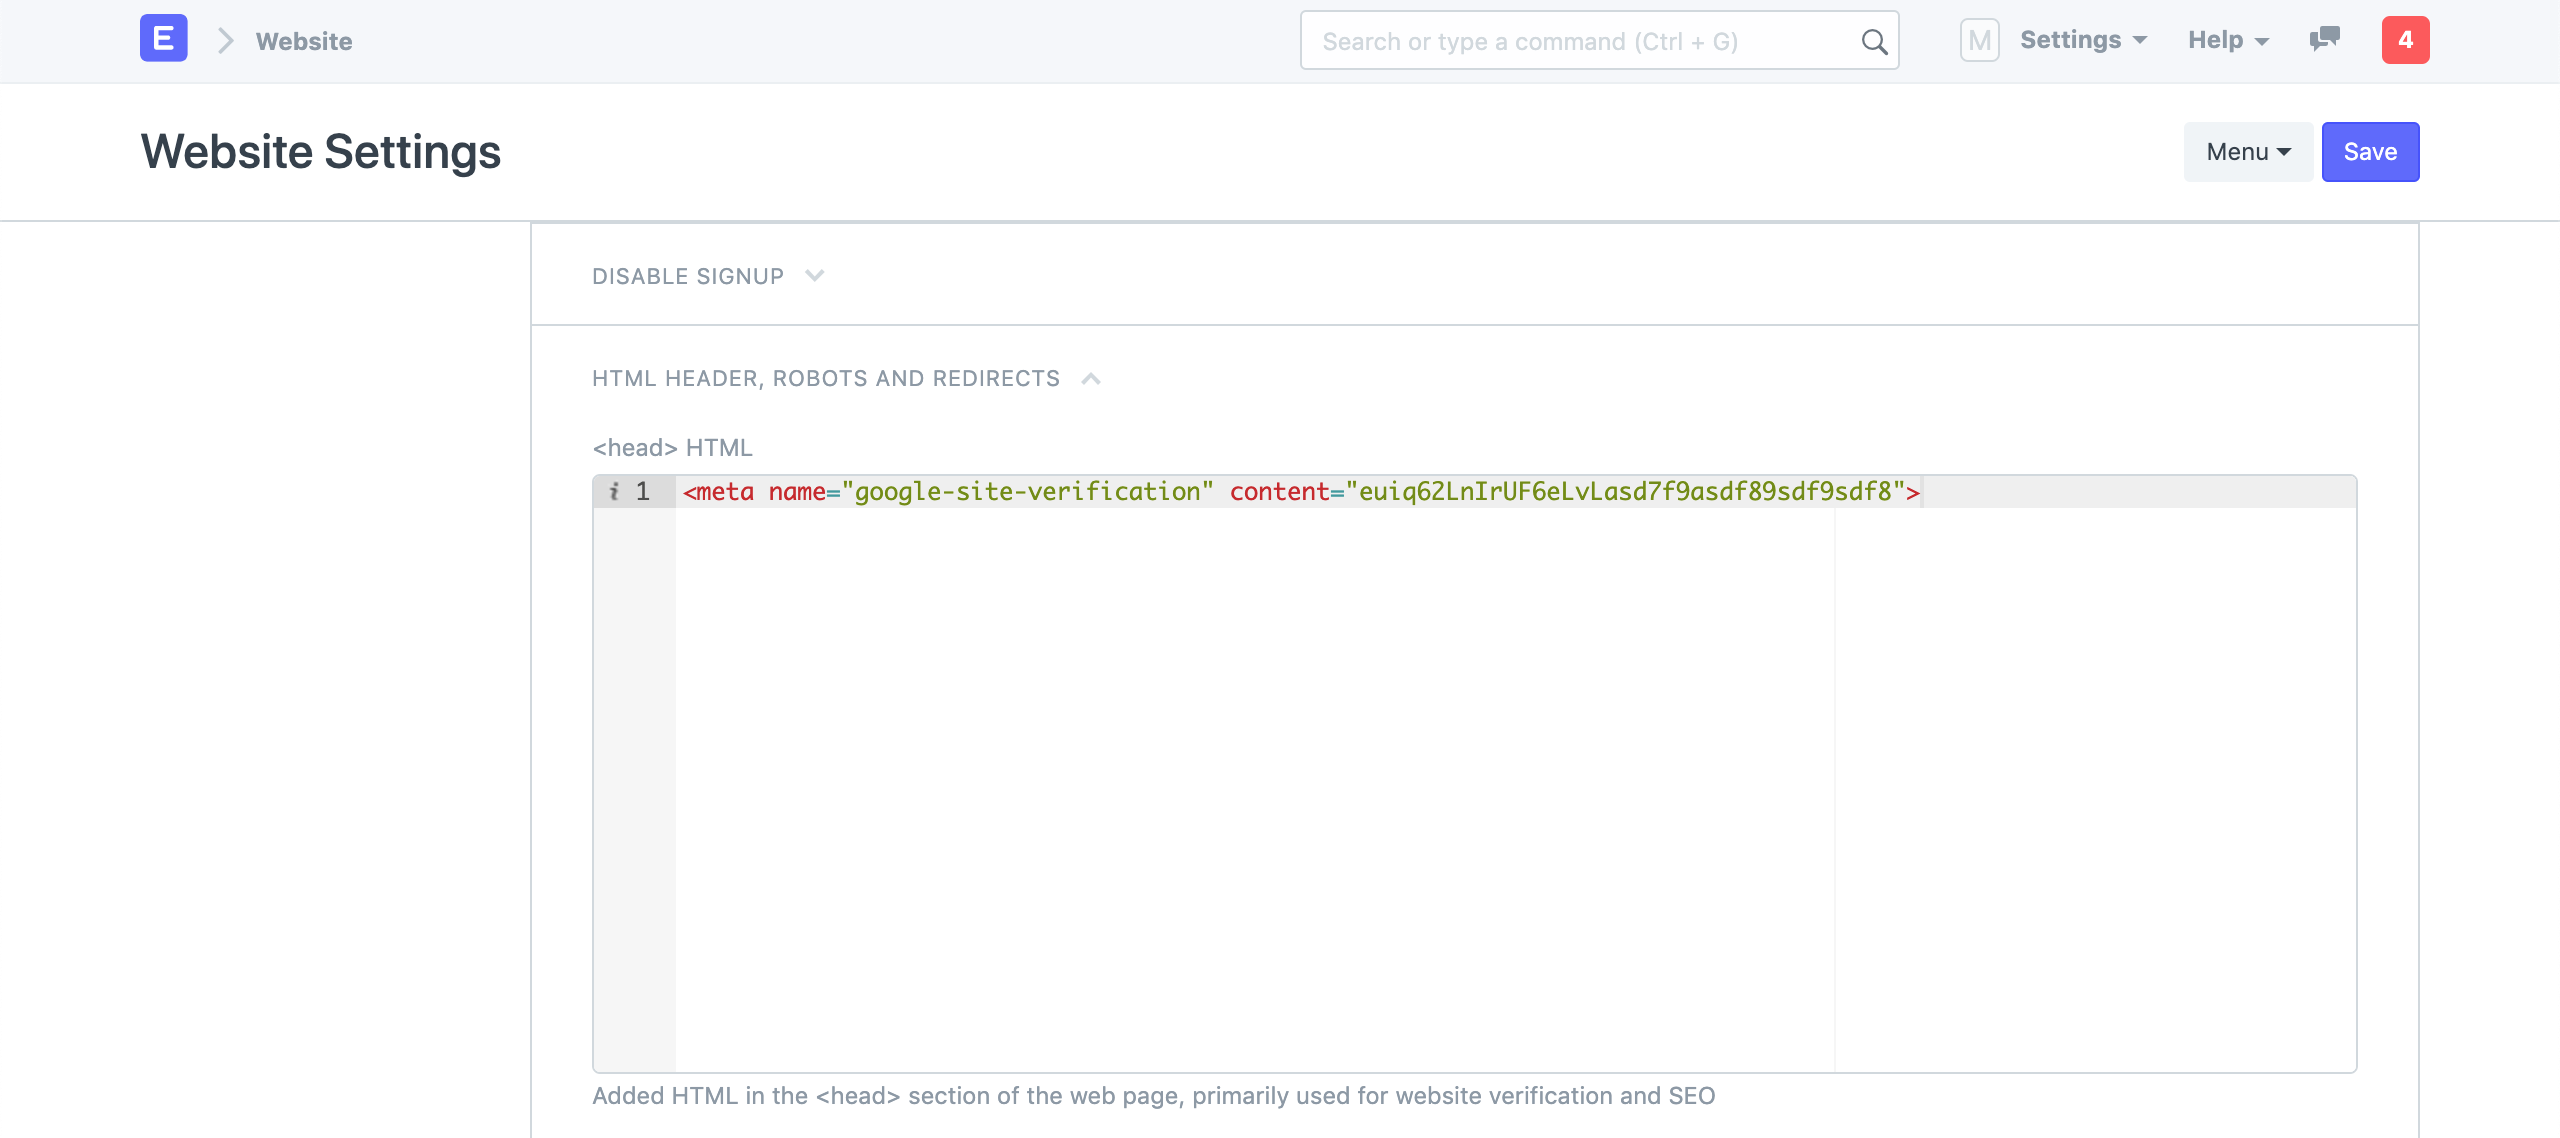
8. HTML Header
All of your web pages' meta tags can be set using this section. The addition of Google site verification tags is a frequent use case.
9. Robots
In this area, you can specify robots.txt guidelines. Web crawlers utilize this data to choose which pages to index and which to skip.
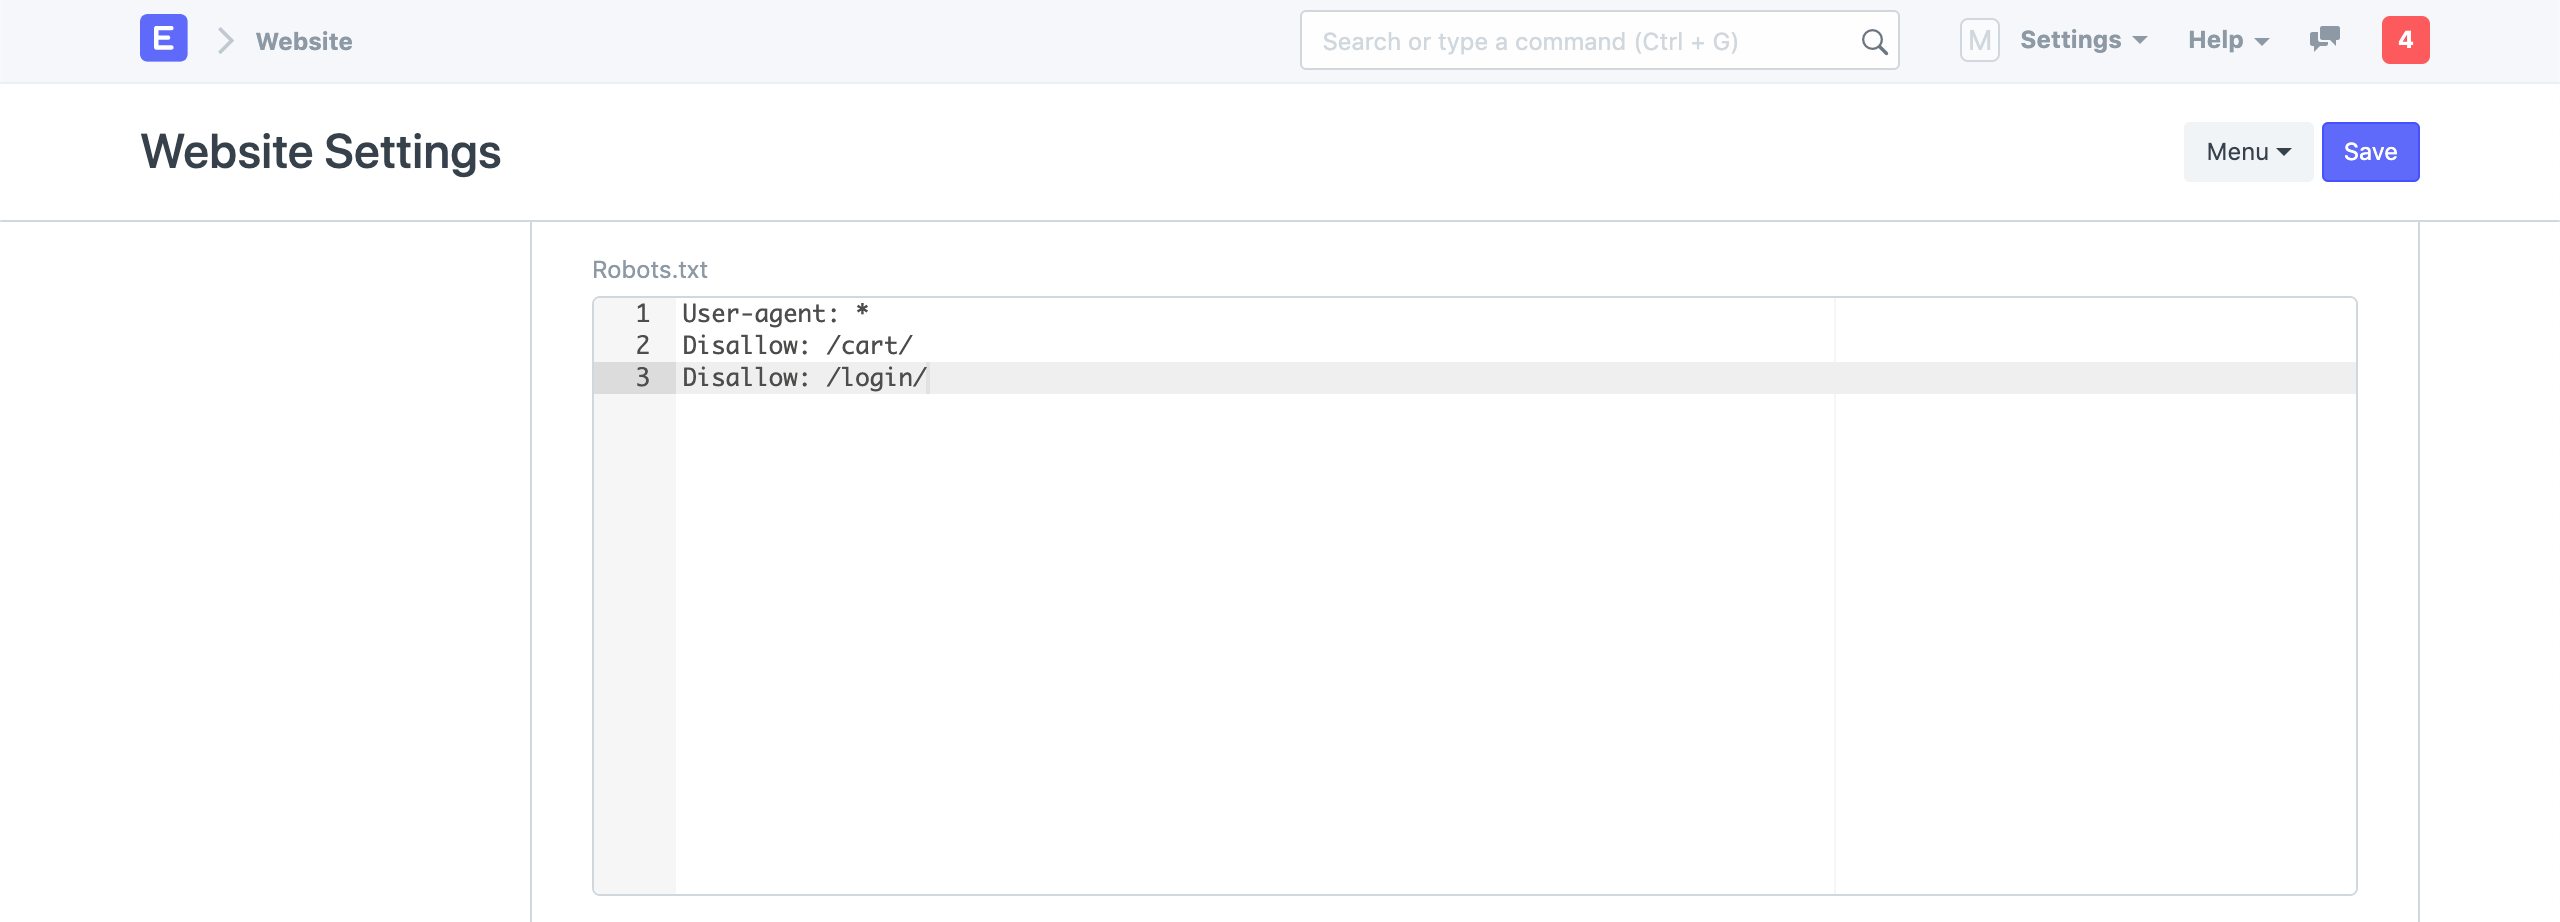
Learn more about robots.txt at Moz - Robots.txt
10. Redirects
Here, a mapping of route redirects can be specified. The mappings in the accompanying screenshot ensure that users will be forwarded to https://apple.erpnext.com/products/iphone if they visit https://apple.erpnext.com/iphone.
For these routes, ERPNext will issue a 301 Permanent Redirect answer.
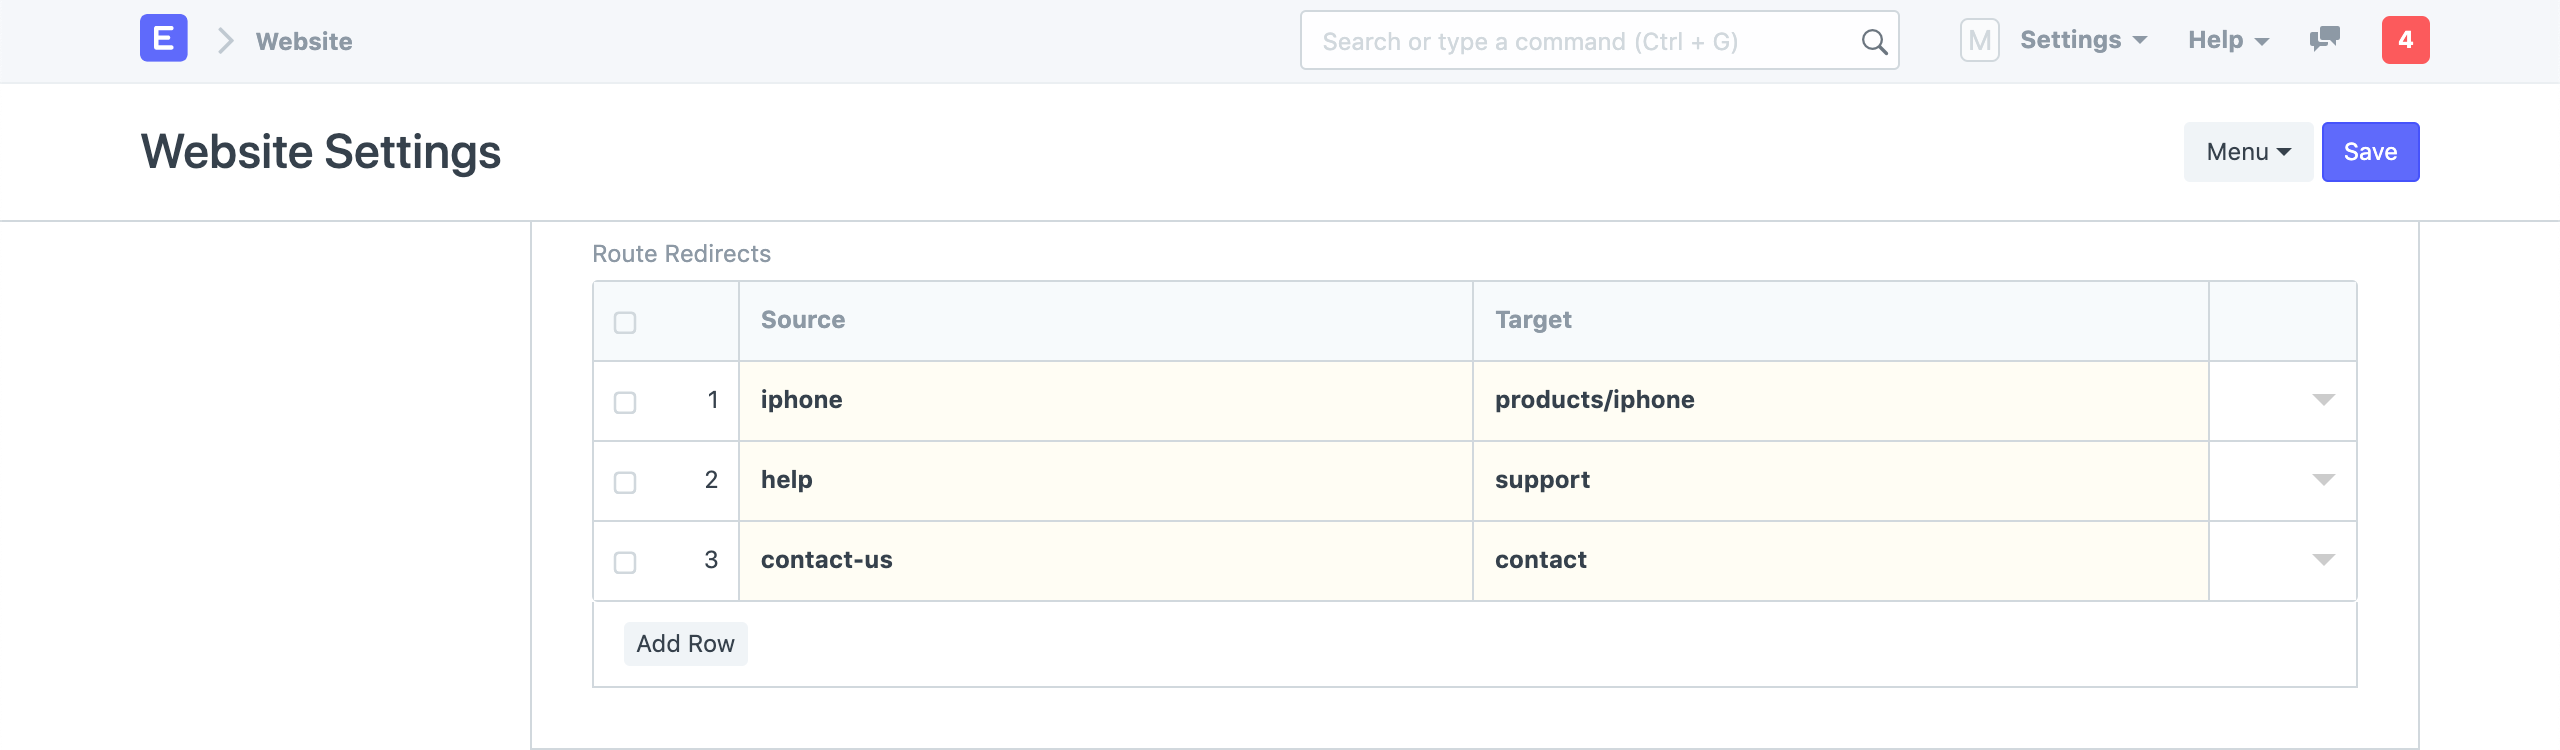
You can map your old routes to new ones here if you're moving your current website to an ERPNext platform. Google will pick up these redirects and assist you keep your SEO rankings.
11. Chat
Under the Chat section of your website, you can allow website visitor chat. Between From time to time and To time, the chat widget will appear. The Chat Operators (Users) that will be notified when a visitor submits a message can also be set.
An experimental feature is chat.