Store Landing Page
Store Landing Page
You may use the Web Page Builder to design a unique landing page for your store once you've enabled the shopping cart for your app.

. How to create a Custom Store Landing Page
To construct a Web Page, adhere to the instructions provided here.
Establish a route for your page, such as /store.
Choose Page Builder as the Content Type.
On the Page Building Blocks Table, select Add Row.
choosing a web template.
To help you design your Web Page, ERPNext includes a fantastic selection of basic web themes.
The page in the aforementioned screenshot is configured as follows:
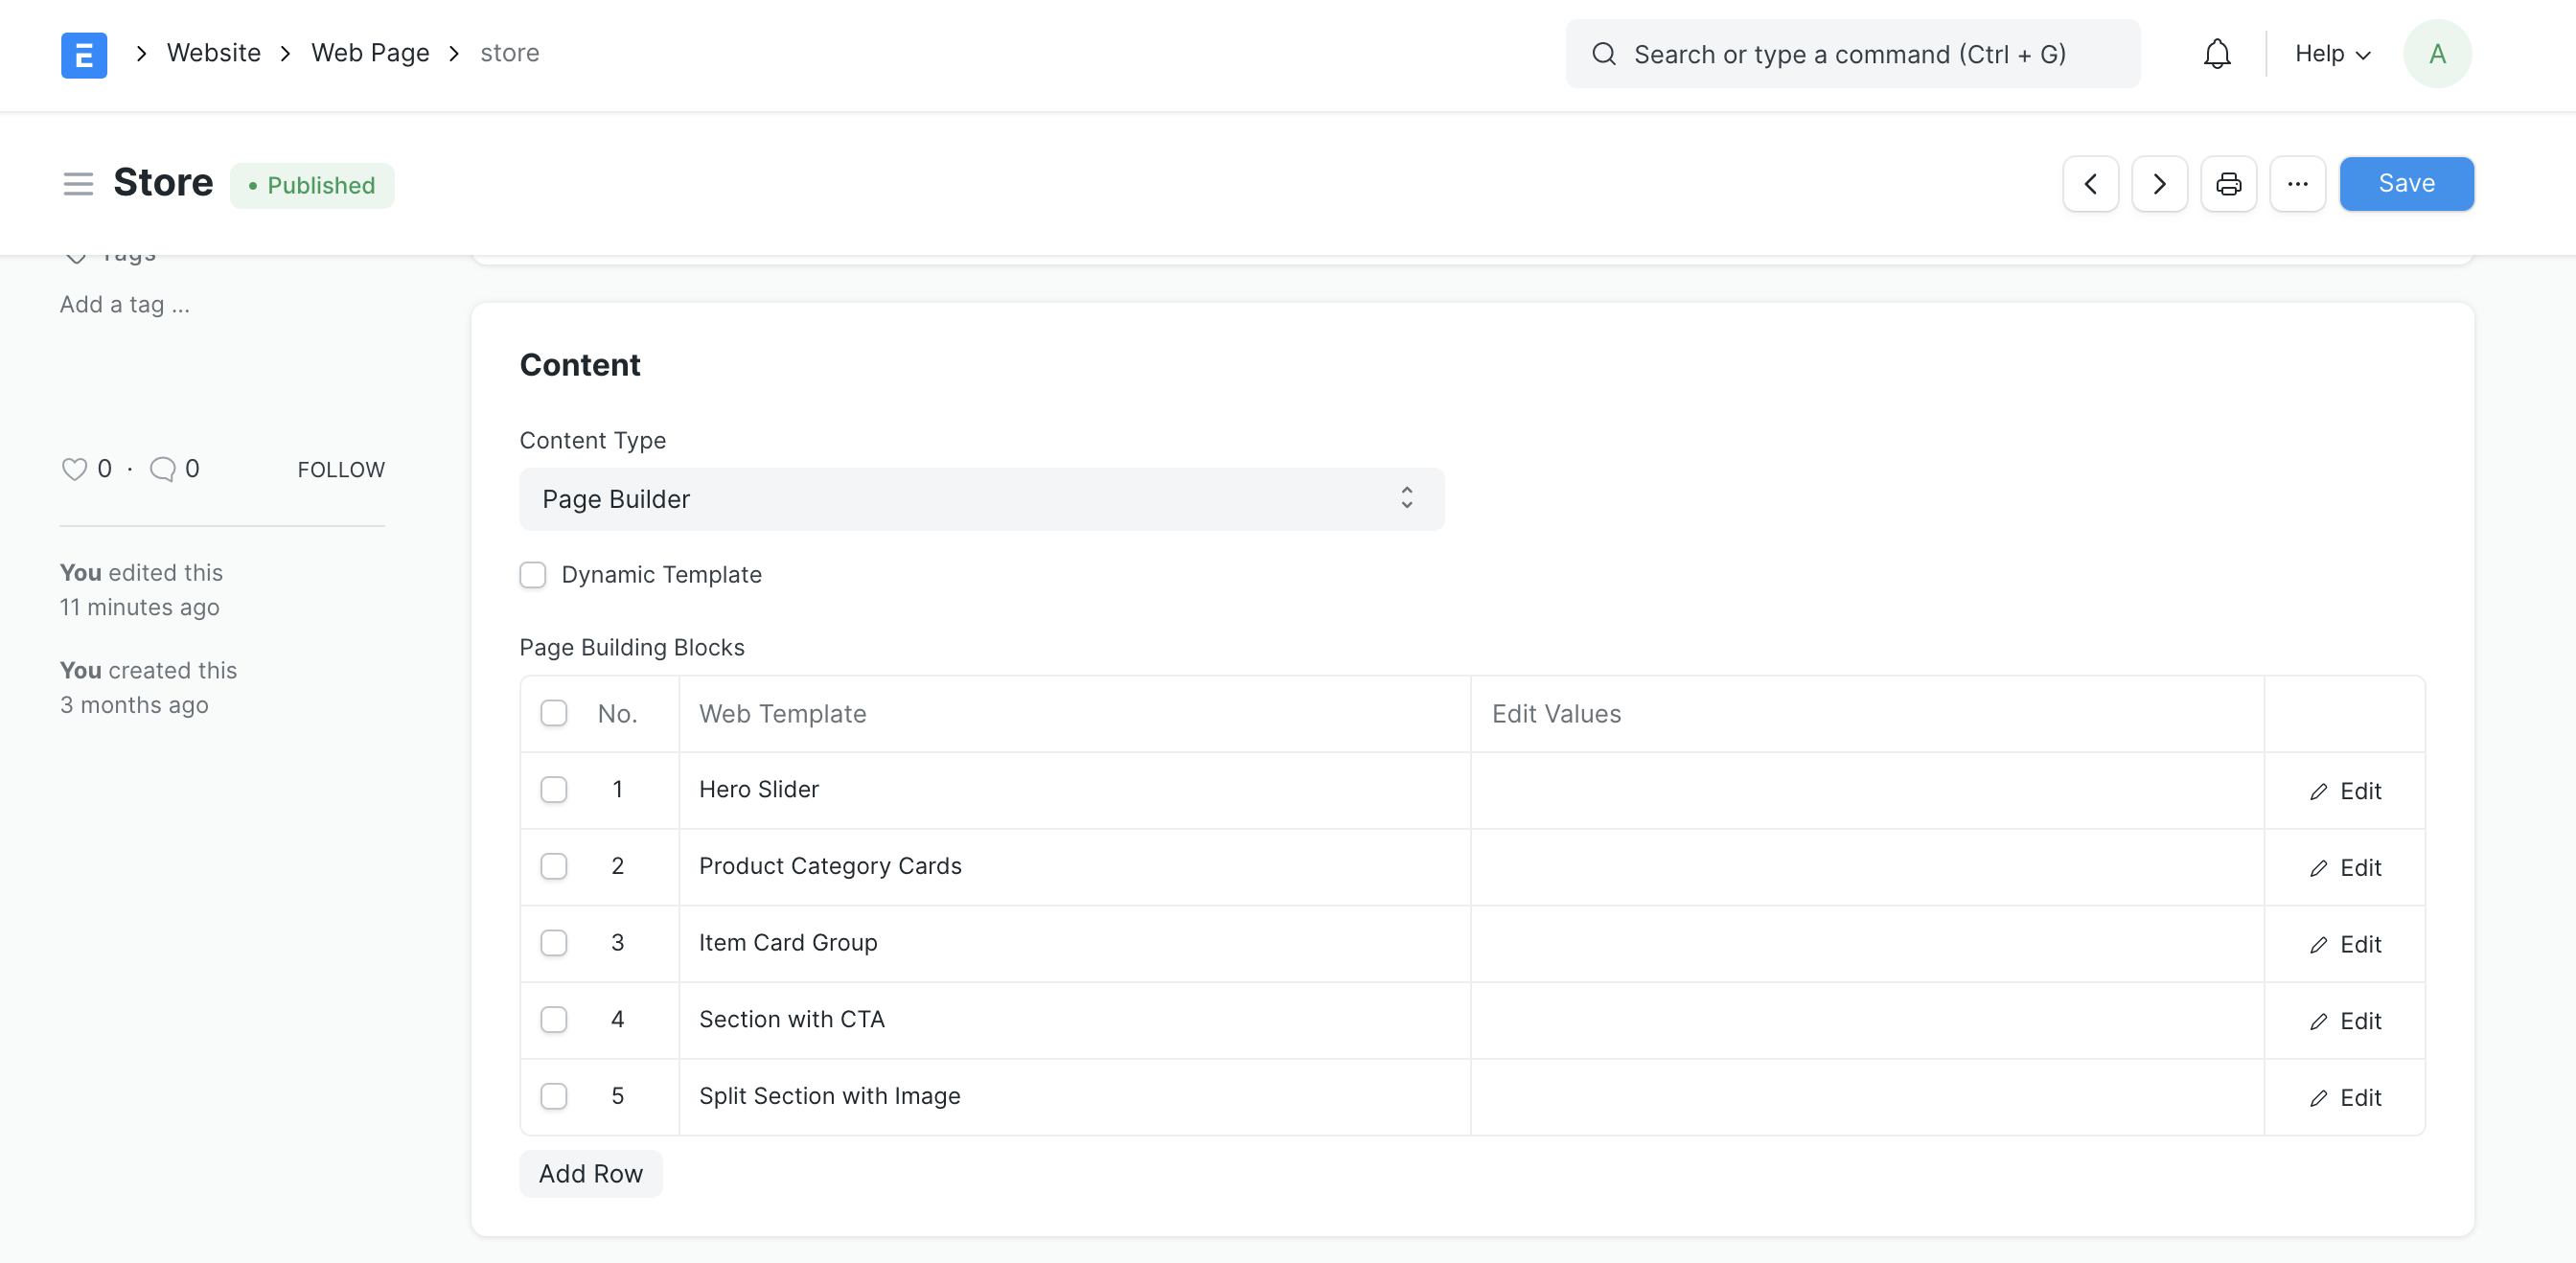
6.Add Values.
To set the content for each part, click on the Edit Values button that appears to the right of each block and enter the values in the dialog box.
The following web templates can be used to create your store's landing page:
- Hero Slider: A total of 5 slides may be produced. Each slide has a programmable image, title, principal action, alignment, and theme.

- Product Category Cards: It is possible to configure up to 8 product category cards. Every product category will be connected to an item group. To construct the route for the product category, make sure the Display in Website checkbox is selected in the Item Group form.

- **Item Card Group:You can use this section to highlight your featured products. 12 cards in total can be setup. Each card will include an item link. The item will occupy two columns of space if the featured box is ticked.

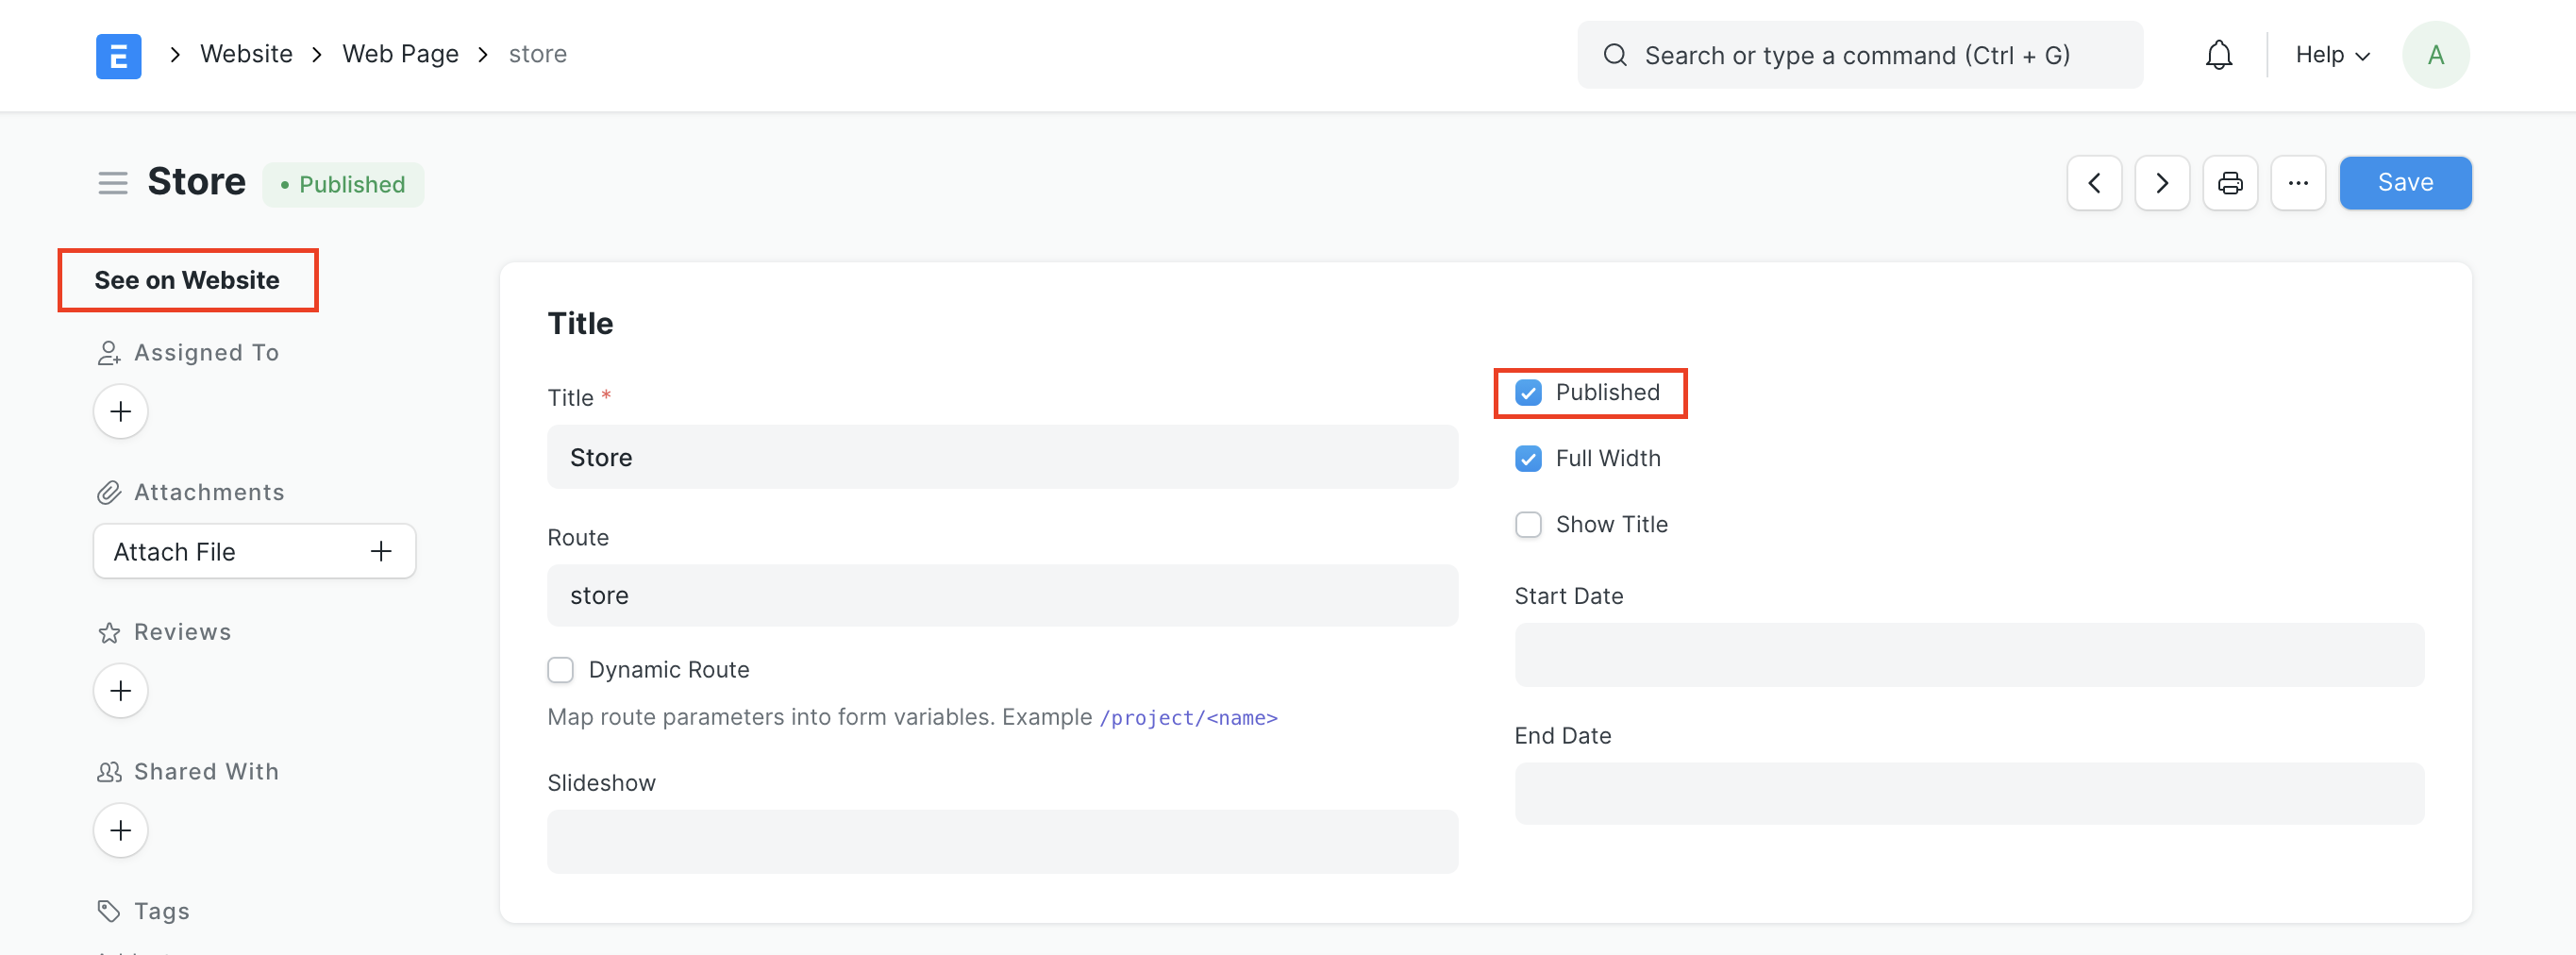
7.Publish your Web Page.
Only when the Published option is ticked will the web page be published. Once the page is published, you may view it by visiting the designated route or clicking on View on Website in the sidebar.
8.Set as your Home Page.
To make this page the home page for your website, follow these instructions.