Employee Advance
Employee Advance
Employees occasionally travel outside for business purposes, and the employer pays a portion of their expenses up front. At this point, the employee can construct an Employee Advance form where information like the Expense's Purpose and Amount can be entered.
The Expense Approver can submit the advance record following verification once the Employee has produced the Employee Advance. The accountant releases the payment and creates the Payment Entry after the Employee Advance is submitted.
Go to: to access Employee Advance.
Human Resources > Expense Claims > Employee Advance
1. Prerequisites
Employee
Department
Chart of Accounts
2. How to create an Employee Advance
Activate Employee Advance > New.
Choose the employee you want to advance money to.
Type in the Advance Amount and Purpose.
Choose the advance account and the payment method.
Save.

The Employee Advance can only be Saved; it cannot be submitted. The only person who can submit it is the expense approver.
2.1 Statuses
These are the statuses that Employee Advance is automatically put to.
Draft: Although saved, a draft has not yet been sent in.
Paid: The employee has received the advance payment, and a payment entry has been submitted.
Unpaid: Employee has not yet received payment of the advance. Against the advance, no Payment Entry is made.
Claimed: After the advance has been paid, the employee has submitted an expense claim for the total Paid Amount.
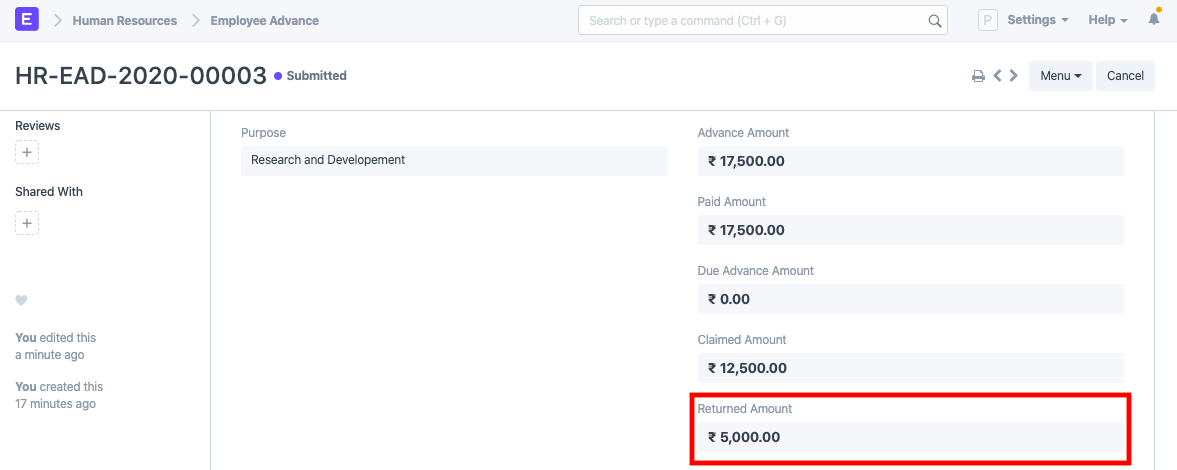
Returned: The employee returns the entire Paid Amount after the advance has been paid, and a return entry is then submitted via Payment Entry/Journal Entry.
Partly Claimed and Returned: When the advance has been paid, the employee has repaid the remaining funds via a submitted Payment Entry/Journal Entry and partially claimed the Paid Amount via Expense Claim.
Cancelled: Any reason may cause the Advance to be canceled.
3. Features
3.1 Employee Advance Submission
Any employee may generate an Employee Advance record, but they cannot submit it.
Once the employee has saved the advance, they should assign the document to the approver. The user who approved the assignment will also get an email notification. You can set up Email Alert to automate email notification.
Upon verification, the expense approver has the option to submit (accept) or reject the employee advance request.
3.2 Make Payment Entry
Employee Advance via Payment Entry
The 'Create' option will be available for usage by the accounts user to generate a Payment Entry when the Employee Advance record has been submitted.
Here is how the payment entry will appear:

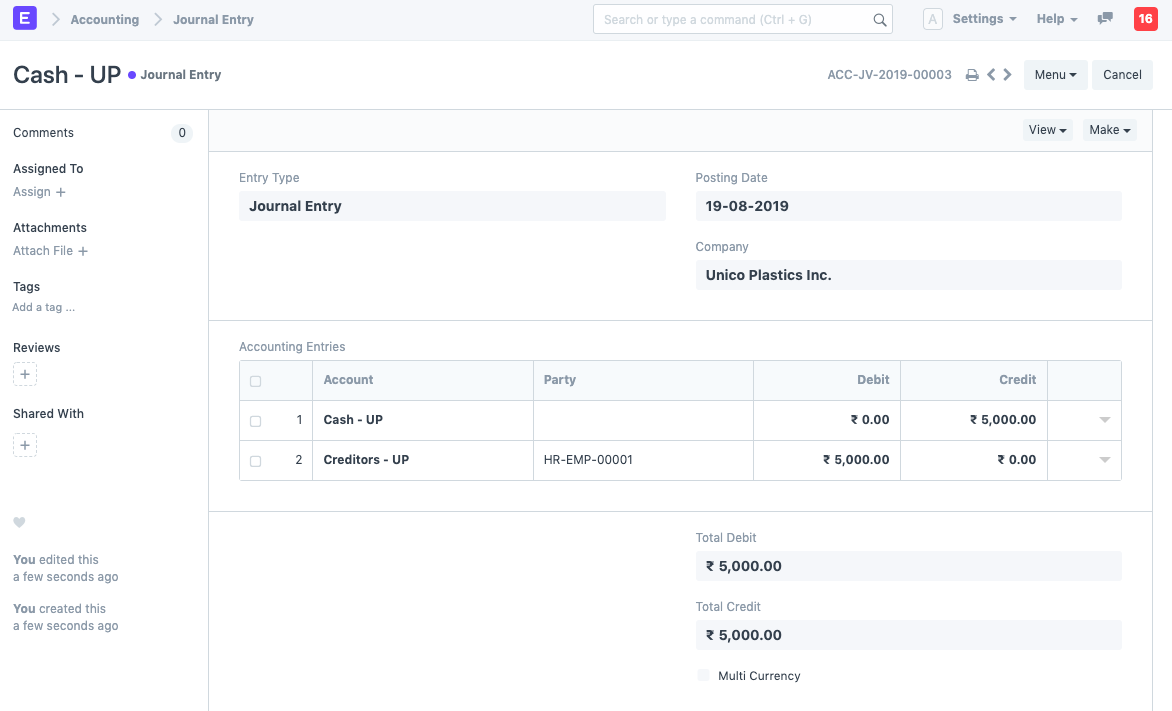
Employee Advance Payment via Journal Entry One alternative is to record a journal entry in relation to the employee advance.
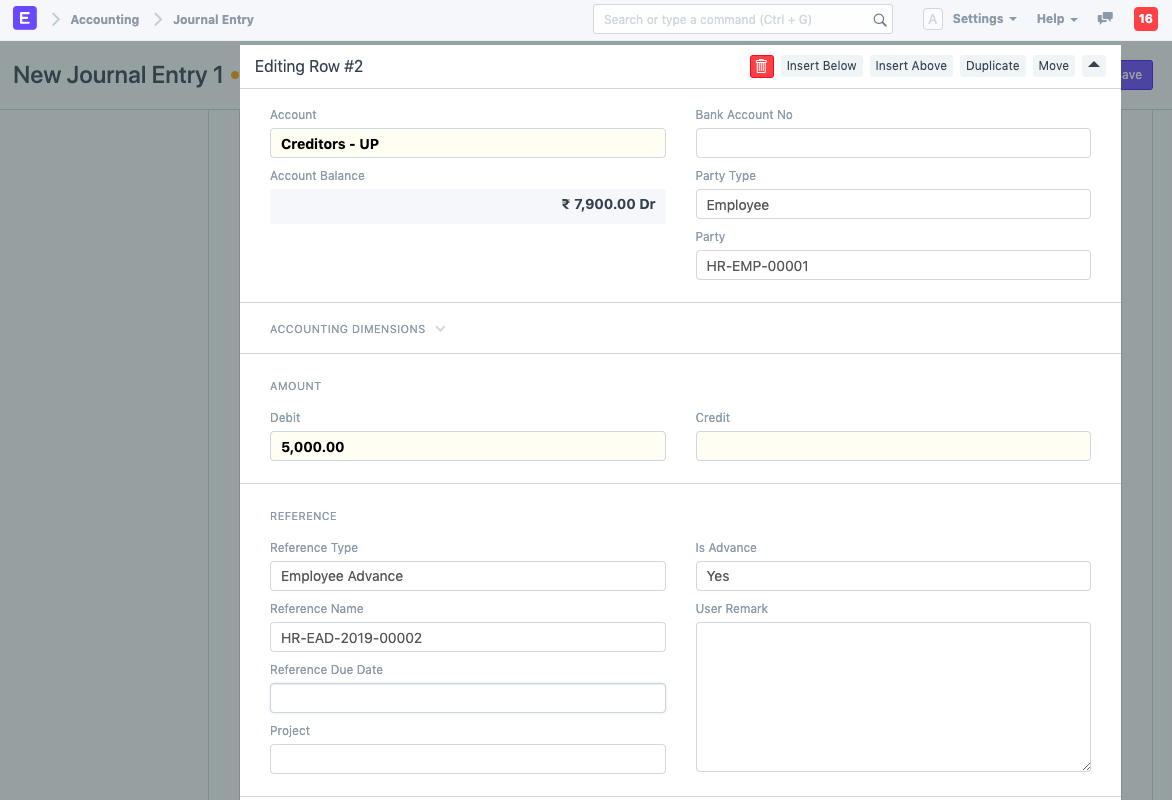
Note: Ensure that Employee Advance is chosen for the Reference Type and Employee Party Type, respectively.
Employee Advance is Paid Employee Advance records will be updated with the paid amount and status upon submission of the Payment Entry/Journal Entry.
3.3 Adjust Advances on Expense Claim
An advance record can be retrieved in the Expense Claim and linked to the claim record later when the employee claims the expense.
3.4 Return Amount
There are three scenarios in which an employee receives an advance:
- The amount may be unused
- All of it may be used
- Some part may be used*
Make a payment entry to show that the amount has been paid after creating the employee advance.
- Click the Return button to reimburse the Advance amount you paid if it is unused.
.png)
If the advance has been fully utilized, it will show up in the Claimed Amount section.
The returned amount will be displayed in the "Returned Amount" field if only a portion of the total is claimed and the remainder is returned.