Setting Workflows on Masters
Typically, workflows are built up for submittable documents. The document is automatically submitted in accordance with the workflow once it has been approved. However, there are use scenarios in which businesses do require the masters for things like items, item prices, pricing rules, etc. to be approved.
These masters are not submittable in Geer ERP. As a result, occasionally they remain active even after rejection and might be used in transactions. We used the Item master as an example in this article. On Item, we will build up a straightforward workflow and only make it active once it has received approval. To do so, take the actions listed below:
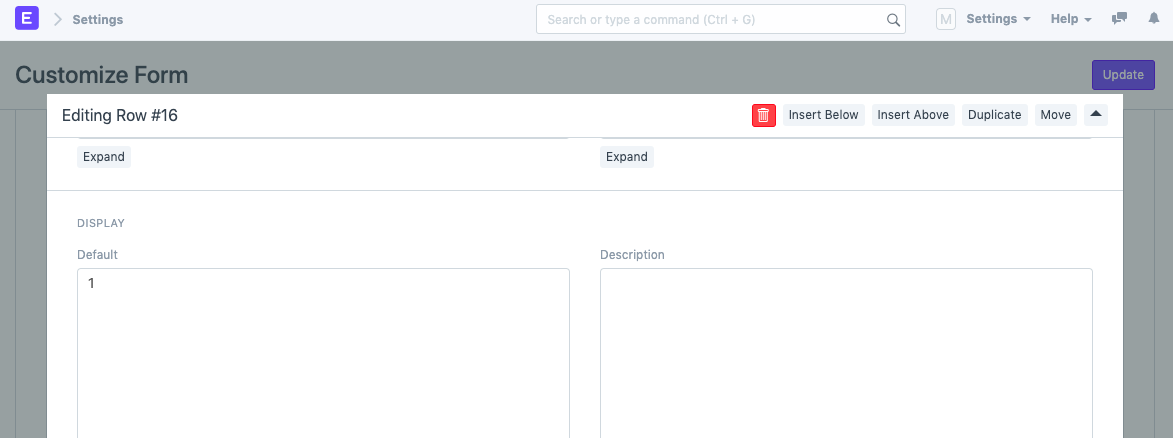
1) Verify that the master on which the workflow will be set has an Enable/Disable checkbox. If it is not already there by default, you must add it using the Customize Form tool and specify the following as the default value:
- 0 if checkbox is "Disable"
- 1 if checkbox is "Enable"
In this instance, the "Disabled" checkbox is present on the Item master. As seen in the Customize Form of the Item DocType below, we have changed the default value to 1.
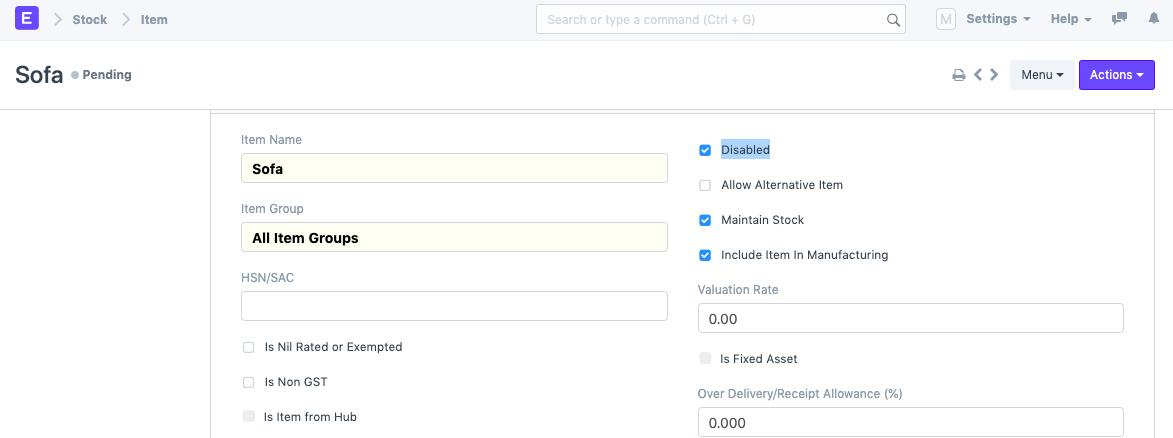
This indicates that until accepted, each new Item generated will be disabled by default (as seen in the screenshot below).
2) Next, set the Workflow.
After approval, be sure to change the "Disabled" (or Enabled) checkbox in the States table to 0 (or 1 in the case of enabled), as shown below.
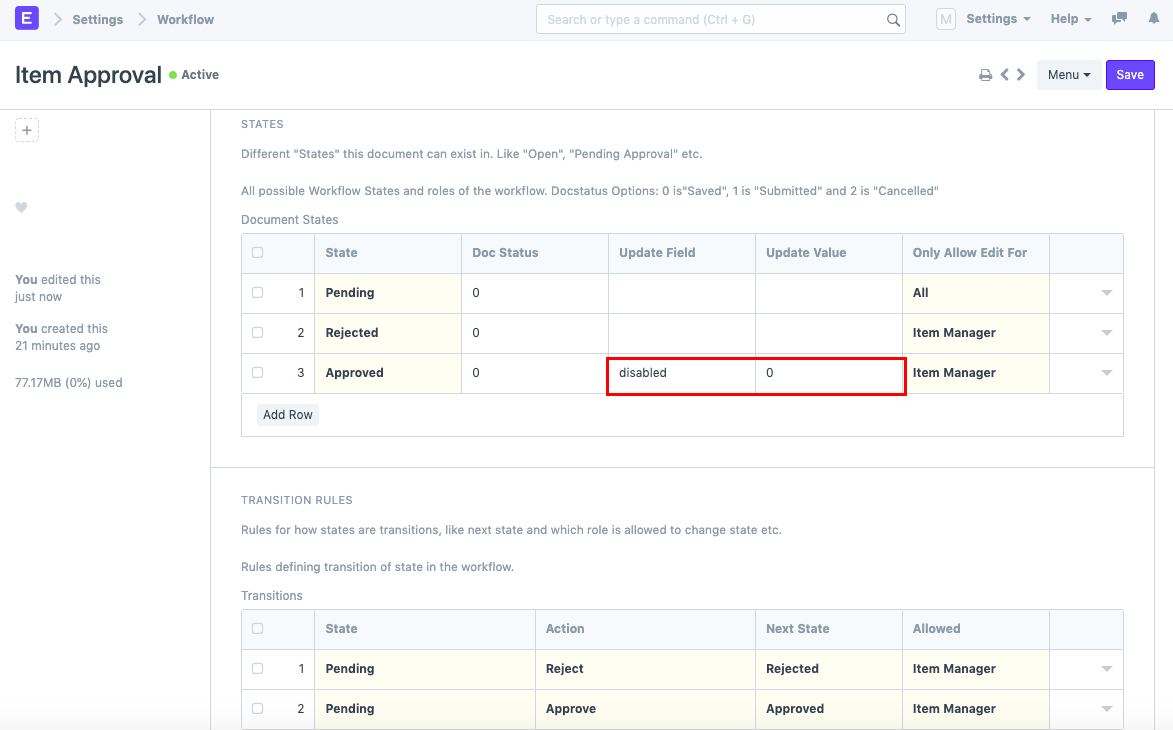
By doing this, you can be guaranteed that as soon as the item is accepted, it will automatically be enabled so that you can use it in transactions.
For a detailed explanation of the workflow, see the GIF below: