Point of Sale Profile
Point of Sale Profile
A POS profile in ERPNext enables the use of the Point of Sale capability.
POS software contains comprehensive features to support various functionality, including inventory management, CRM, financials, warehousing, etc. Before the advent of contemporary POS, each of these tasks had to be completed manually, which increased the risk of data entry mistakes.
You want your Point of Sale to be as speedy and effective as possible if you operate retail operations. You can accomplish this by giving the user a POS Profile.
Go here: to access the list of POS Profiles.
Home > Retail > Retail Operations > Point-of-Sale Profile
1. How to create a POS Profile
1.Go to the Point-of-Sale Profile and click on New.
2.Enter a name for the profile.
3.Select a Naming Series.
4.Set a Write Off Account and Write Off Cost Center to which the transactions will be recorded.
5.Set up payment modes in the table, the default will be cash if nothing is set here. Only the modes set here will be available when using POS. After adding payment modes, set one of them as the default payment method by ticking the checkbox.
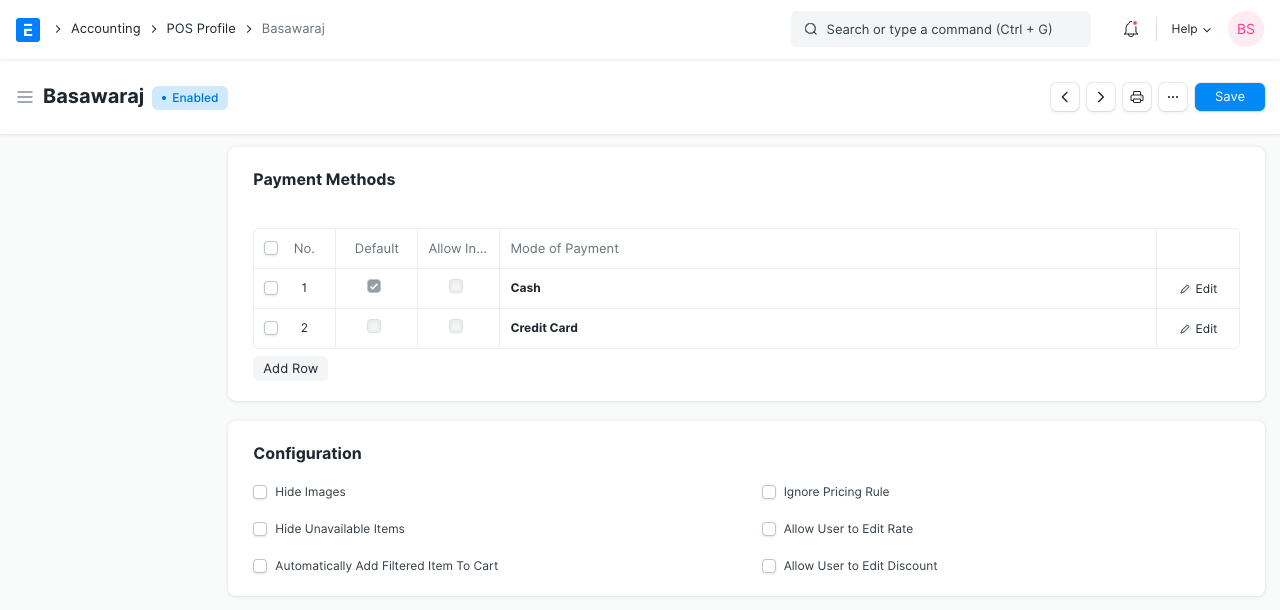
Set the default amounts for the payment methods (recommended: 0).
Save.
1.1 Additional options when creating a POS Profile
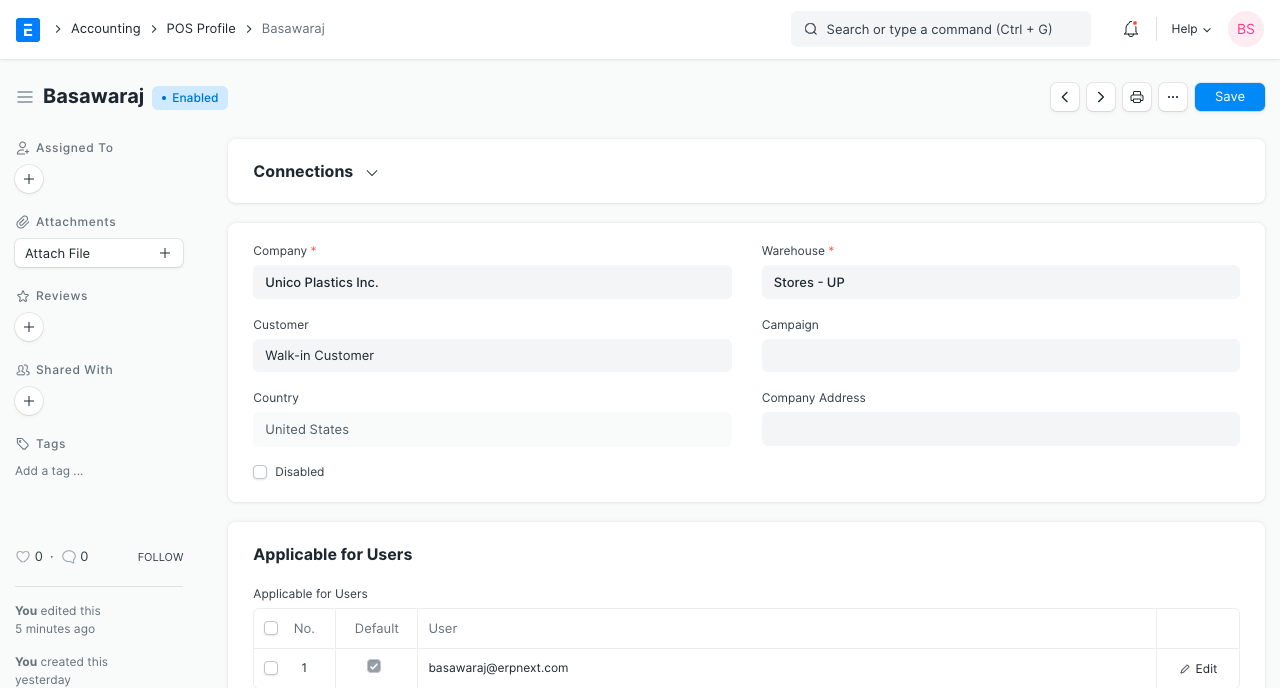
Customer: By adding item groups and customer groups to the POS Profile, users can sell specific products to specific Consumers through the POS.
Warehouse: POS transactions using this POS Profile will have an impact on the stock levels in the specified Warehouse.
Campaign: You can link a sales campaign here to track overall sales against it.
Company Address: This option is available if the POS counter is installed at a company branch.
Update Stock: If this feature is turned on, transactions made using the POS Profile will have an impact on the stock levels. In other words, when you "Submit" this Sales Invoice, Stock Ledger Entries will be made, negating the requirement for a separate Delivery Note.
Ignore Pricing Rule: With this POS Profile, any active Pricing Rules will be disregarded.
Allow Delete: The data is cached in Offline POS. By checking this option, the user will be able to remove the sales invoice that was cached during the draft stage.
Allow user to edit Rate: POS Profile users will have the ability to change the 'Rate' of Items Added in Transactions.
Allow user to edit Discount:The 'Rate' of Items Added in Transactions may be modified by the POS Profile User.
Allow Print Before Pay: The POS User will be able to print an invoice before the payment is made thanks to this.
Display Items In Stock: The POS User will see how many Items are still available in the chosen Warehouse.
2. Features
2.1 Applicable for Users
By default, the POS Profiles established in ERPNext are accessible to all Sales Users. But, you can add users to the table if you only want them to have access to particular POS Profiles. Other Users cannot use this POS Profile for retail transactions once even one User is configured in it.
Setting POS Profile as default: The current POS Profile for that User becomes the default POS Profile when the Default checkbox in the table is selected. The POS Profile will therefore be pre-set the next time the User logs into the system.
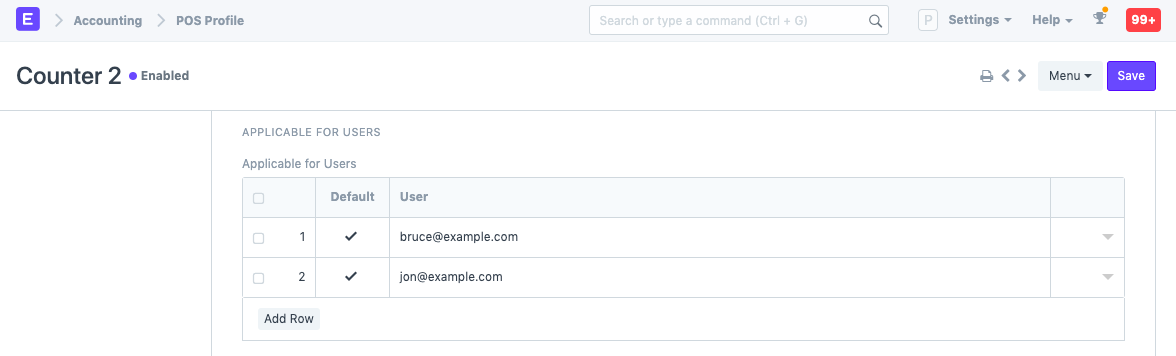
Please take note that the POS setting will only be applied to the User you provide. The setting will be applied to every user if the User option is left empty. Visit the Point of Sale website to learn more about how POS operates.
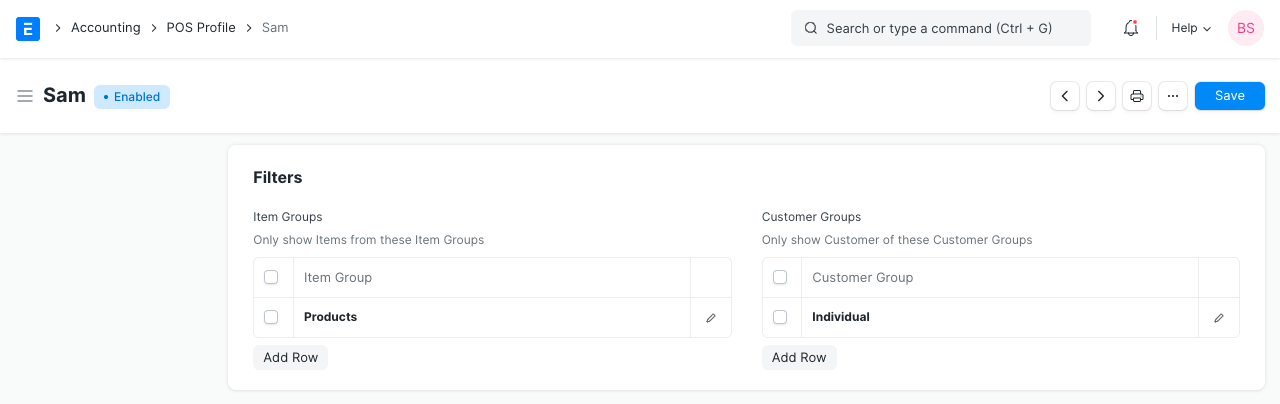
2.2 Setting Item Group and Customer Group
While creating transactions using the POS Profile, the group will be automatically selected if an item group or customer group has been set up.
2.3 Print Settings
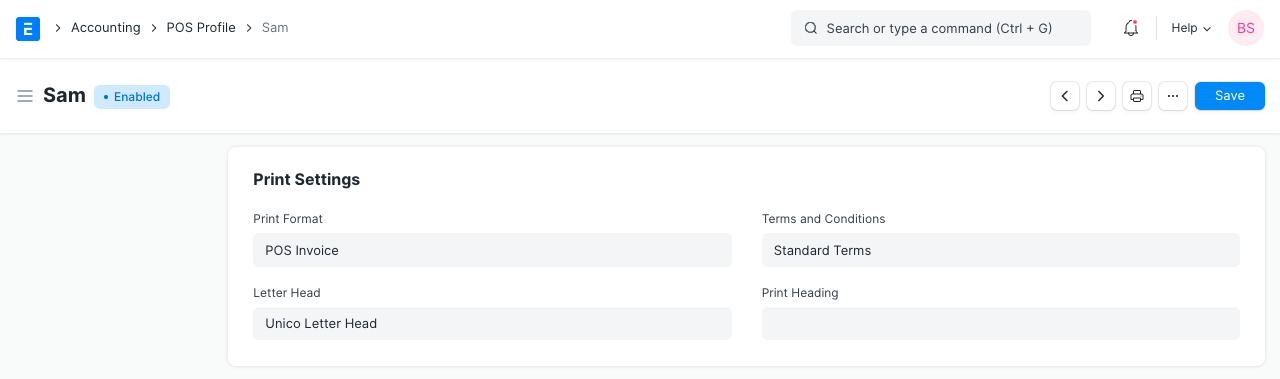
Print Format for Online You can choose a Print Format to control how the printed document will be laid up. See the Print Format page for further information.
Letterhead Your POS Sales Invoice can be printed on letterhead from your business. Find out more here.
Print Headings While printing the document, headings on the POS Sales Invoice can also be modified. The heading might read "Invoice" or "Bill," for instance. This can be accomplished by choosing a Print Heading. Go to Home > Settings > Printing > Print Heading to add new print headings. Find out more here.
Terms and Conditions The terms and conditions that may apply to the item you're selling may also apply here. Click here to learn more about adding Terms and Conditions.
2.4 Accounting
Price List:The item prices are kept in a price list. The item prices for the current POS Profile will be fetched from the specified price list when a price list is set here.
Currency: This will be set by default to use the company's default currency. You can, however, alter it. Remember to update the accounts if you alter the currency.
Taxes and Charges: The taxes and charges will be applied automatically to the POS transaction if you choose a Sales Taxes and Charges Template or a Purchase Taxes and Charges Template.
Apply Discount On: You can choose to apply the discount to either the Grand Total (pre-tax amount) or the Net Total here (post tax amount).
Tax Category: The Tax Regulations linked to the Tax Category you choose here will be applied to each transaction made using this POS Profile.
The general ledger can be configured to update the following accounts when necessary:
1.Account for Change Amount
2.Write Off Account
3.Write Off Cost Center
4.Income Account
5.Expense Account
2.5 Accounting Dimensions
You can tag transactions in Accounting Dimensions depending on a particular Region, Branch, Client, etc. This makes it easier to see financial figures differently depending on the criteria you've chosen. Visit the Accounting Dimensions page to learn more.
Note: Cost Center is treated as a dimension by default.