Process Statement Of Accounts
Process Statement Of Accounts
Introduced in Version 13
You can send Statement of Accounts (General Ledger Report) and Ageing (Accounts Receivable Overview) Reports to your clients in bulk by email, either manually or automatically, using the tool Process Statement of Accounts.
When you wish to frequently email customers updates about their transactions, this function is helpful (like Sales Invoices). Customers will receive a PDF attachment in their emails with information about their accounts, including the posting date of the invoice, the Sales Invoice number, and other pertinent information.
This feature's objective is to alert several clients of outstanding invoices.
You can either use the navbar's search function or click to: to reach the Process Statement of Accounts list.
Home > Accounting > Tools > Process Statement Of Accounts
1. Prerequisites
Customers' email addresses are used by the program to send them the reports. The tool won't let you choose the appropriate Customer if the below email entries are missing from the Customer contacts, therefore make sure they are filled out in the Customer papers.
*Customer Billing Email: This must be entered in the Customer Contact section with the "Is Billing Contact" checkbox selected. *Customer's primary email address is not required unless you check the box next to "Send To Main Contact" on the form.
Setting up an email account with outgoing enabled. Here is more information on this.
2. How to create a Process Statement Account entry
1.Go to the "Process Statement Of Account" list view by searching in the navbar and click on "New".
2.Enter a name for the entry, for future reference.
3.Set the General Ledger filters for the statements which will be sent to the customers.
*"From Date" and "To Date" filters will be hidden and auto-filled dynamically when "Enable Auto Email" option is selected.
*"Project" and "Cost Center" are Table MultiSelect fields. Meaning you can select multiple Projects and Cost Centers in the General Ledger filters.

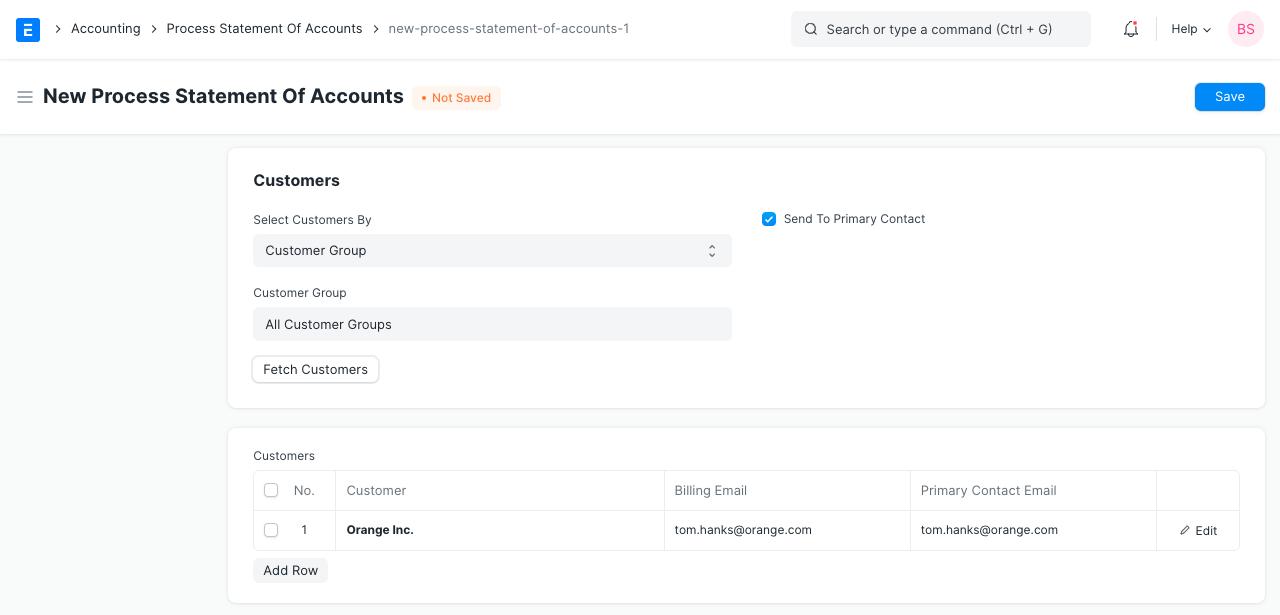
4.Customers can be chosen from the child table in the "Customers" section to retrieve their primary and billing emails.
*By entering the option and selecting "Fetch Customers," you can select customers in bulk by grouping them according to "Customer Group," "Territory," "Sales Partner," and "Sales Person."
*When group values are selected in tree doctypes like "Territory," "Sales Person," and "Customer Group," the customers who have child values for these fields will also be obtained. Hence, all customers with "Territory" values under India in the Territory tree will be selected when "India" is selected as the territory in the form.
**The "Send To Main Contact" option will send the Statement of Account in addition to the billing email to the principal contact email IDs of the customers.
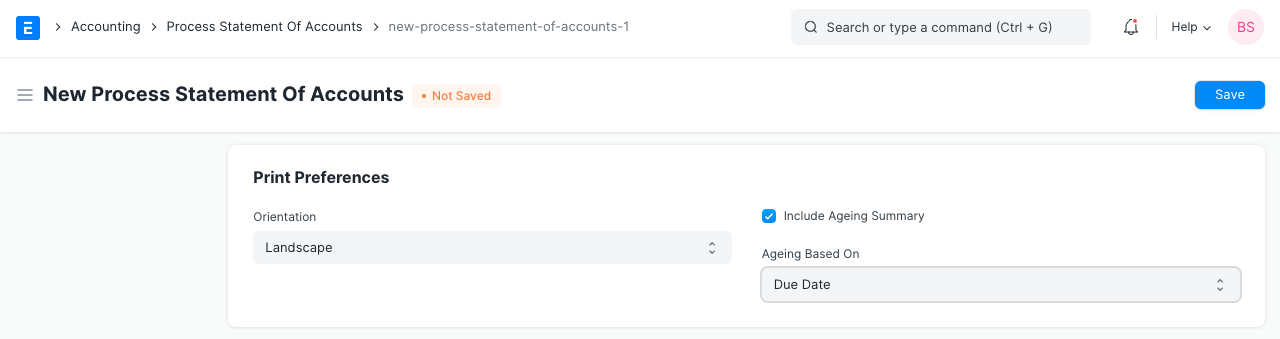
- In "Print Preferences" section you can select 2 things:
*Print the PDF file in either "Landscape" or "Portrait" orientation.
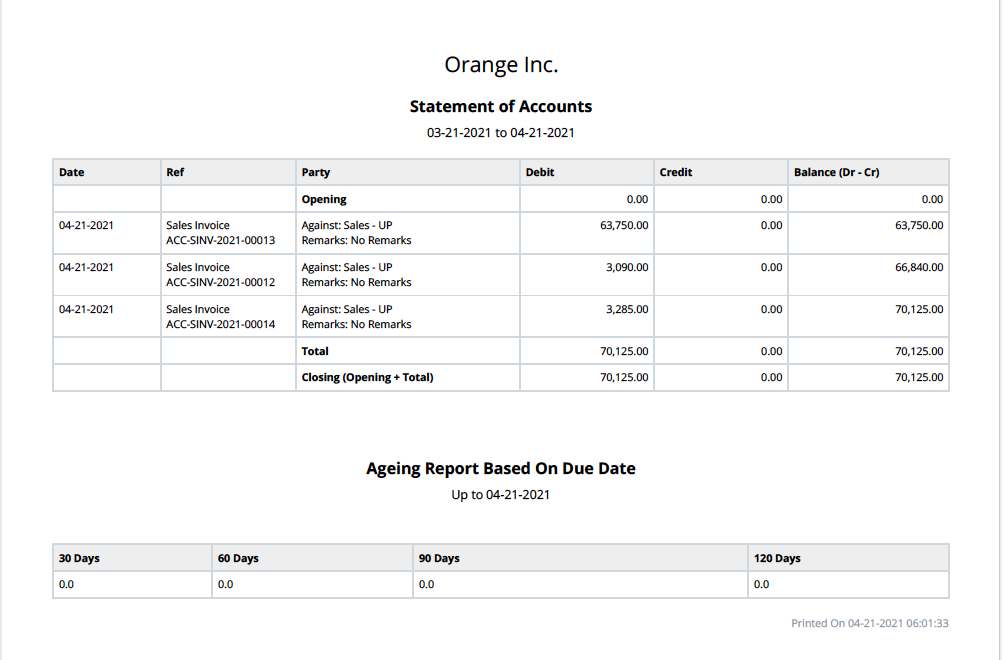
*If you like to view the ageing report (Accounts Receivable Summary report), which displays the ageing amount for vouchers (such as Sales Invoices) depending on either "Due Date" or "Posting Date," for which the ageing period is 30/60/90/120 days.
6.You can customize how the emails are sent by going to the "Email Settings" area. This is divided into two subsections:
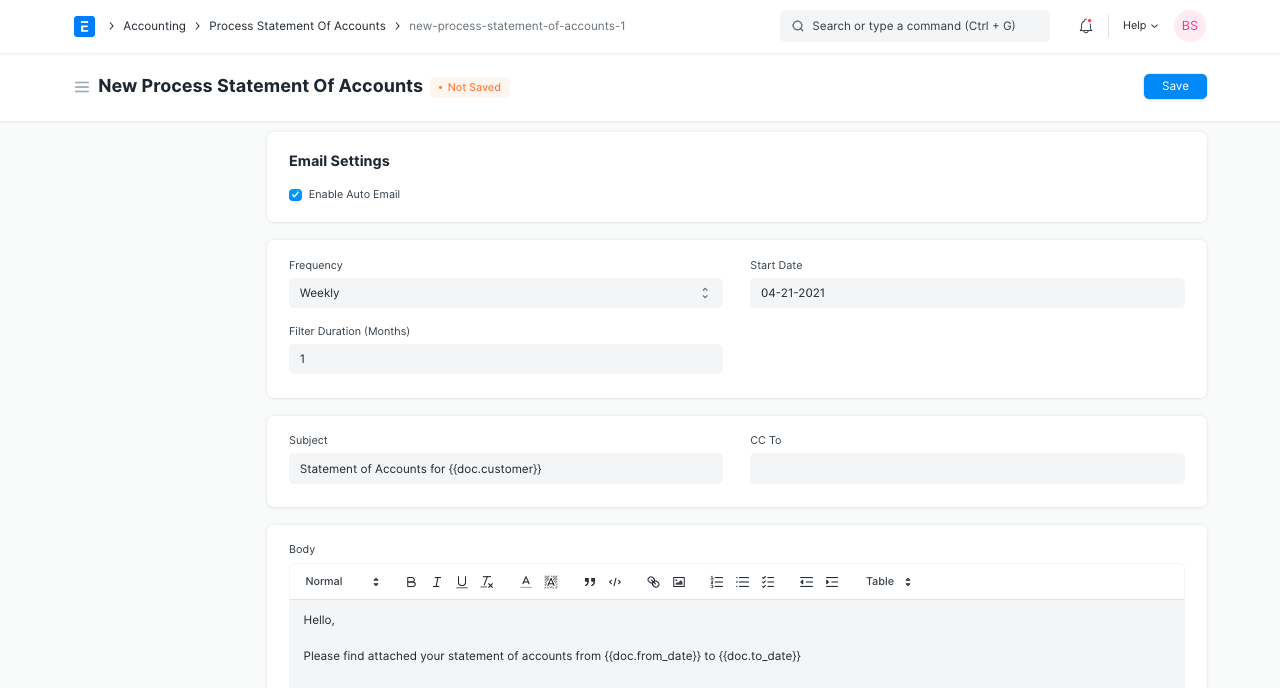
*When you click "Enable Auto Email," options to automatically email clients with periodic reports will appear.
*After the "Start Date," you may choose the "Frequency" at which emails to consumers will be sent. Weekly, monthly, and quarterly options are offered.
*The "Filter Duration" can also be chosen in months. You will receive the results for the previous three months, counting backwards from the present date, if you, for instance, set "Filter Duration" to "3". In this case, the term "current date" refers to the day when the emails were sent.
*These emails are delivered as a background operation at midnight rather than immediately.
*After that, you may choose the email's "Subject," "CC To," and "Content" fields. If you don't provide any values in this area, the default settings will be as displayed below.
- Review your settings and click on "Save".
Now, either wait for the emails to be sent if "Enable Auto Email" is enabled, or click "Send Emails" to send them right away.
3. Features
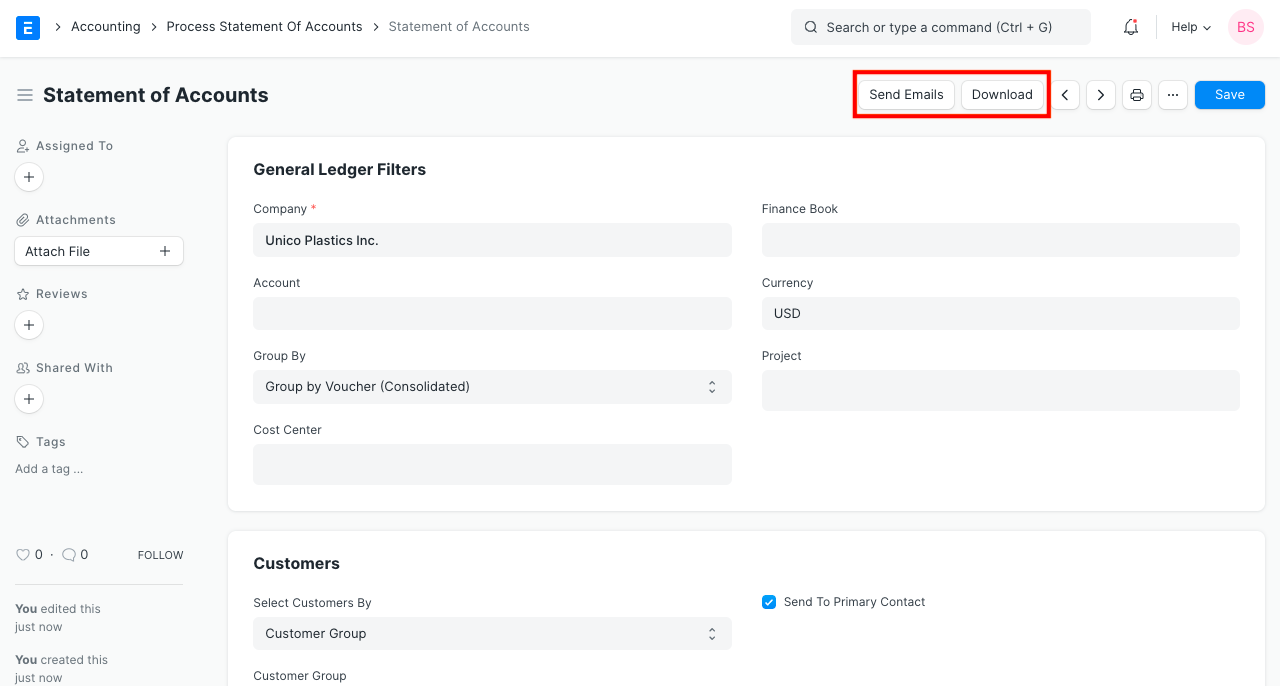
3.1 Download consolidated PDF of all customers
Upon creating an entry, there is a "Download" button at the top that allows you to view the PDF of the combined report for all customers. This is useful for reviewing.
3.2 Send emails manually
While generating an entry, there is a button at the top labeled "Send Emails" that enables you to manually start emailing clients. The emails are gathered into a queue by means of a background task, which you can monitor in the "Email Queue" doctype using the DocType and Document references. Even if "Enable Auto Email" is enabled, you can still do this.
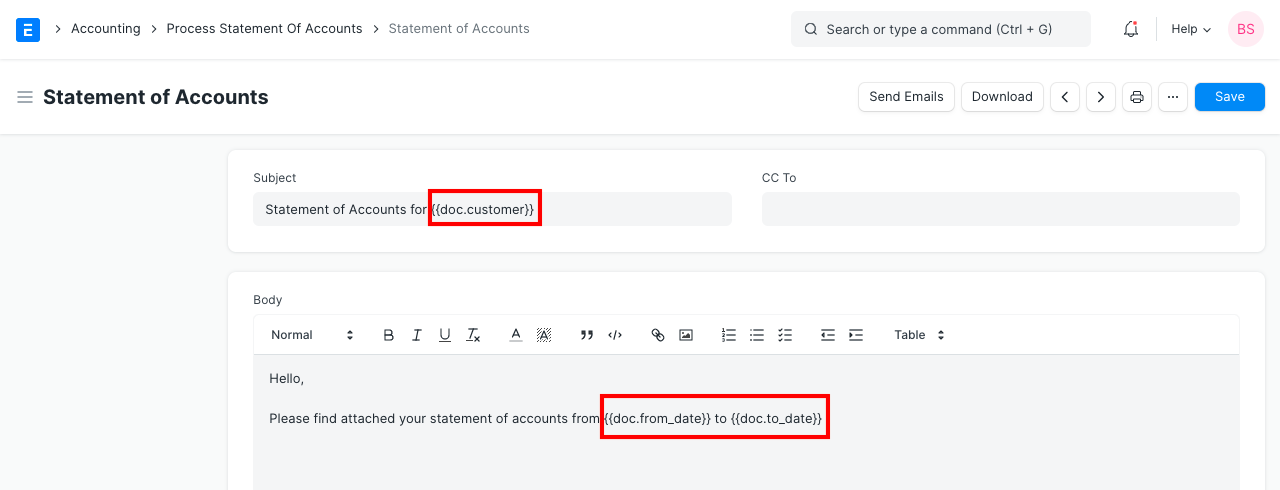
3.3 Using dynamic values in the Email Subject and Body
Jinja tags allow you to enter dynamic values from:
*The client listed as the "customer" object to whom the email will be sent
*Almost any field in the chosen Process Statement Of Account document is located under the "doc" object. any frappe technique.
*under the "frappe" item, utilities
They can be utilized as follows:
Resulting Email:

Report PDF: