Material Transfer from Delivery Note and Purchase Receipt
Material Transfer from Delivery Note and Purchase Receipt
You can generate a Material Transfer entry in ERPNext using a Stock Entry document. It must be given as both a Delivery Note and a Purchase Receipt in some Material Transfer circumstances, though.
Material Transfer from Delivery Note
Scenarios
One of the instances is when you need to give the customer a Delivery Notice when you move a Material from your warehouse to the project site.
In addition, each time material is transferred, taxes must be paid according to legal regulations. In a transaction like a delivery note, it is simpler to manage than in a stock entry.
In order to account for these possibilities, the Delivery Note now includes a provision for Material Transfer. These steps will show you how to use a delivery note to create a material transfer entry.
Steps:
Enable Target Warehouse Delivery Message Target Warehouse is a hidden field in the item doctype (previously Customer Warehouse). By checking the box next to "Allow Material Transfer From Delivery Note and Sales Invoice," you can allow it in Stock Settings.
Additionally keep in mind that the chosen client should represent the same business. To do this, turn on the "Is Internal Client" checkbox in the customer form and choose your business from the list under "Represents Business."
Select Warehouses
Choose source Warehouse as From Warehouse when establishing a Delivery Note for Material Transfer for a specific item.
Choose a warehouse in the customer warehouse where the material will be transported or choose a target warehouse.
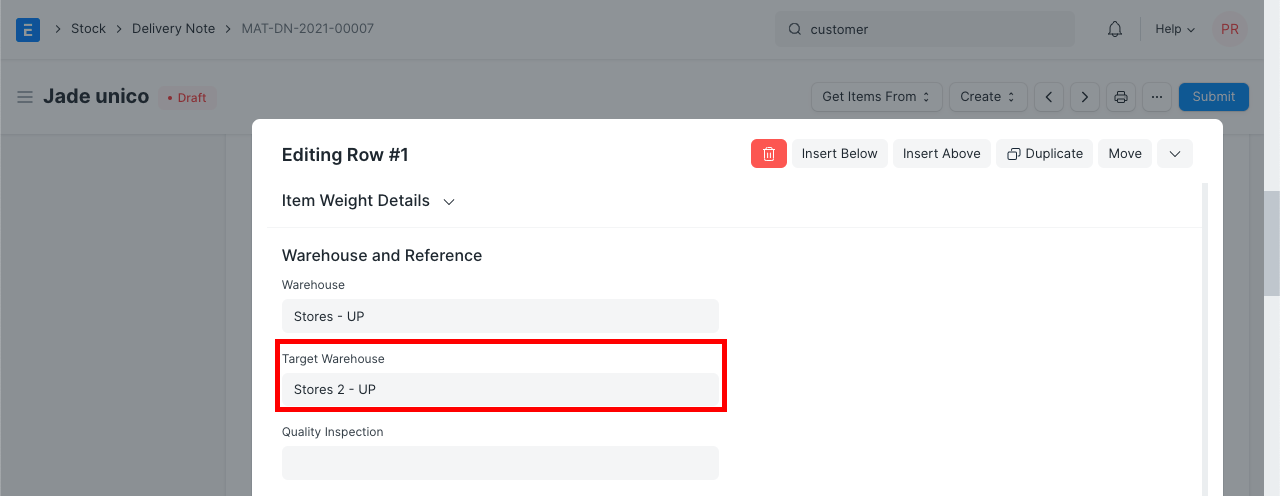
Stock for the item will be taken out of "From Warehouse" and added to "Customer Warehouse" upon submission of a Delivery Note.
Material Transfer from Purchase Receipt
Scenarios
Taxes must be paid on each transfer of Material according to statutory regulations. As taxes cannot be charged to transfers of items made via Stock Entry, it is simpler to handle a scenario like this in a transaction like a Purchase Receipt.
The processes for using a purchase receipt to create a material transfer entry are listed below.
Steps
Enable Supplier Warehouse
Similar to the Customer Warehouse described before, the first step is to enable the Supplier Warehouse from Stock Settings as shown above.
Additionally keep in mind that the chosen supplier need to represent the same business. Enable the "Is Internal Supplier" checkbox on the Supplier form and choose your business in the "Represents Business" column to accomplish this.
Select Warehouses
Choose the target Warehouse as the Approved Warehouse when establishing a Purchase Receipt for Material Transfer for an item.
Here is how you turn an internal delivery note into an internal purchase receipt:

Choose a warehouse from which to transfer material from the supplier warehouse.
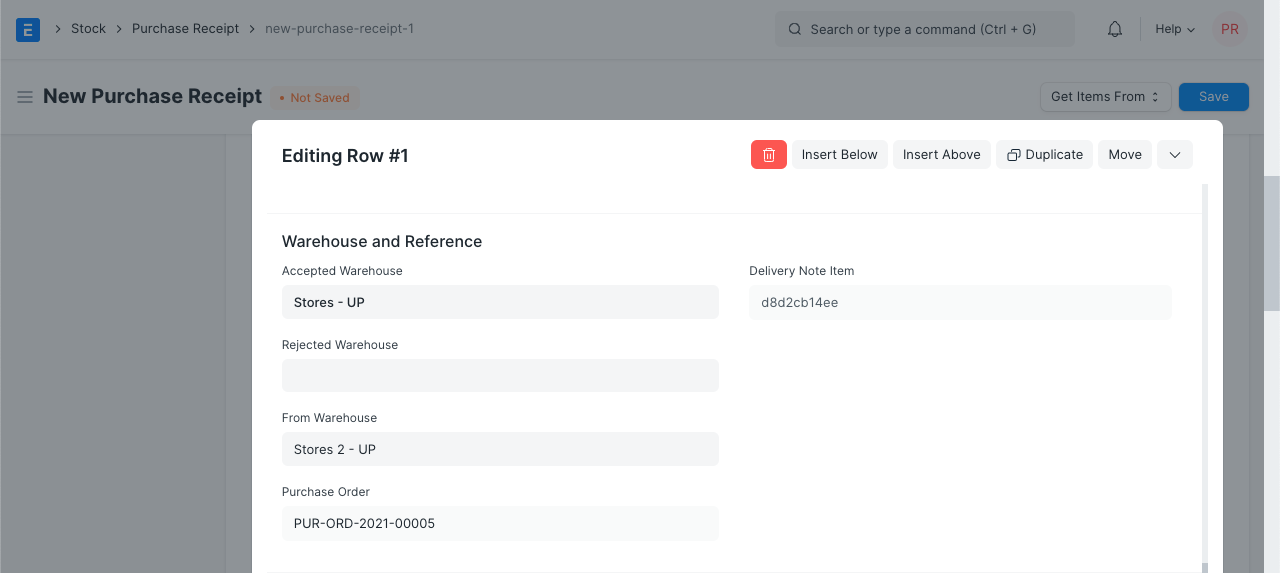
Stock for the item will be taken out of the "Supplier Warehouse" and added to the "Accepted Warehouse" upon submission of the purchase receipt.