Website Item
Website Item
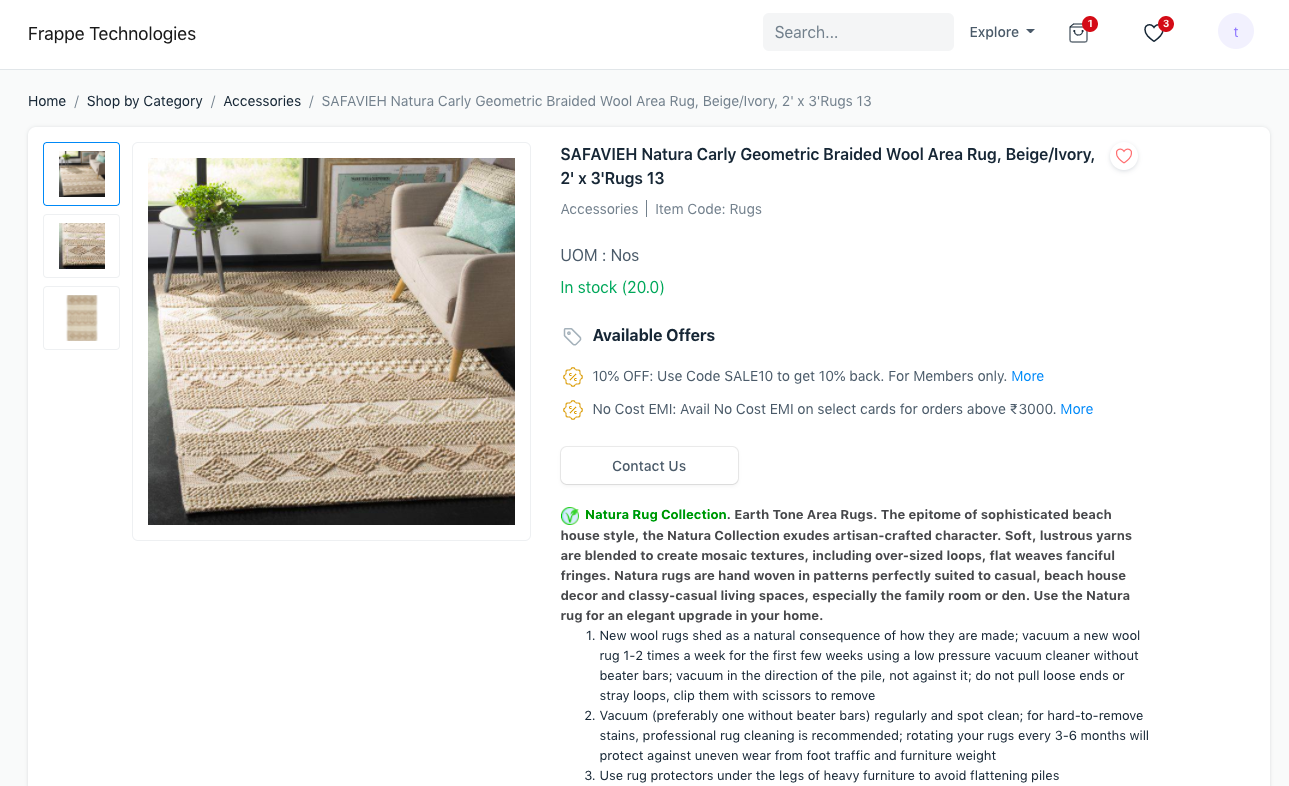
A new DocType named Website Item has been created to hold the website information related to an item. Now, publishing an item only requires the click of a button. An item is successfully published after a website item is created against it.
Here, the prerequisites are things.
Publishing an Item
Every unpublished item under Actions has a button that says "Publish in Website." By pressing this button, a Website Item will be created and published on the website.
Your-site-name/all-products will list the recently generated Website Item if you visit that page.
Click the View on Website link on the top left of the item image in the Website Item document to view the Website Item page on the website.
Updating the Website Item

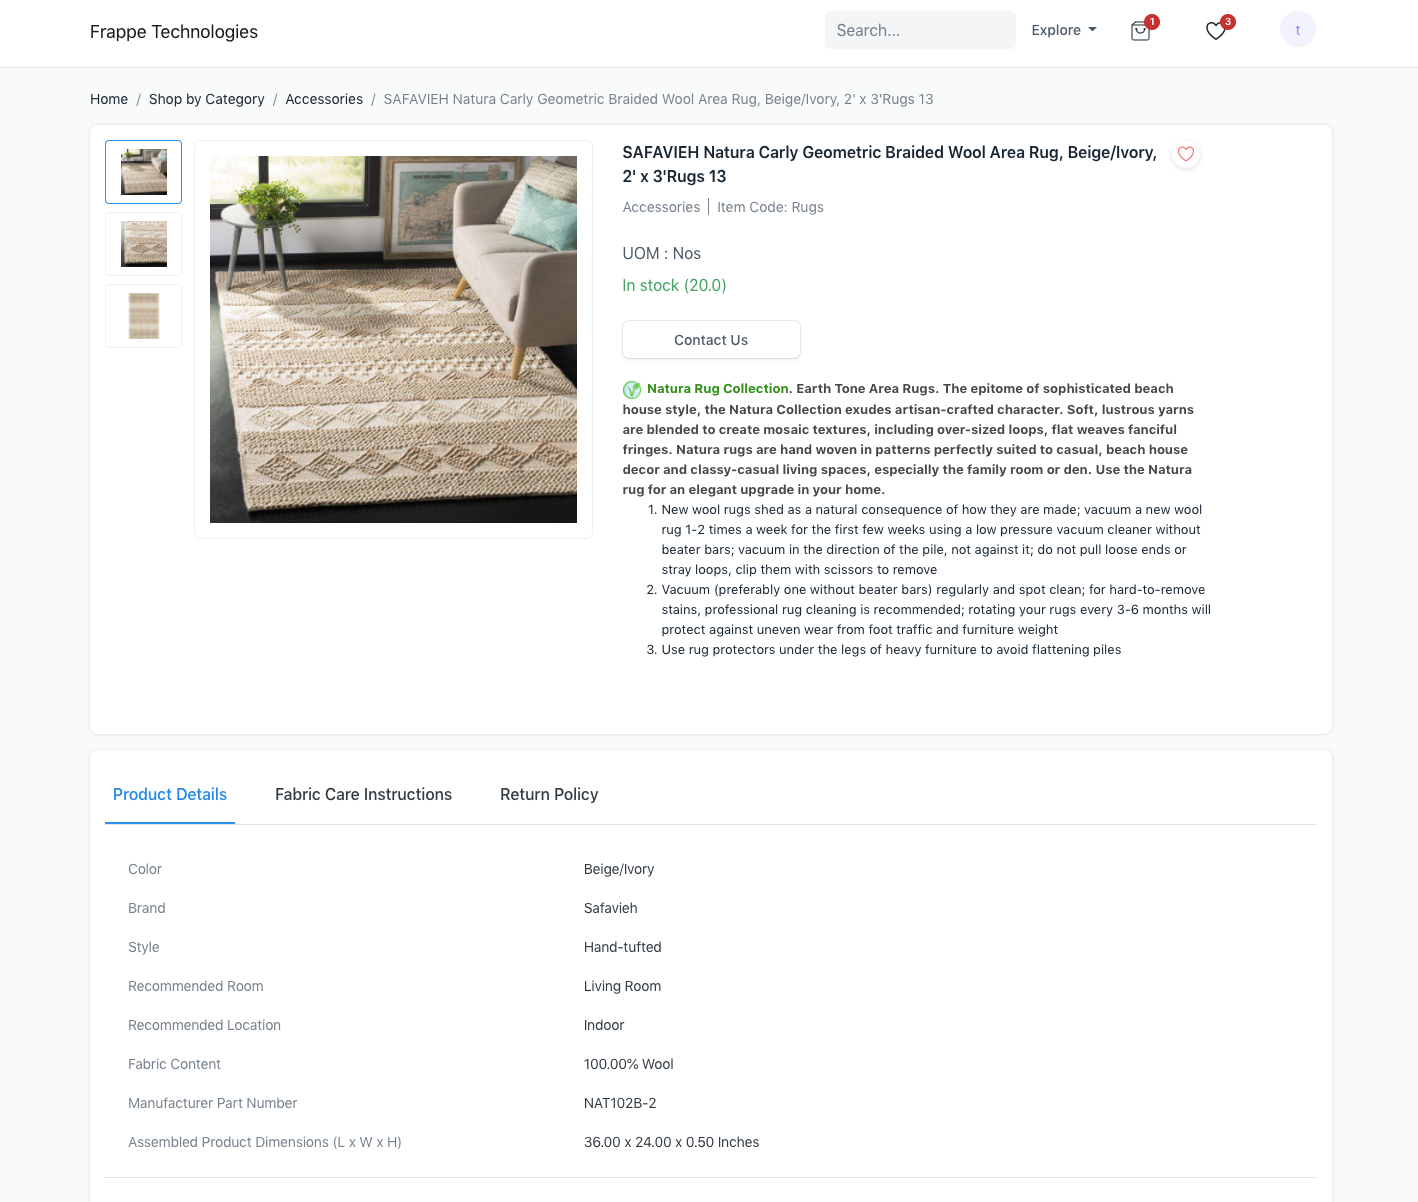
You can edit the data contained in a Website Item after it has been generated so that it will appear on the website. the following fields:
General
1.Website Item Name:This box is used to select the title of the website item.
2.Route:This is automatically produced and just specifies the URL at which your item's full page view will be accessible.
3.Published: You can uncheck this box if you want to conceal or remove your published item.
Display Images
1.Website Image:It has a Picture from the item master prefilled automatically. It can also be modified.
2.Slideshow:A Slideshow that you add will be displayed on the Website Item's page. The website image will be displayed by default if a slideshow is not present (if present).
3.Image Description: It serves as a backup text in the event that the image is not displayed.
Stock Information
1.Website Warehouse: Choose the warehouse where the inventory for this website item will be stored. Depending on the remaining stock in the chosen Warehouse, the availability of the Website Item will be displayed.
2.On Backorder: If enabled, it will be made clear that the website item is on backorder and is not often kept in stock. Out of Stock or In Stock will be replaced with Available on Backorder.
The product page will display the item as "Not in Stock" if the Website Warehouse is not configured and the "Keep Stock" box is checked for an item.
Display Information
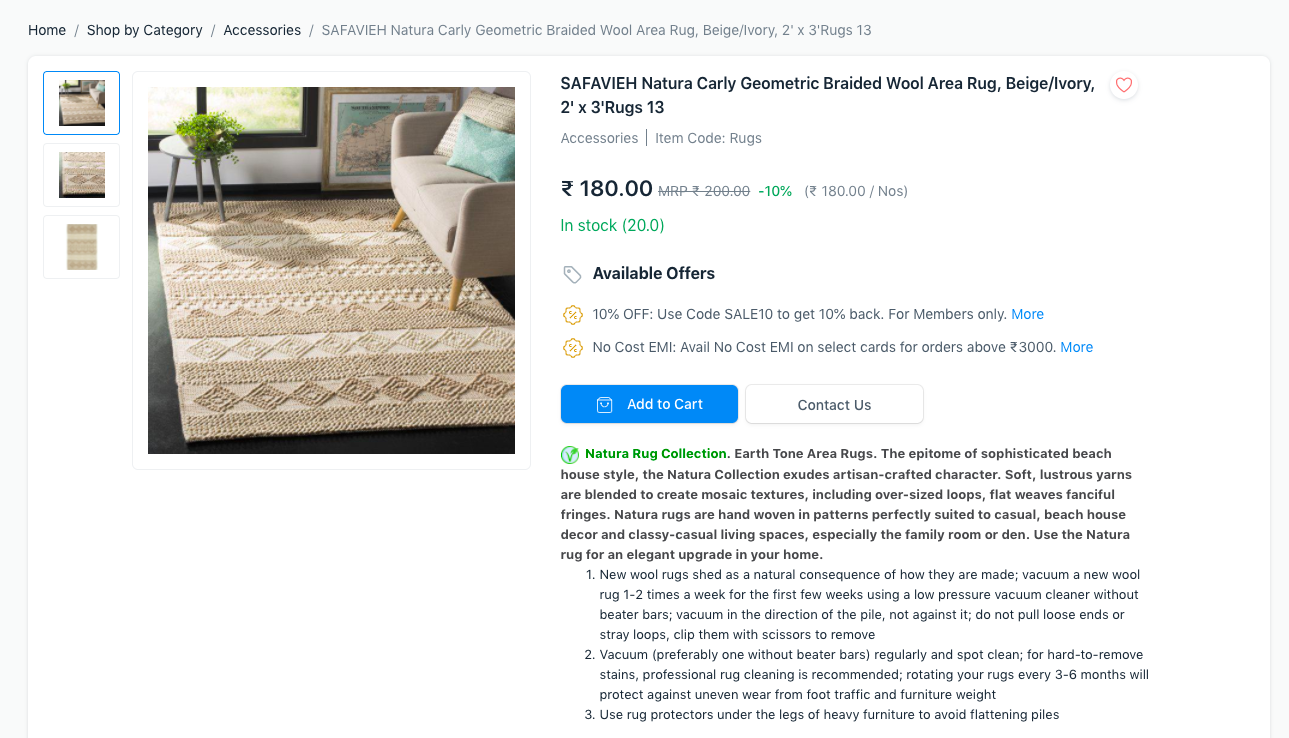
1.Short Website Description: This text area allows you to enter a brief description or summary for the List View. Moreover, you can put HTML here to display in the List View. e.g This product is b>100% pure/b>!
2.Website Description: You can format your website item description in this rich text editor field to make it visually appealing and instructive. If a Website Description is not specified, the Item Description is utilized as a fallback.
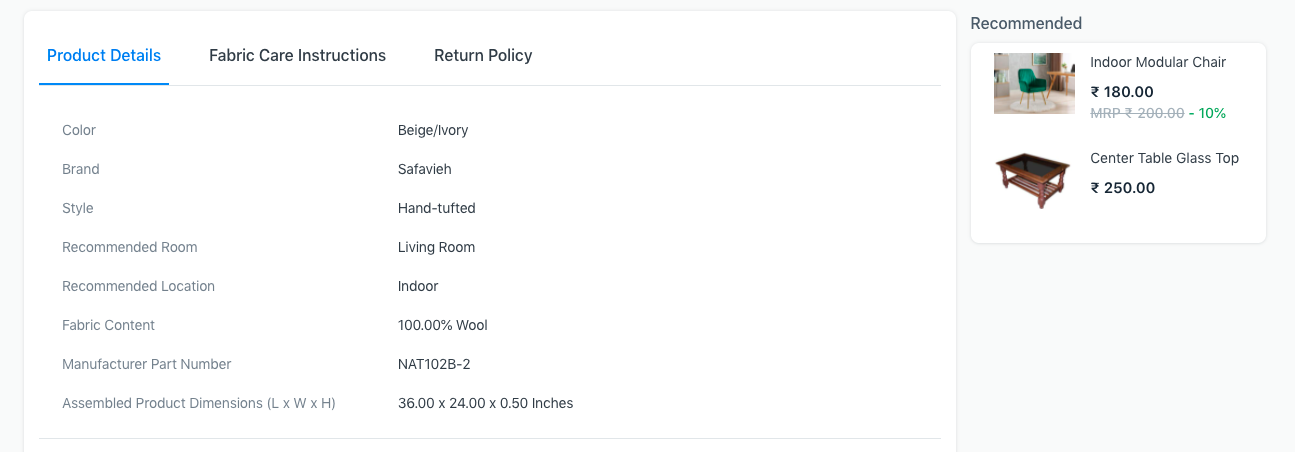
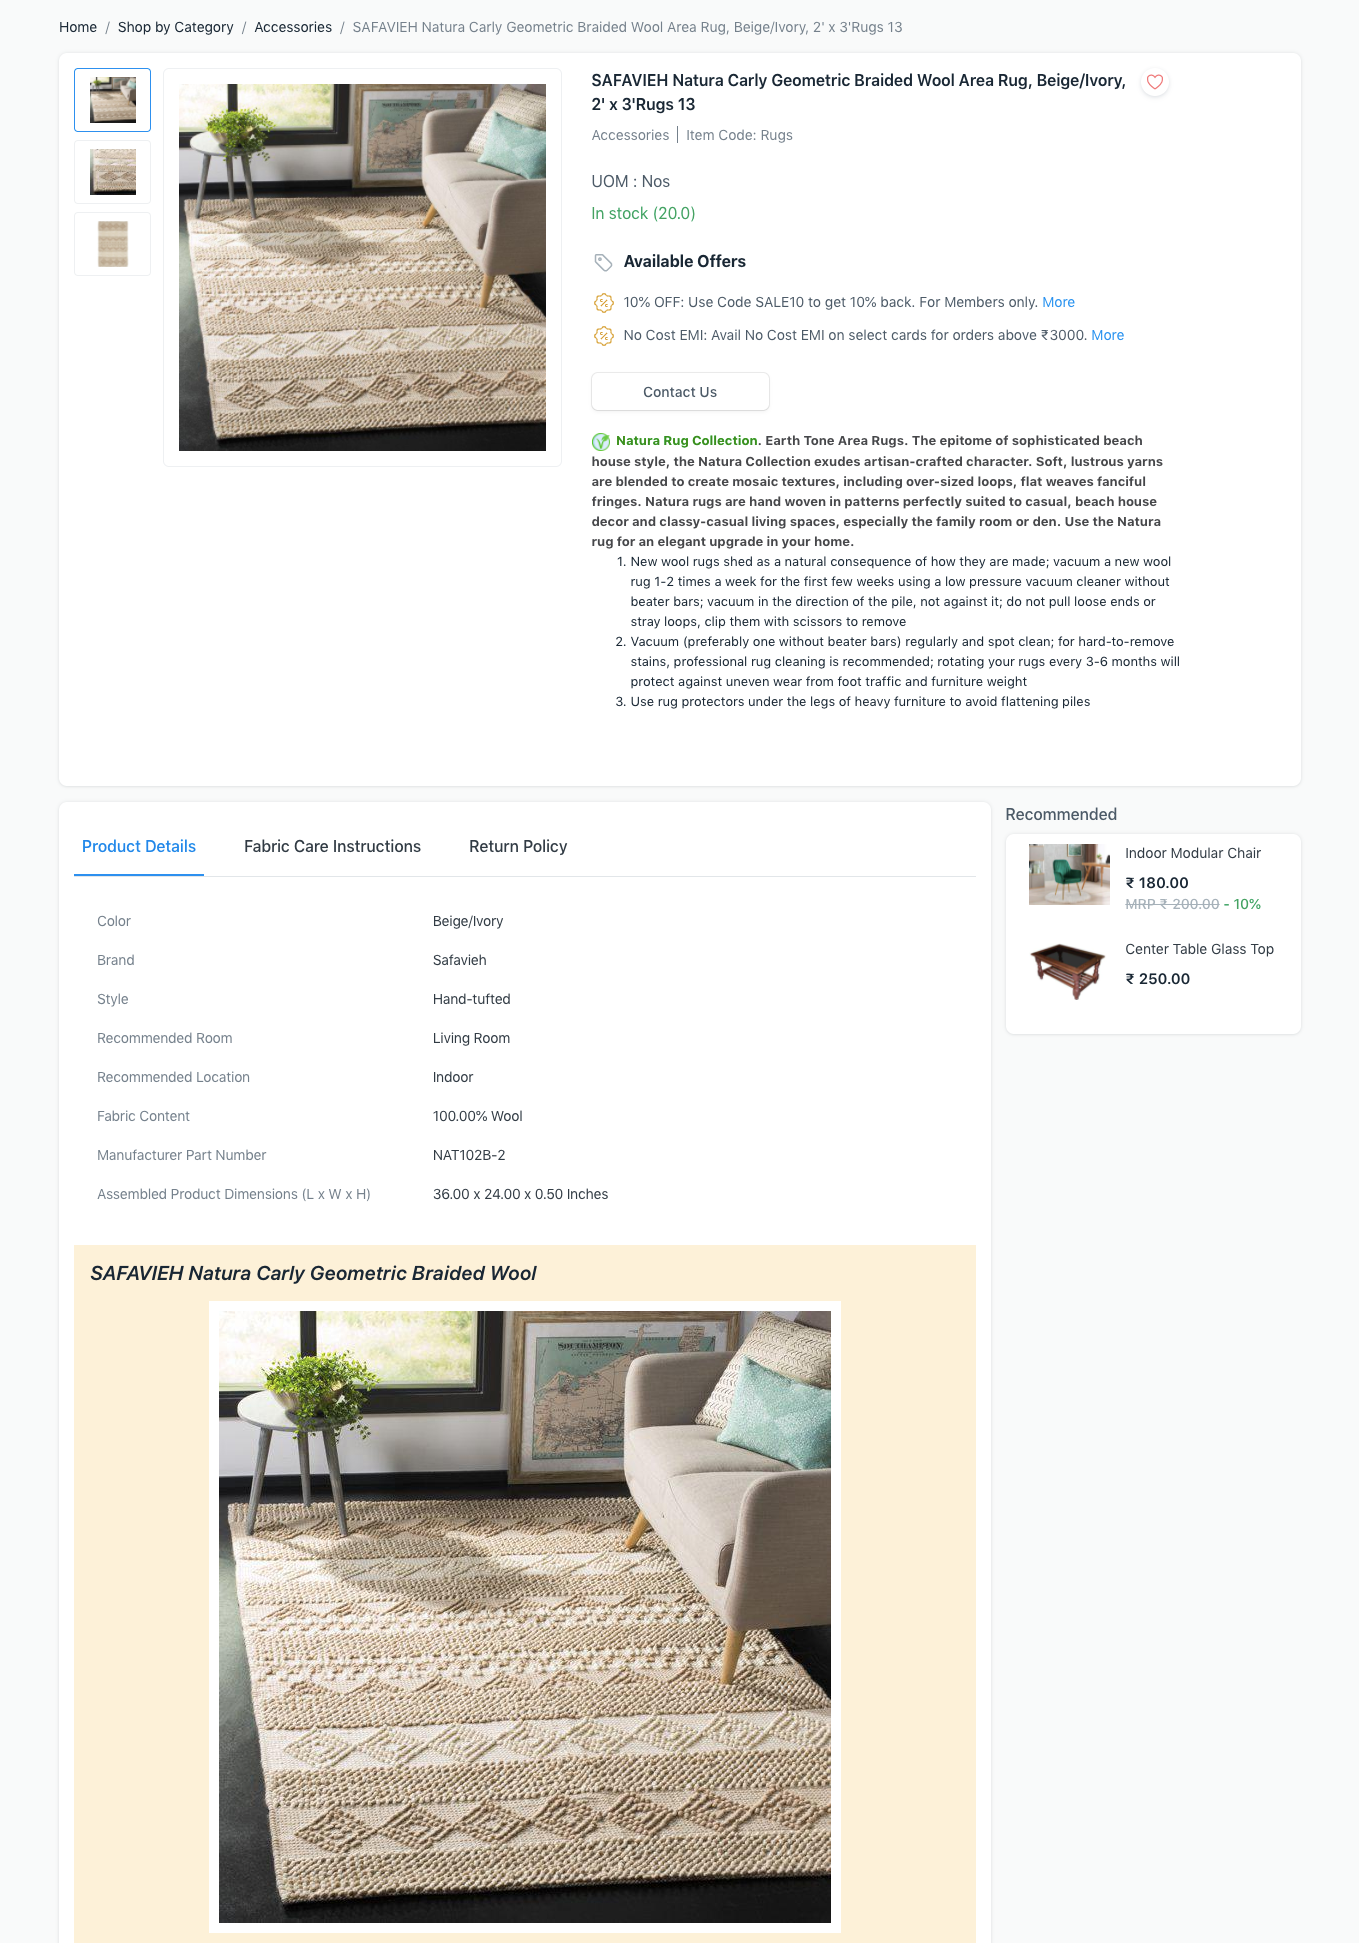
3.Website Specifications: Specifications for the website item, such as weight, manufacturer, measurements, material, etc., might be mentioned. By selecting Copy From Item Group, you can also add common requirements to the item group to which this website item belongs. The Product Details portion of the Website Item's page will display this information.
Display Additional Information You can examine the Product Details section in a tabbed area along with other data as well. Given this:
Enable Add Section with Tabs under Show Extra Information.
Now that you've added a label and some information, you can add tabs to the Tabs table. You can add complex HTML to the content box to make your tab more visually appealing or just a basic text.
The first tab in this section's tabbed layout will be labeled "Product Information," and it will include the previously mentioned website specifications (if present).
The Tabs table tabs will appear after this.
Recommended Items
To urge consumers to focus on a closely connected item, you can display Suggested Items next to Website Items. Go to E Commerce Settings > Add-ons > Allow Suggestions to turn this on.
The things you want to recommend can subsequently be added to the Recommended Items section against a Website Item. The Website Item Page will display them.
Offers At checkout, customers can add coupon codes, but they must be aware of them. Offers may be placed to the website item for display in this case.
Go to the Website Item's Offers section.
Provide a one- or two-word, brief offer title in the offer title.
Increase the length of the subtitle by one sentence in the Offer Subtitle.
Expand on the offer's features in the Offer Description. Save
Search and SEO 1.Ranking: To have control over the position of the website item in the product listing, give it a rank. Webpage items with higher rankings are shown more prominently.
2.Set Meta Tags: Meta tags are useful for SEO. To learn how to add them, view the website.
3.Website Item Groups: To categorize items on your website, choose from the existing groups in this table or create new ones. The Item Group Pages of the Item Groups listed in this table's Item Groups will display the Website Item.
Advanced Display Content For the Website Item page, you may use Bootstrap 4 markup to add an additional themed area.
Adding Price Details Via Item Price, prices can be applied to website items. Go to E Commerce Settings and ensure that Business, Pricing List, and Default Customer Group are specified before setting an item price.
Create an item price for the website item right away, choosing the price list from the E Commerce Settings.
To display struck prices, you may also add a pricing rule with a discount percentage or discount amount applied to the current item price.