Address Template
Address template can store different formats of addresses based on the region
Address definitions vary from region to region. You can construct country-specific Address Templates to manage different address formats for your Documents (such as quotations, purchase invoices, etc.).
Go to: to access the address template.
Home > Settings > Address Template
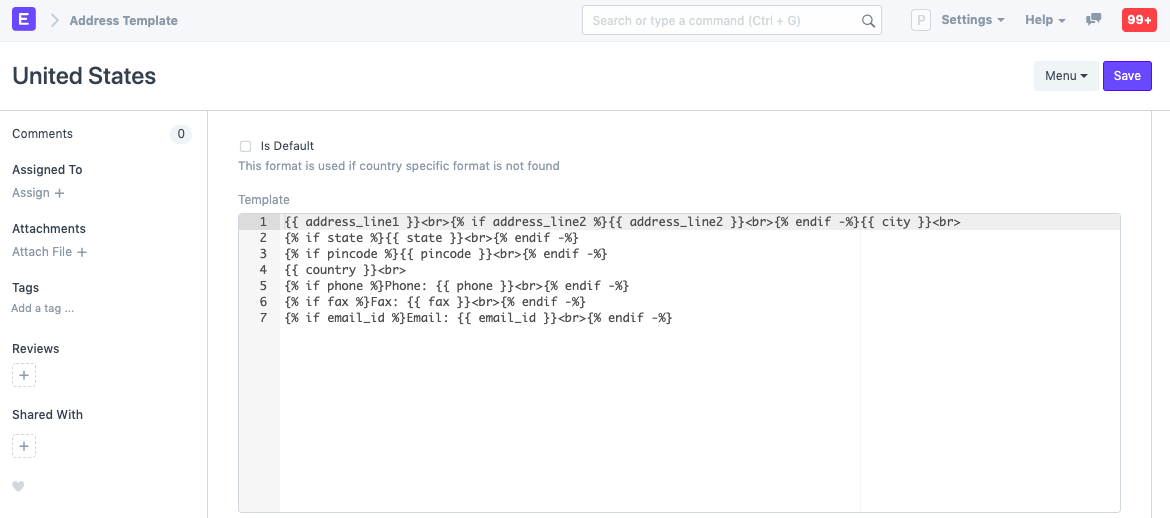
As soon as you configure the system, a default Address Template is generated. You have the option of editing it or making a new template. All nations without a defined template will use this default one.
Consider a US client whose address includes the word "County" in the address. The county will appear in the address field and consequently in the print preview if you select it for the United States in the address template. Using address templates, fields like county can be added and fields like PIN code can be altered to show as a ZIP code.
The Address Template checks the 'Country' field in the Address master to apply different address templates to transactions.
1. How to create an Address Template
- Go to the Address Template list, click on New.
- Change the CSS and Jinja if required.
- Save.
1.1 Jinja Templating
The Jinja Templating system and HTML serve as the foundation of the templating engine. The ability to create templates will be available for all fields, including Custom Fields.
The default Jinja template is shown below:
{% raw %}{{ address_line1 }}<br>
{% if address_line2 %}{{ address_line2 }}<br>{% endif -%}
{{ city }}<br>
{% if state %}{{ state }}<br>{% endif -%}
{% if pincode %}PIN:  {{ pincode }}<br>{% endif -%}
{{ country }}<br>
{% if phone %}Phone: {{ phone }}<br>{% endif -%}
{% if fax %}Fax: {{ fax }}<br>{% endif -%}
{% if email_id %}Email: {{ email_id }}<br>{% endif -%}{% endraw %}
Here is an example: