GST for multiple branches
GST for multiple branches
This will allow you to automate the calculation of GST if your business has multiple branches with separate GSTINs.
This is a continuation of the blog post titled "Five Steps to Automate Indian GST in ERPNext."
Update your Company’s branch-wise addresses
Configure State-wise GST Accounts (Optional)
Item-wise GST setup
Classification of Inter-State and Intra-State Taxes
Configuring Invoice Templates
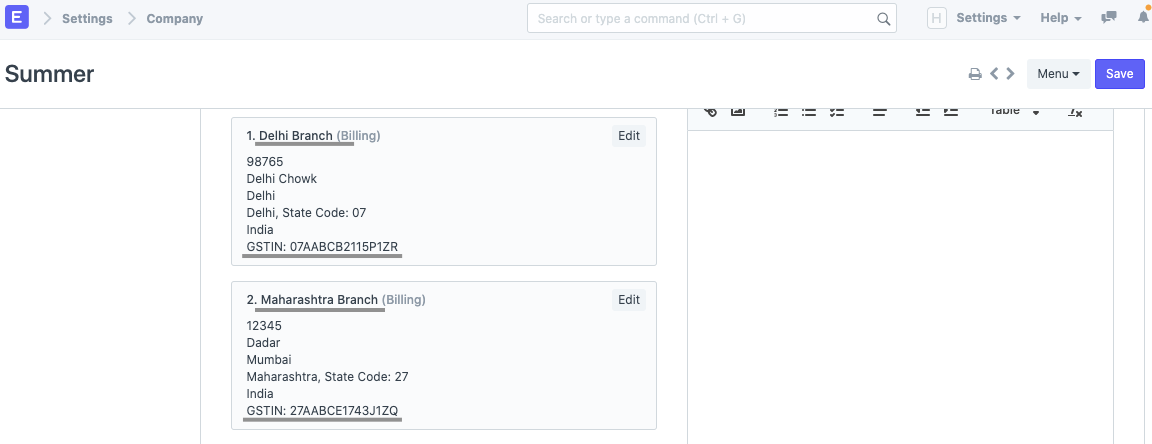
Step 1- Update your Company’s branch-wise billing addresses
The initial step is to update your company's branch-by-branch address with the correct GSTIN, as it will vary (if in different states) between branches.
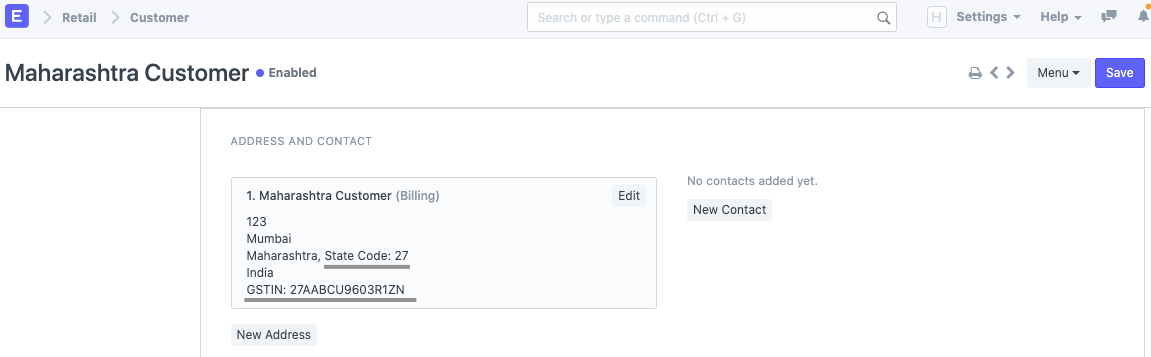
Verify that your Customers' and Suppliers' addresses are configured with the correct GST State and Party GSTIN.
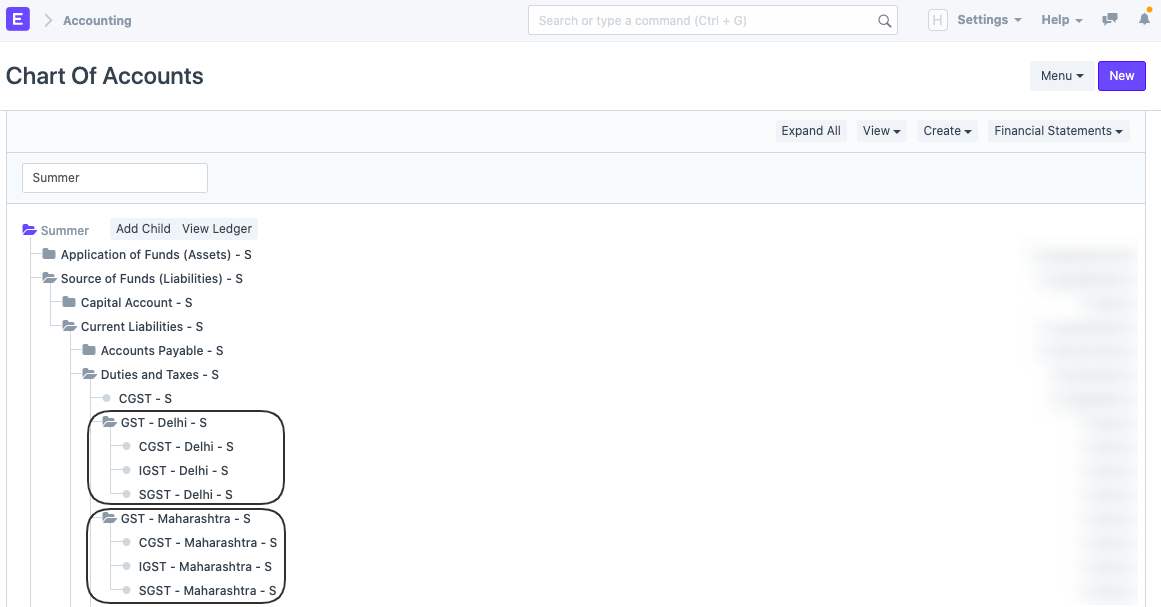
Step 2 - Configure State-wise GST Accounts (Optional)
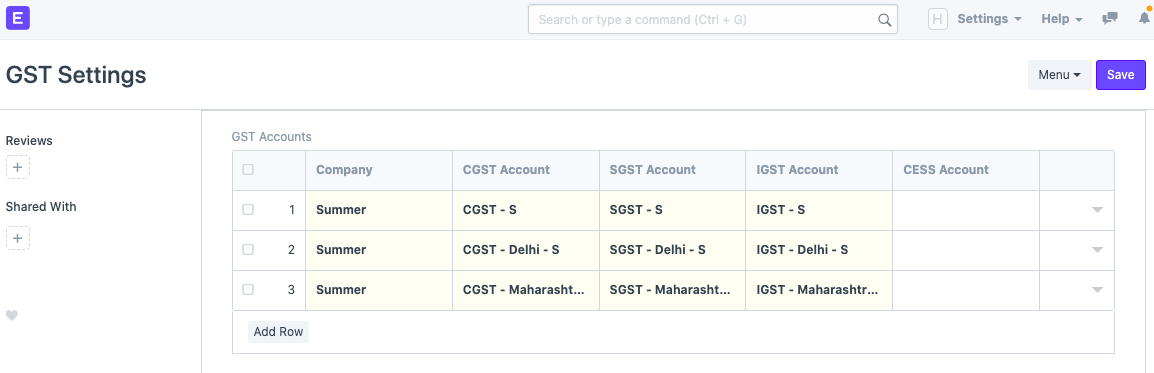
To configure, navigate to Chart of Accounts and create a set of GST accounts (CGST, SGST, and IGST) for each state, as shown in the screenshot below.
Include these newly created accounts in all GST Reports by adding them to the GST Accounts table in the GST Settings.
Step 3 - Item-wise GST setup
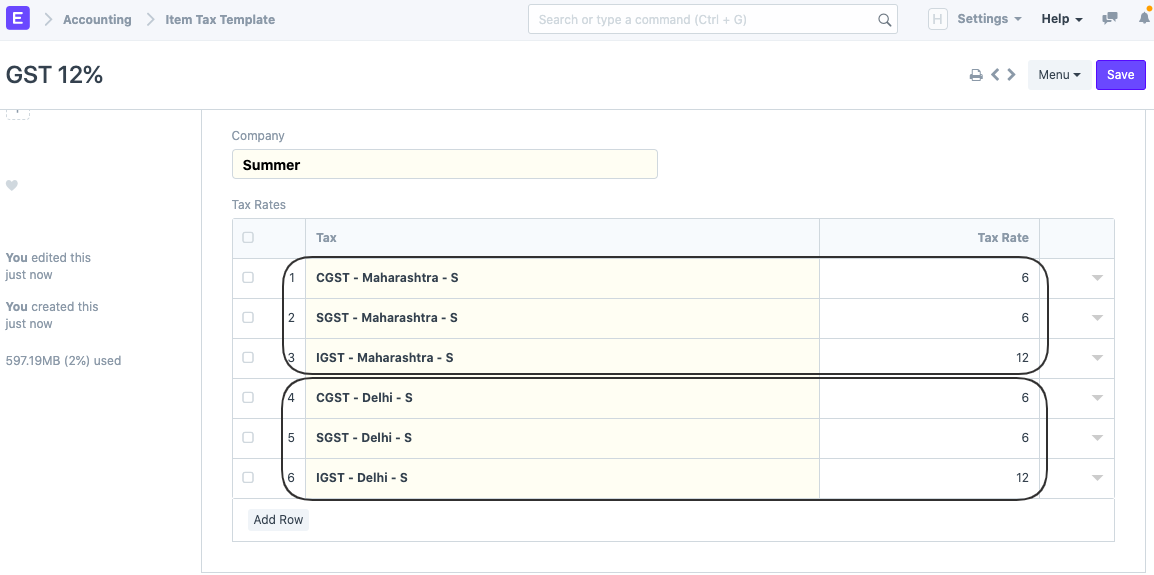
a. Create an Item Tax Template with multiple tax rates and add all of the GST Accounts created in the previous step.
b. b. Establish the rates.
This assists the system in determining which GST Accounts and Tax Rates to apply to invoices.
Your Item Tax Template should resemble the following:
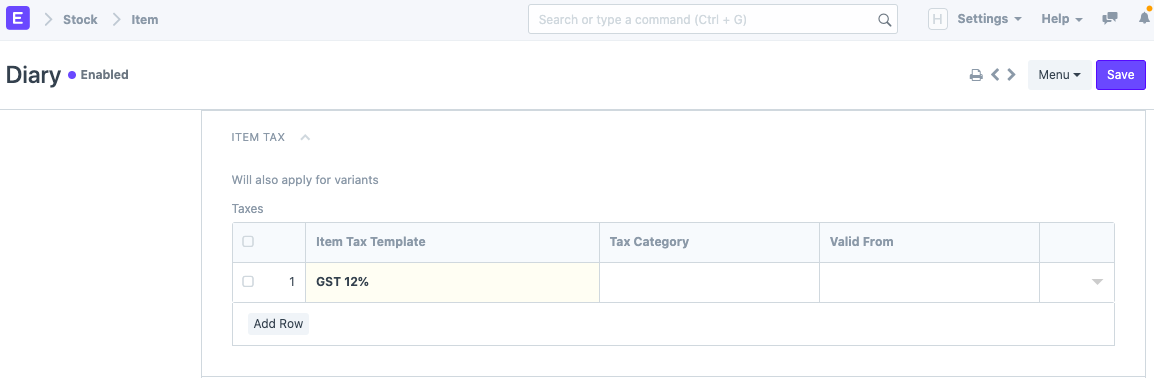
The same way you can create different Item Tax Templates for different GST Rates.
After creating Item Tax Templates, you can assign these templates to their corresponding Items via the Item Master.
Step 4 - Classification of Inter-State and Intra-State Taxes
We're almost there.
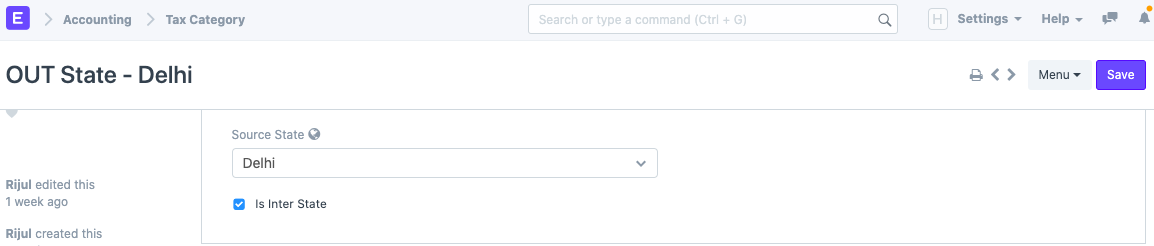
Create two Tax Categories, one for each of our state-based branches. Each of our company's branches will be listed as the Source State for each Tax Category.
Each state will have two Tax Categories, one for interstate transactions and one for out-of-state transactions.
For ‘Out State’ Tax Categories, mark ‘Is Inter State’ checkbox as enabled.
IN State Tax Category for Delhi:

*OUT State Tax Category for Delhi:
Create for other States the same way as shown above.
Step 5 - Configuring our Invoice Templates
Configure a pair of Sales Taxes and Charges Templates and a pair of Purchase Taxes and Charges Templates for each Tax Category.
Go to Sales Taxes and Charges Template and define two templates per state (as seen in the screenshot below for Maharashtra)
Choose the IN State Tax Category and the appropriate CGST & SGST account in Account Head for the IN State template.
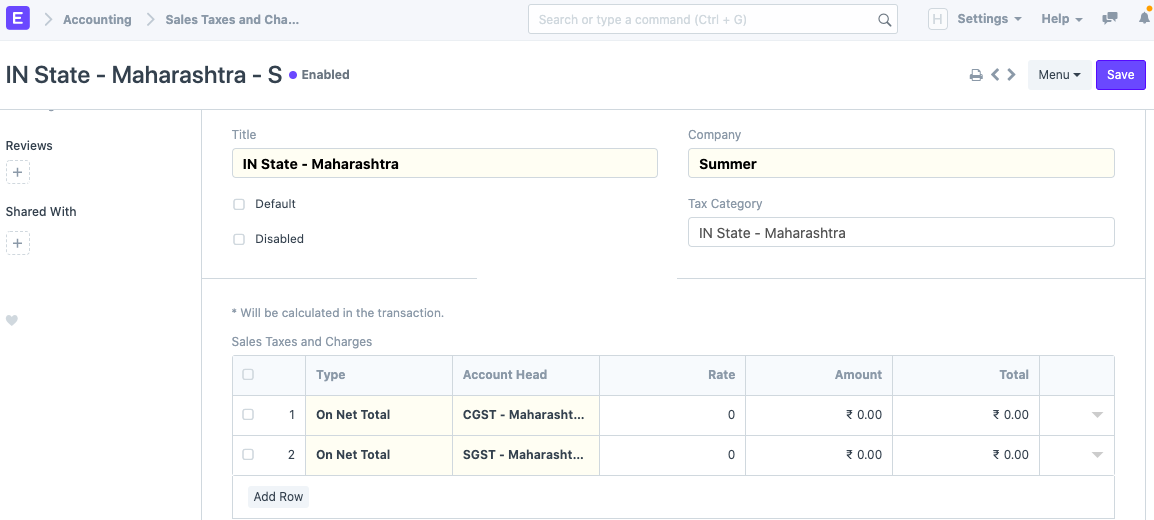
In the Account Head section of the OUT State template, select the OUT State Tax Category and the appropriate IGST account.

Note: Enter our Tax Accounts in Account Heads and leave rest as '0' - since the tax rates will be fetched from the Item Master.
Configure Purchase Taxes and Charges Template and additional States using the same steps.
We enjoy the fruits of our labour:
Reload your account now, as the setup has been completed.
Create an Invoice or an Order to verify that everything works as expected:
1.Choose a Customer or Supplier.
2.Check the Company's Address and select the Branch from which you wish to create the Invoice/Order.
3.Selecting Customer/Supplier will retrieve the appropriate template; verify that Taxes and Charges are also retrieved correctly.
Example 1:
Here, I've selected a customer from Maharashtra and the company's address is also in Maharashtra, so the system should retrieve the IN State template we created previously.
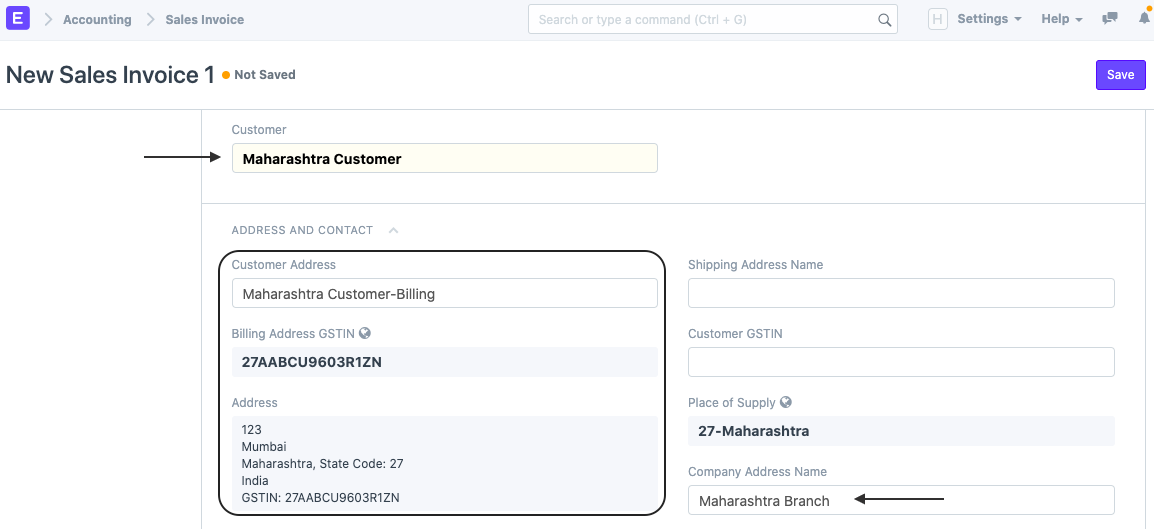
It automatically retrieved the following Taxes and Fees Template:

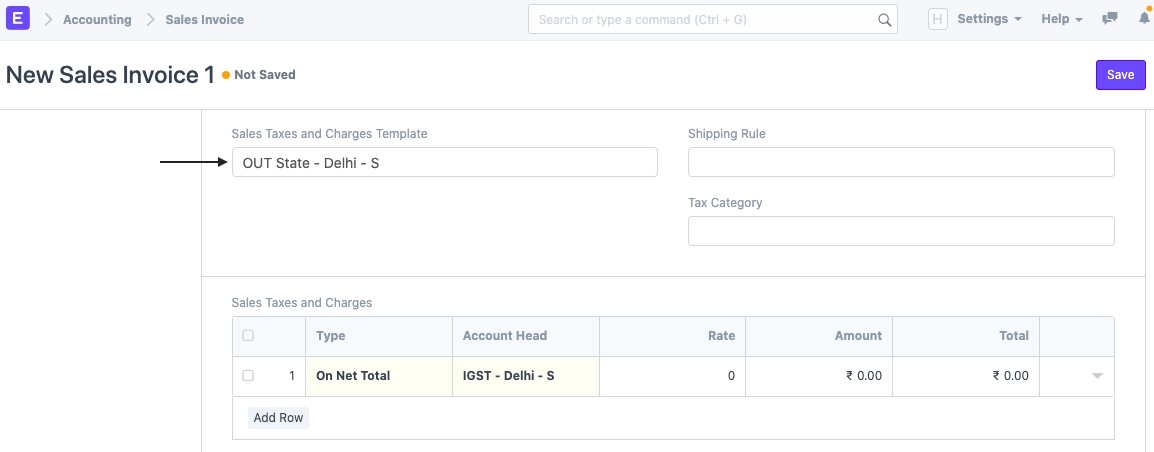
Example 2:
Here, I've selected a Customer from Maharashtra and the Company's Address is in Delhi; it should retrieve the OUT State template we created in the previous section.

It automatically retrieved the following Taxes and Fees Template: