Item
Item
An item is a good or service that your business provides.
The word "item" can also refer to unfinished goods or their component parts (before they can be sold to customers). You may handle a wide range of things with the help of ERPNext, including raw materials, sub-assemblies, finished goods, item variants, and service items.
ERPNext is designed to handle your sales and purchases item by item. For each service you provide, you can create an item if you're in the services industry. For ERPNext to be successfully implemented, the Item Master must be finished.
Go to: to access the Item list.
Home > Stock > Items and Pricing > Item
1. Prerequisites
It is recommended that you first produce the following things before making and using an item:
- Item Group
- Warehouse
- A Unit of Measure if required
2. How to create an Item
Go to the Item list and select new.
When you enter an item code and click inside the item name area, the name will automatically be filled in with the same information.
Pick a group of items.
Input the typical selling rate and opening stock units.
Save.
2.1 Item Properties
Item Name: The name of your product or service is what it is actually called.
Item Code: Your item is identified by the abbreviation "Item Code." It is advised to keep the Item Name and the Item Code the same if you have a small number of items. New users may now recognize and change item details in all transactions thanks to this. If your list has numerous Items with lengthy names and is hundreds long, coding is advised. Item Codification can be used to comprehend naming Item codes. By turning on this function in the stock settings, you can additionally generate item codes based on naming series.
Item Group: An item can be categorized under different criteria, such as products, raw materials, services, sub-assemblies, consumables, or all item groupings, using an item group. Under Setup > Item Group, create your default Item Group list and pre-select the option when filling out the information for a New Item. Sub-assemblies, raw materials, etc., or based on your business use case, are examples of item groups.
Default Unit of Measure: You will use this as the standard unit of measurement for your product. It may be expressed in Nos, Kgs, Meters, etc. In Set Up> Master Data> UOM, you can save all the UOMs that your product will need. When filling up a New Item, these can be pre-selected by using the % sign to bring up the UOM list. Visit the UoM website for further information.
2.2 Options when creating an item
Disabled: An item cannot be chosen in any transaction if it is disabled.
Allow Alternative Item:A specific material might not always be accessible throughout the production of a final good. You can create and choose an alternative item from the Item Alternative list if you check this box. Visit the Item Alternate page to learn more.
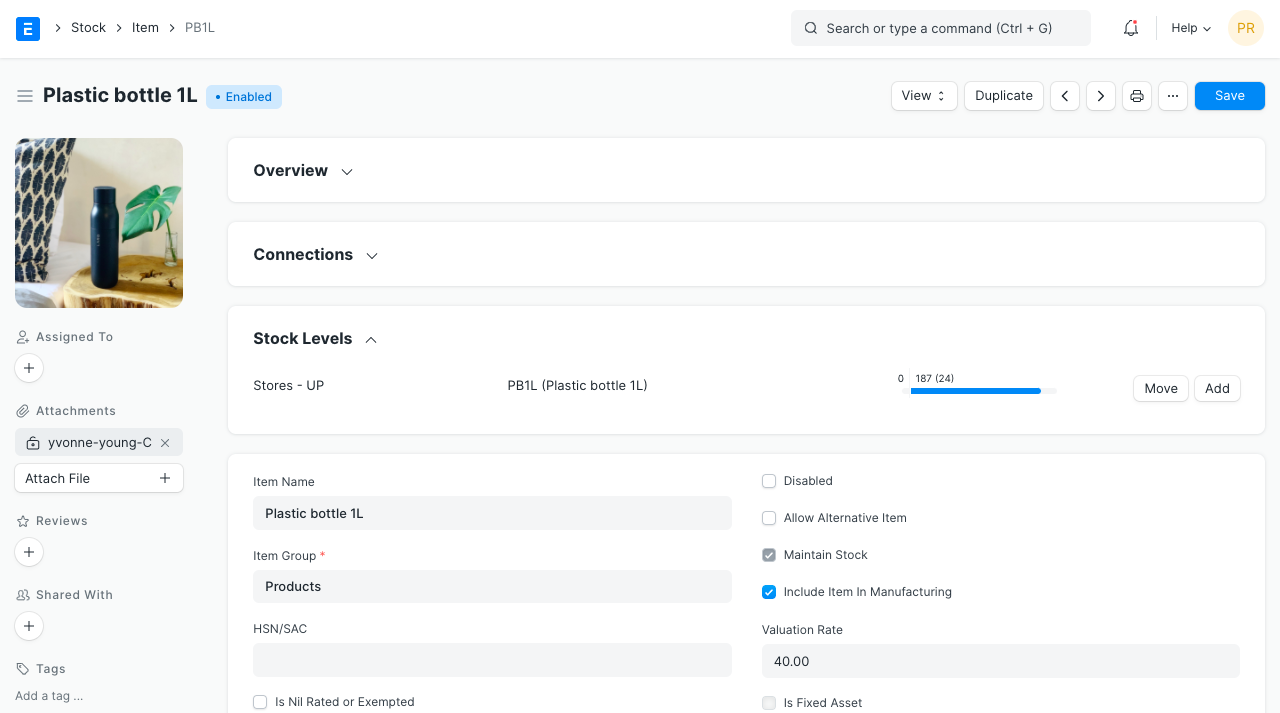
Maintain Stock: For each transaction involving this item, ERPNext will create a stock ledger record if you are keeping a stock of it in your inventory. When creating a non-stock item (made to order/engineer) or service, make sure to keep this option unchecked.
Include Item in Manufacturing: These are the items that will be utilized as raw materials to make finished goods. Keep this unchecked if the Item is an extra service, such as "washing," that will be used in the BOM.
Valuation Rate: There are two ways to keep the stock's value. Moving Average and First In First Out (FIFO). Please see Item Value, FIFO, and Moving Average for more information to fully comprehend this subject.
Standard Selling Rate: When creating an item, entering a value in this field causes an item price to be created behind the scenes automatically. When the Item has been saved, you cannot add a value. In this instance, any transactions involving the item establish the item price. how quickly you'll sell the product. Sales orders and sales invoices will retrieve this.
Is Fixed Asset: If this product is an asset of the company, tick this box. To learn more, see the Asset Module.
Auto Create Assets on Purchase: If the item is a company asset, check this box to automatically create assets when you make the purchase through the purchase cycle. See the Asset Page for more information.
Allowance Percentage: Only once you create and save the item will you have access to this option. This represents the percentage by which you may overcharge for or deliver this item. If nothing is selected, the default settings are used.
Uploading an Image: Save the partially completed form to upload an image for your icon, which will appear in all transactions. The 'Change' button on the Picture icon won't show up until your file has been saved. To upload an image, click Upload after selecting Change.
For India:
HSN/SAC: Service Accounting Code (SAC) and the Harmonized System of Nomenclature (HSN) for GST. Several Goods are classified under various codes according to these government-defined numbers. If there aren't any HSN codes in the list, new ones can be added.
Is nil rated or exempted: For a GST-registered item that receives no tax treatment. as in cereals.
Is Non GST: for a good that is not subject to the GST. like gasoline.
3. Features
3.1 Brand and Description
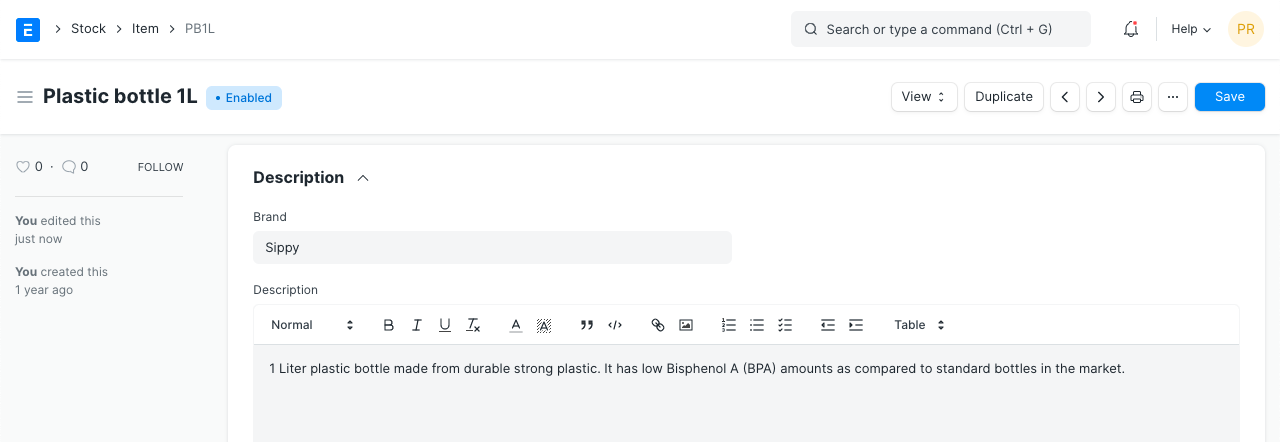
Brand: If you have multiple brands, you can pre-select them when creating a new item by saving them under Selling > Brand.
Description: An explanation of the thing. By default, the text from the item code will be retrieved.
3.2 Barcodes
Items can store barcodes so that they can be rapidly scanned and added to transactions. The barcode for an item can be added to the Barcodes table for scanning. In ERPNext, there are two varieties of barcodes.
EAN: A 13-digit number serves as the European Article Number. More POS systems accept EAN and use it globally.
UPC: A 12-digit number serves as the Universal Product Code. UPC is typically only utilized in the USA and Canada.
3.3 Inventory
Shelf Life In Days:This is for a batch of a product. the number of days after which a batch of a product becomes useless. For instance, medications.
End of Life: The time period after which a specific item or thing will be utterly useless. In other words, the product won't be useful for producing or conducting business. For instance, suppose you want to manufacture items using plastic beads after employing plastic crystals for the first five years.
Warranty: The item must be serialized in order to track a warranty duration. The delivery date and the expiration duration are recorded in the Serial Number master when this item is delivered. You can monitor the status of the warranty by using the serial number master.
A warranty period is a window of opportunity during which a purchased item may be exchanged or returned.
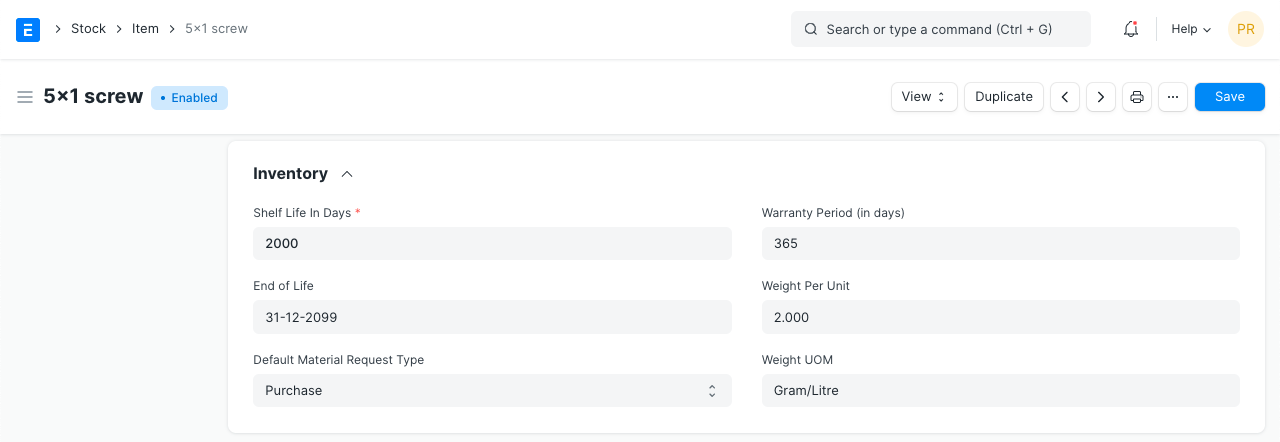
Weight UOM: The item's unit of measurement. It could be Nos, Kilo, etc. The Weight UoM that you use internally may differ from the UoM used for purchases.
Weight Per Unit: the item's real weight per unit. Example: 10 biscuits in a pack or 1 kilo of cookies.
Default Material Request Type: The field that has been set here will automatically be selected when you make a new Material Request for this item. Another name for this is a "indent."
Valuation Method: Choose the valuation method, such as Moving Average or FIFO. To learn more, read Item Valuation Methods.
Allow negative stock: When checked, even if negative stock is disabled in Stock Settings, the item can go negative. This is helpful if you want to disable negative stock on high-value items but allow it on a few carefully chosen low-value items for a short period of time.
3.4 Automatic Reordering
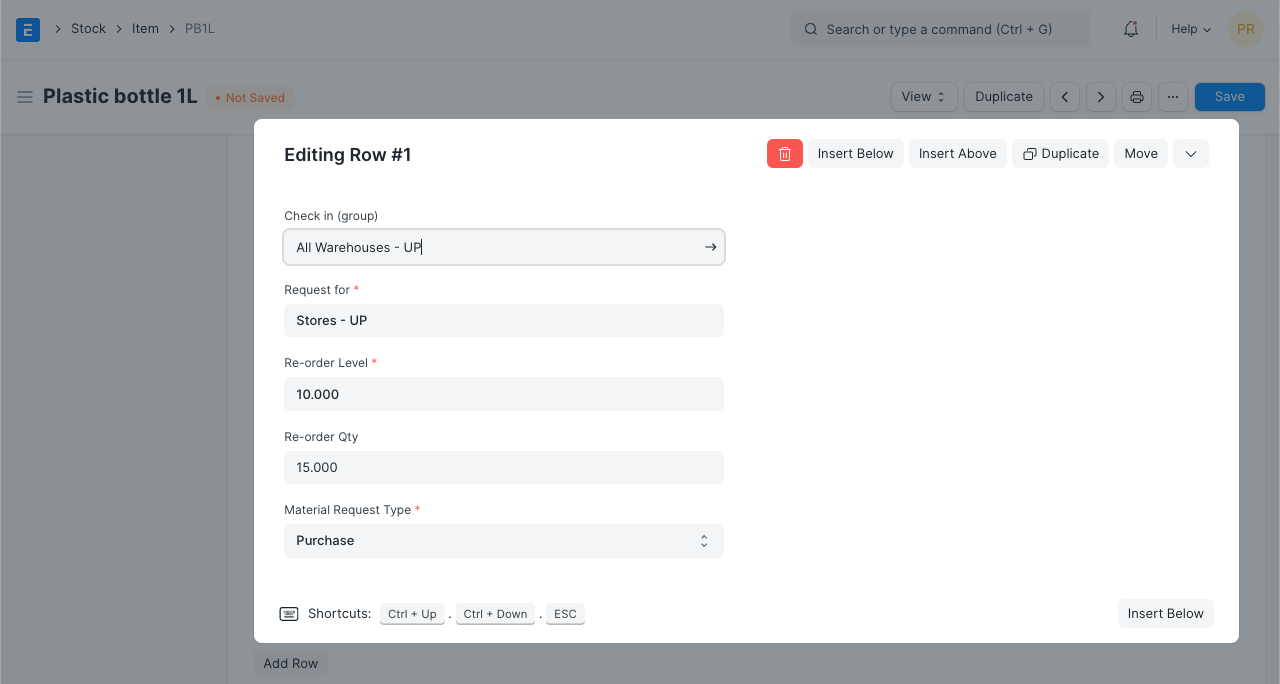
You can establish an automated reorder under the "Auto Reorder" section to be placed when an item's stock falls below a specified threshold. In Stock Settings, this ought to be turned on. As a result, the item will receive a Material Request. When a Material Request is created, the user who holds the roles of Purchase Manager and Stock Manager will be notified.
Check in (group): which set of warehouses should the item's quantity be checked?
Request for: Which warehouse should receive the new order?
Re-order Level: The reorder will start when this amount is reached. Based on the lead time and the average daily consumption, the reorder level can be calculated. For instance, you may set Motherboard's reorder level to 10. The system will either automatically create a Material Request in your ERPNext account when there are just 10 Motherboards left in stock.
Re-order Qty: The quantity of units that must be ordered again in order to keep the total ordering cost and holding cost as low as possible. The supplier's "Minimum Order Quantity" requirements and a number of additional parameters are used to determine the reorder quantity.
For instance, even if your reorder level is 100 items, you may not actually need to order that many. The Reorder quantity may exceed the Reorder level or be equal to it. Lead time, discounts, transit, and typical daily consumption may all be factors.
- Material Request Type: The kind of Material Request used to reorder the supply. Whether you purchase the item, produce it yourself, or move it across warehouses will affect this.
Note: The Material Request is created at 12 midnight depending on the set reorder level.
3.5 Multiple Units of Measure
Alternative UoMs can be added for an item. You can establish a second UoM with the proper conversion factor if you receive your orders in kilograms but your default UoM is numbers (NoS). For instance, 500 screw numbers equal 1 kilogram, so choose Kilogram/Litre as the UOM and enter 500 as the conversion factor. Visit this website to learn more about selling in different UoMs.
3.6 Serial Numbers
Serial numbers enable tracking of warranties and returns. The number system aids in tracking specific items in the event that a supplier recalls any particular item. Expiration dates are likewise managed by the numbering system.
Please take note that you do not need to serialize your products if you sell them in large quantities or if they are little, like pens or erasers.
In some accounting entries in ERPNext, you will need to provide the Serial Number. Avoid providing serial numbers if your product is not a significant consumer durable, has no guarantee, and has no danger of being recalled.
3.7 Batches
It is possible to produce a group of items in batches. This is helpful for transferring the batch and connecting a batch's expiration date.
Has Batch No: By checking this box, options for the batch number, expiration date, and keeping sample stock will become available. If this item has already been the subject of a transaction, you cannot activate it. You will need to manually enter the serial numbers for each transaction if this is disabled.
Batch Number Series: Applying a prefix to the batch numbers The first batch will be designated 5x1SCR00001 on the first transaction or manufacture if you set 5x1SCR.
Automatically Create New Batch: Transactions will be automatically created in the format AAAA.00001 if the batch number is not mentioned in them. Leave this option empty if you always want to manually generate a batch number for this item. "Naming Series Prefix" in the Stock Settings will be overridden by this setting. If you manufacture the Items, you can set the batch numbers to create automatically; otherwise, if the Items originate from an outside manufacturer, you can manually enter the batch numbers.
Has Expiry Date: By checking this box, the batch number will be generated based on the expiration date. The "Batch" master allows you to set the expiration dates.
Retain Sample: must keep a minimal quantity of the item's sample stock. For this, you must configure a Sample Retention Warehouse under Stock Settings. Visit this page to learn more.
Has Serial No: When you do transactions or manufacture, this is established in a manner similar to batch number series. If you set the Serial Number Series to AA, a serial number in the form of AA00001 will be generated on the first transaction.
Tip: If an items table asks for inventory details after you input an item code, you can immediately enter serial or batch numbers in a pop-up window depending on whether the item is serialized or batched.
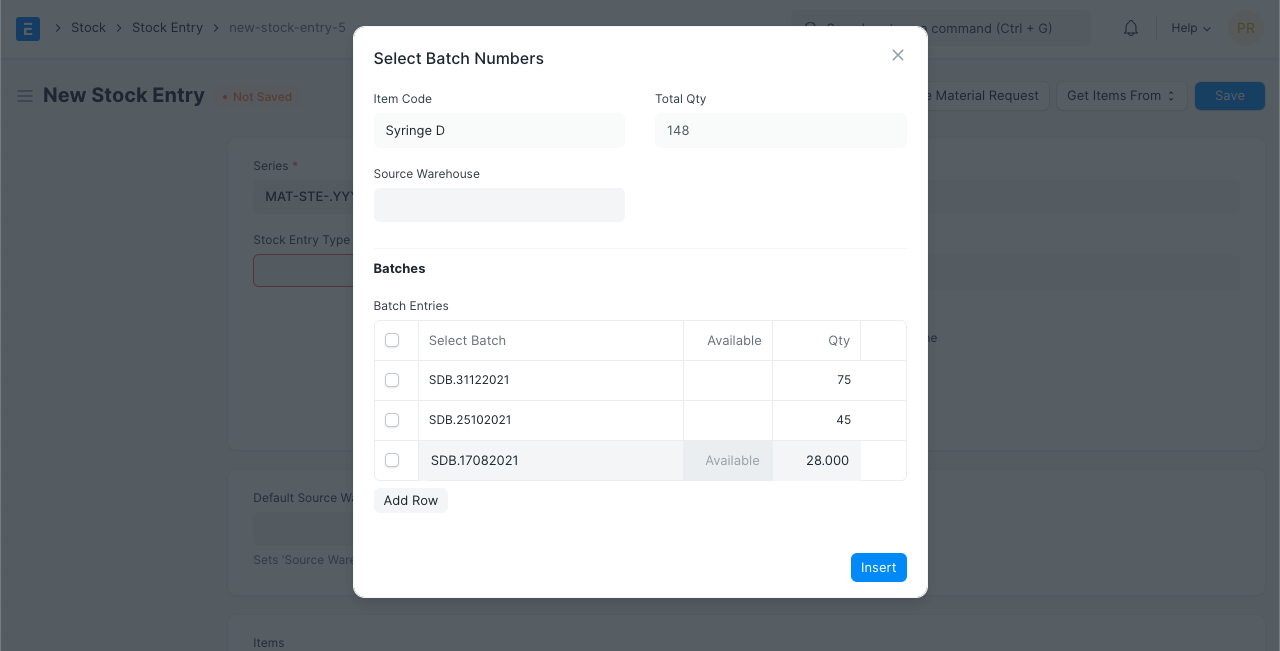
It should be noted that once you designate an item as serialized, batched, or neither after creating a stock entry, you cannot change it.
To know more, visit the Stock Reconciliation page.
3.8 Variants
A different version of an item is an item variant. See Item Variants for further information on managing variants.
3.9 Item Defaults
You can provide company-wide transaction-related defaults for this item in this section.
Default Warehouse: When you deal with this item, the Warehouse that is automatically chosen is this one.
Default Price List: Standard Buying or Standard Selling, whichever applies. The default accounts for buying and selling can also be set.
Supplier: If a default supplier is established, new purchase transactions will be made with this provider.
Default Expense Account: That is the account that will be debited for the item's cost.
Default Income Account: The money from the sale of the item will be credited to this account.
Default Cost Center: This item's expenses are tracked using it.

Tip: You can add more rows for multiple companies.
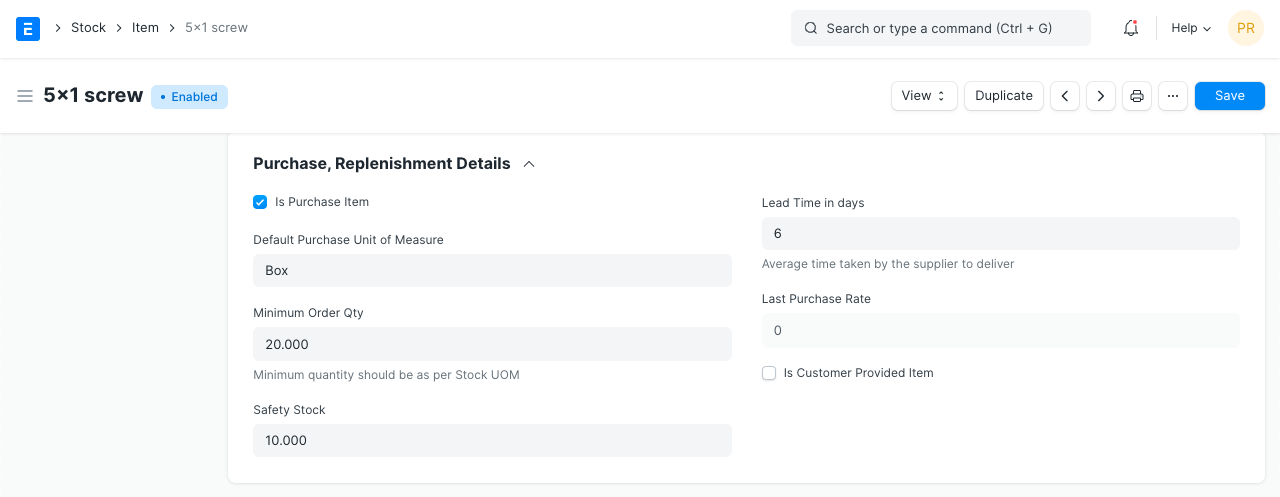
3.10 Purchase, Replenishment Details
Default Purchase Unit of Measure: the UoM by default applied to purchase transactions.
Minimum Order Qty: a buy transaction's minimum quantity requirement, such as a purchase order. If this option is selected, the system will prevent you from completing the buy transaction if the quantity of the item in the transaction is less than the quantity specified here.
Safety Stock: In the report "Itemwise Suggested Reorder Level," the term "Safety Stock" is used. The algorithm recommends a reorder level for an item based on Safety Stock, typical daily consumption, and lead time.
Reorder Level = Safety Stock + (Average Daily Consumption * Lead Time)
Last Purchase Rate: This will show you the price at which you most recent made a purchase of this item using a Purchase Invoice.
Is Purchase Item: If left unchecked, you won't be able to utilize this item to make purchases.
Is Customer Provided Item: A customer's supply of the item must be verified before it can be received via Stock Entry > Material Receipt. If checked, the Customer column is required and serves as the Material Request's default customer. Check out this website to learn more.
Lead time days: The amount of days between placing an order and the item arriving at the warehouse is known as the lead time.
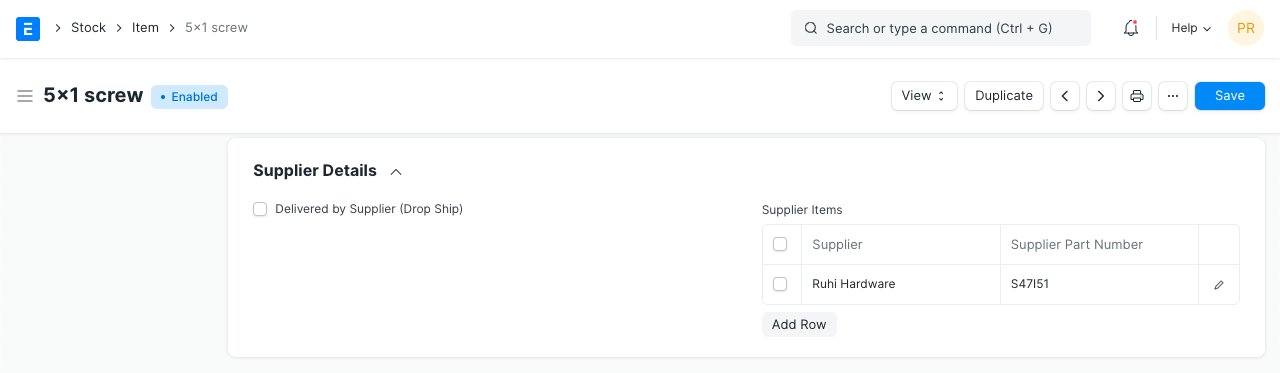
3.11 Supplier Details
Delivered by Supplier(Drop Ship): Check this box if the provider will be delivering the product directly to the client. Click here to read more.
Supplier Codes: Track Item Code for this Item as specified by the Suppliers. When choosing an item in a purchase transaction, a Supplier Part No. will also be obtained for the Supplier's reference. Find out more about it by reading this.
3.12 Foreign Trade Details
You can enter the information here if you're sourcing the item from another nation.
Country of Origin: the nation from where you're obtaining the product.
Customs Tariff Number: To share with customs agencies, you can generate a customs tariff number with a description and use it as a reference here. It can be used in the future to provide Delivery Notes.
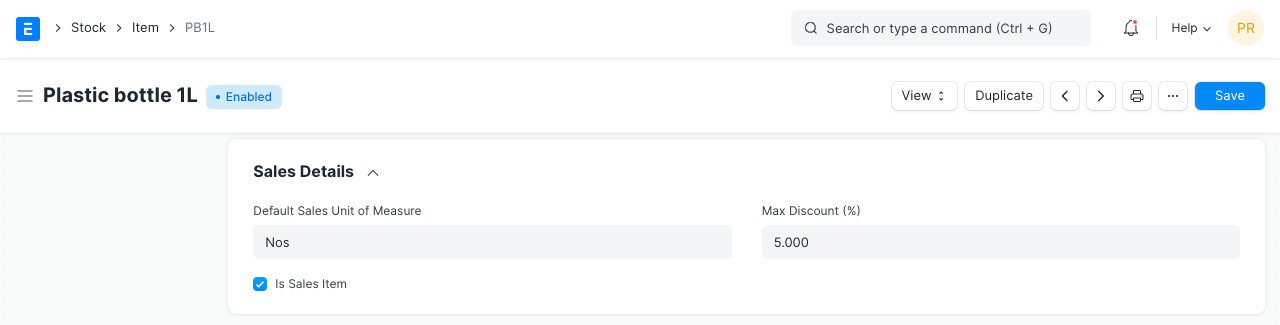
3.13 Sales Details
Grant Commission: When this item sells, pay a commission to the salesperson and the sales partner. If disabled, the commission computation will not take into account the sales this item generated.
Default Sales Unit of Measure: The UoM that will be requested by default for sales transactions.
Max Discount (%): You can choose the highest percentage discount that can be given to a product. For instance, if you specify a 20% discount, you cannot sell this item at a lower price than 20%.
Is Sales Item: You cannot utilize this item in sales transactions if this box is left unchecked.
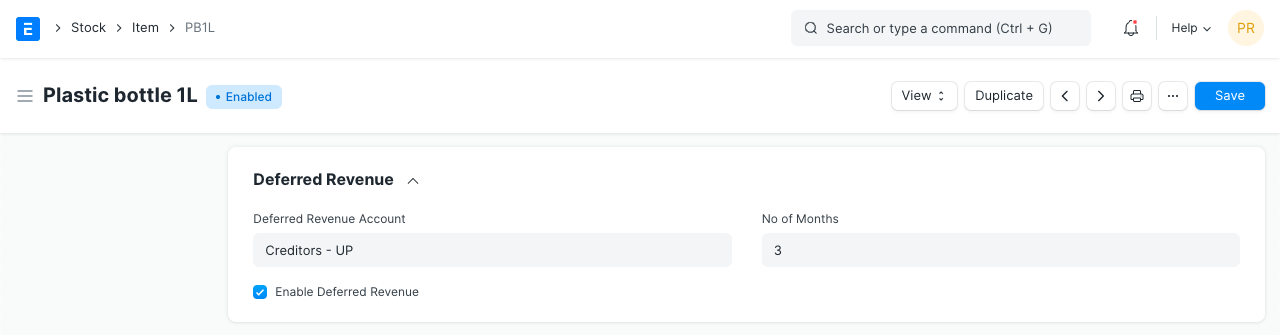
3.14 Deferred Revenue and Deferred Expense
Deferred income or expense from the item can be enabled. You can choose the Delayed Expense Account and the number of months the revenue or expense is deferred after checking the box.
Consider a yearly gym membership as an example; you pay the fee all at once, but the service is provided all year long. This represents deferred revenue for the owner of the gym and deferred expense for the client.
Check out the pages on Deferred Revenue for more details.
3.15 Customer Details
An item may be identified by the customer using a different item code. similar to Supplier Code is this.
- Customer Name: Choose a clientele here.
- Customer Group: Based on the Client you choose in the previous field, this will be fetched.
- Ref Code: This item can be recognized by a different number by a consumer. You can track the Item Code that the Client assigned to this Item. The Customer's Reference Code for this Item will be displayed when you make a sales order.
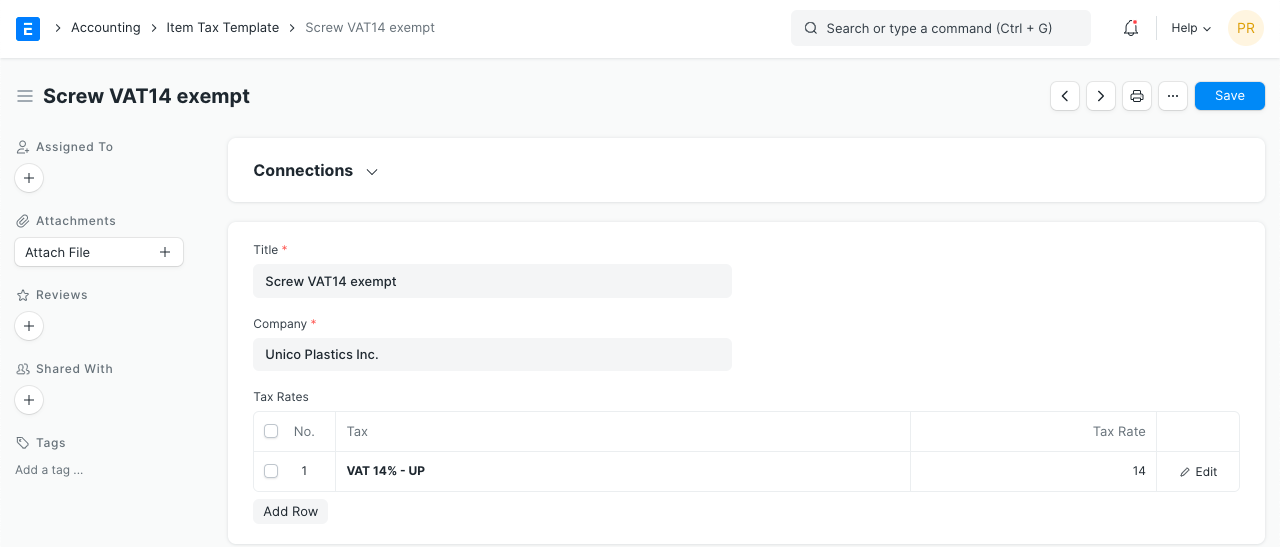
3.16 Item Tax
Only when an item's tax rate differs from the rate specified in the basic tax Account are these changes necessary.
You must either choose an existing "Item Tax Template" or create a new one. If an item is tax-exempt, for instance, and you have a tax Account with the tax rate "VAT 14%," you would choose that rate in the first column and enter "0" for the tax rate in the second. For further information, go to the Item Tax Template page.
You can also set a Tax Category for this Item.
3.17 Inspection Criteria
Inspection Required before Purchase: Check this box if you must inspect the item before buying it, that is, before you create a purchase receipt.
Inspection Required before Delivery: Check this box if your supplier's examination of the item is required as part of the delivery process. Namely, before creating a Delivery Note.
Quality Inspection Template: This template of criteria will automatically be updated in the Quality Inspection table of the Quality Inspection if a Quality Inspection is prepared for this item. Weight, length, finish, and other parameters are examples of criteria.
If a quality inspection is created for this item, this template of criteria will immediately be updated in the quality inspection table. Examples of criteria include weight, length, finish, and other factors.
3.18 Manufacturing
Default BOM: The standard Bill of Materials that was utilized to make this item.
Supply Raw Materials for Purchase: If you're subcontracting to a vendor, you can decide to give them the supplies they need to make the product according to the default BOM.
Manufacturer: Choose the company that produced this item.
Manufacturer Part Number: Enter the manufacturer part number that has been given to this item by the manufacturer.
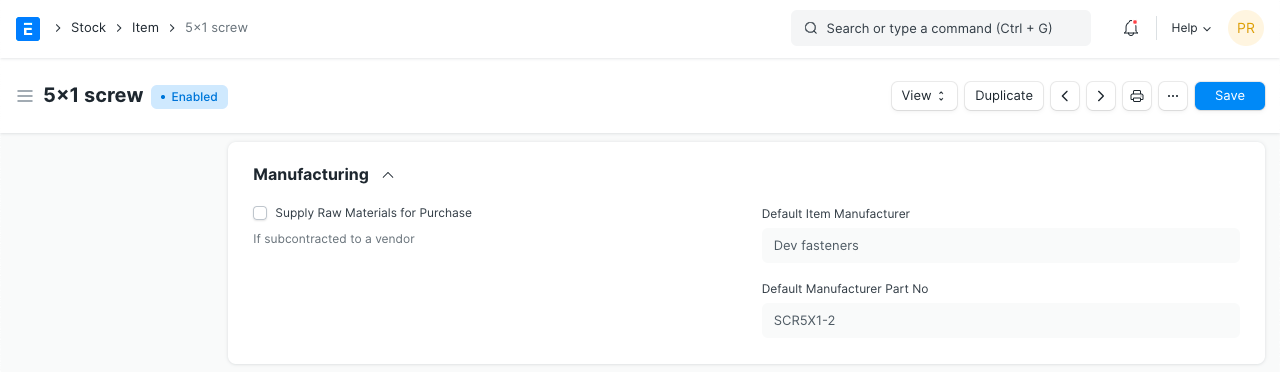
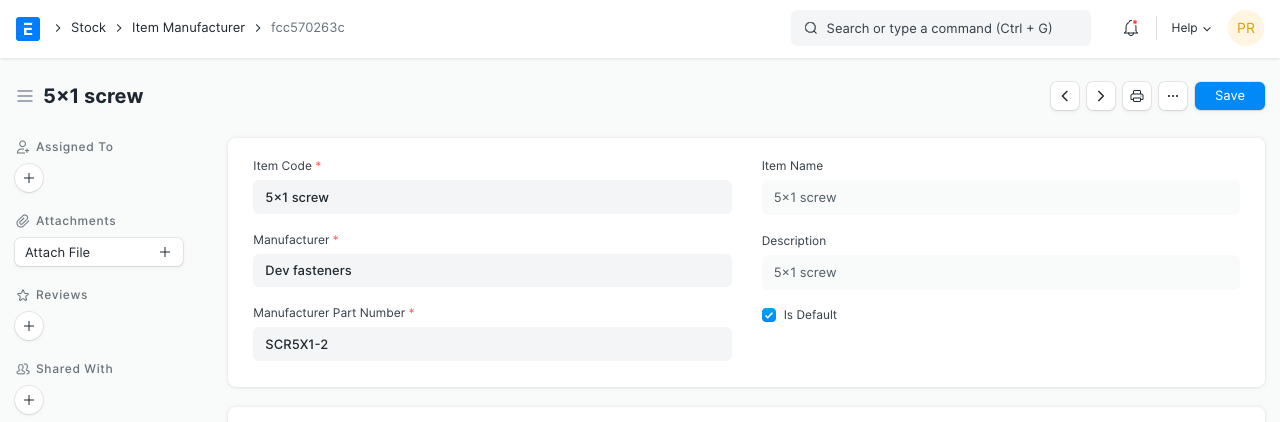
When you create a "Item Manufacturer" from the dashboard and choose that record as the default, the manufacturer information is displayed. Add information for:
Item Code
Enter the manufacturer name
- Enter the part number the manufacturer uses to identify this item
- Select 'Is Default' to show the manufacturer and part number in the Item record
3.19 Website
- Show in Website: The option to display this item on your website is available. When you check this box, more choices to customize the item on your website will become available. Click the "See on Website" option on the top left, immediately above the item image, to view the item on the website. To learn more, visit the Website module.
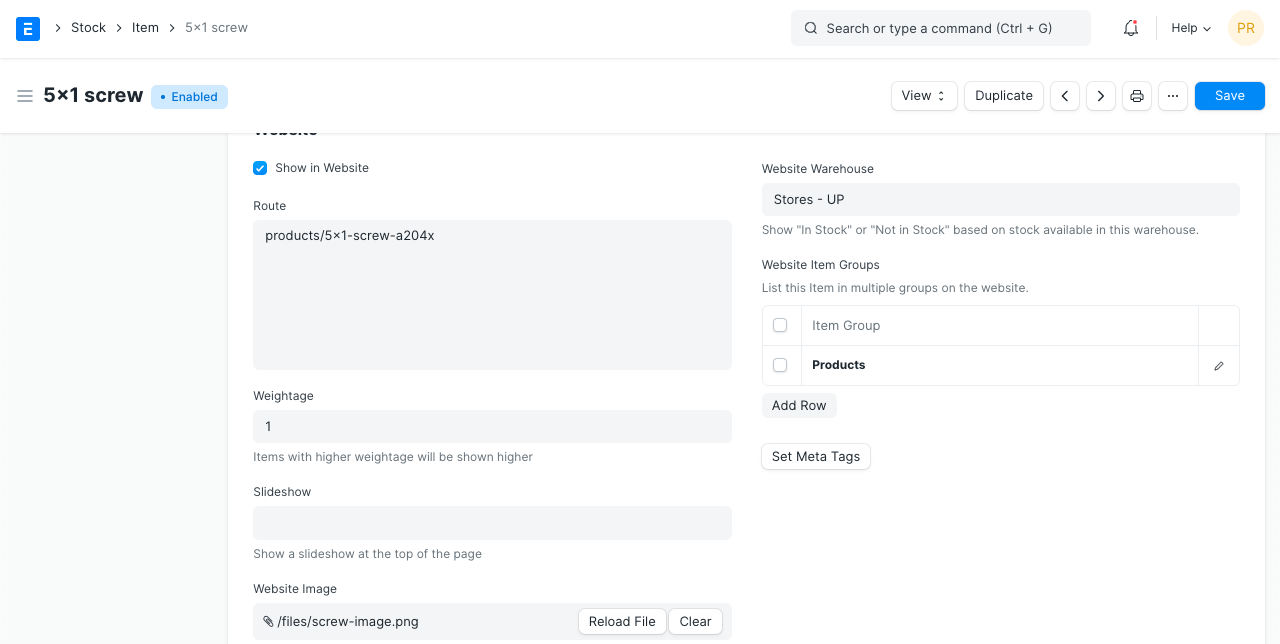
- Weightage: On the website, items having a higher weight will be shown first. The maximum number you can enter in this field is really high.
Slideshow: At the top of the page, a slideshow may be seen. To learn more, go to the Homepage page of the Website module.
Image: An image can be attached instead of a Slideshow.
Website Warehouse: For transactions made through your website, pick an existing warehouse or create a new one. Your offline warehouses won't be like this Warehouse. All online purchases will subtract stock from the warehouses designated under the website warehouse.
Website Item Groups: To categorize products on your website, choose from the existing groups in this table or add new ones.
Set Meta Tags: Meta tags are useful for SEO. To learn how to add them, view the website.
Visit Manufacturing and Website to understand these topics in detail.
3.20 Website Specifications
Other item-related configurations are made in this area.
- Copy from Item Group: The "Website Specs" information will be retrieved according to the settings made in the particular Item Group selected in the preceding section (2.17).
Website Specifications: The product's label and its description. For illustration, "Warranty: 1 year."
Website Description: The item page will show this.
Website Content: (Started in v12) Use Bootstrap 4 markup to generate additional styling, etc., to display on the item page.
3.21 Hub Publishing Details
A free online marketplace called the hub allows suppliers and customers to do business. The transactions are frictionless if both parties are using ERPNext. The hub's website address is https://hubmarket.org.
Publish in Hub:You can decide whether or not to publish your product on https://hubmarket.org. A free market exists there. The transactions will be frictionless if your supplier or customer is also using ERPNext. For instance, when you create a purchase order, the supplier will also create a sales order.
Hub Warehouse: For the purpose of keeping the stock for your hub transactions, this is a separate warehouse.
Synced With Hub: When transactions happen, the hub syncs item information and other information.