Leave Allocation
Leave Allocation
Leave Allocation enables you to allocate a specific number of leaves of a particular type to an Employee.
Go to: to access Leave Allocation.
Home > Human Resources > Leaves > Leave Allocation
1. Prerequisites
It is advised that you create the following documents before making a leave allocation:
Employee
Leave Type
Leave Period
Leave Policy
2. How to create a Leave Allocation
Click on New under Leave Allocation list.
Choose the Employee, the Leave Type, the From Date, and the To Date.
Specify the quantity of newly allocated leaves for that specific leave type.
Publish and save.
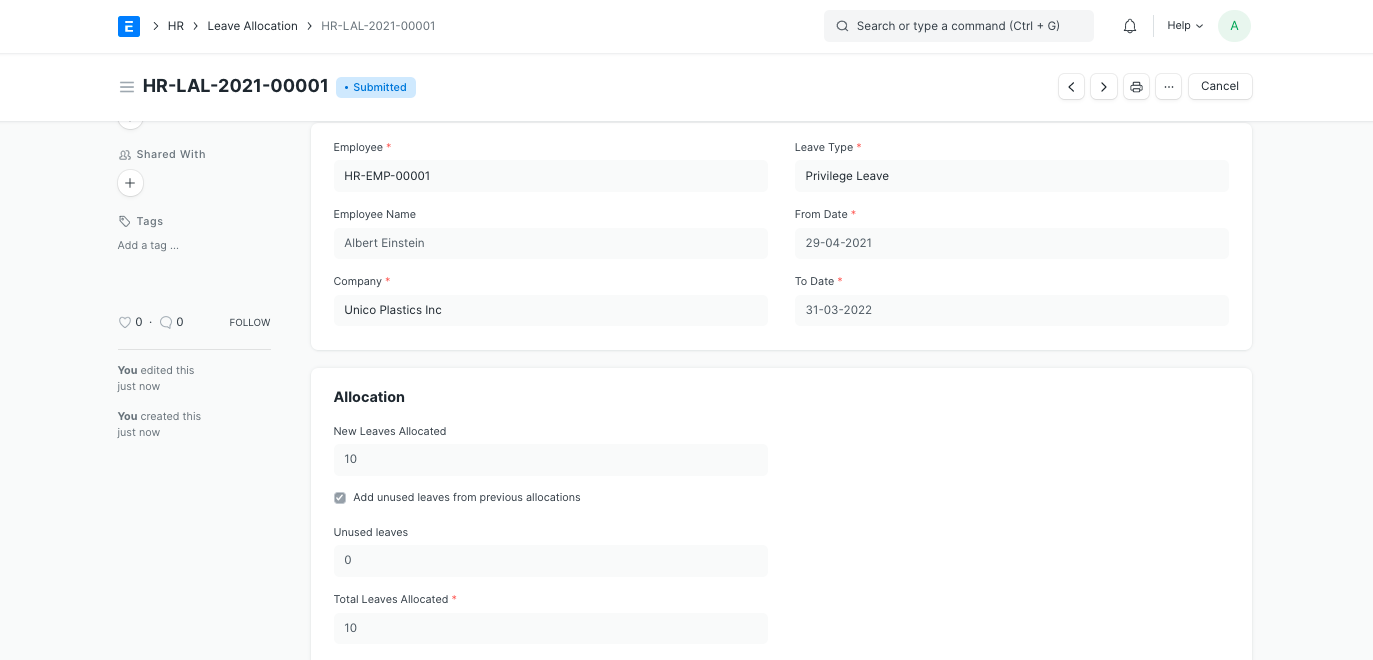
Note: If you want to carry over unused leaves from the previous allocation period for this specific Leave Type, enable the "Add unused leaves from previous allocations" option.
2.1 Allocating Leaves through Leave Period
Typically, leaves are allotted for a specific leave period. The Grant button can be used to generate leave allocations based on the leave policy that applies to each Employee after a leave period has been set and saved.
Typically, leaves are allotted for a specific leave period. The Grant button can be used to generate leave allocations based on the leave policy that applies to each Employee after a leave period has been set and saved.
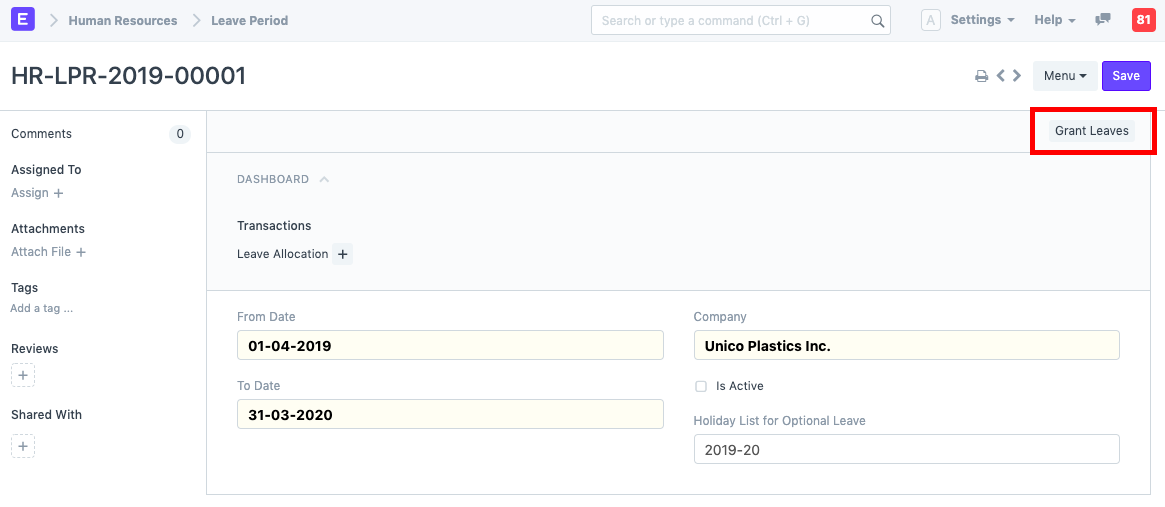
Based on an employee's grade, department, or designation, you can assign leaves.
The selected Employees will immediately receive the leaves after they have been approved, according to the Leave Policy that has been set in their Employee master. The Leave Allocation list allows you to view the newly distributed leaves.