Issue
Issue
An issue is a customer inquiry that you receive, typically through email or through the website's contact page.
Having a separate support email address is an excellent idea for managing incoming inquiries. For instance, if you email ERPNext's support department at support@erpnext.com with a support request, our system will instantly create an issue for you.
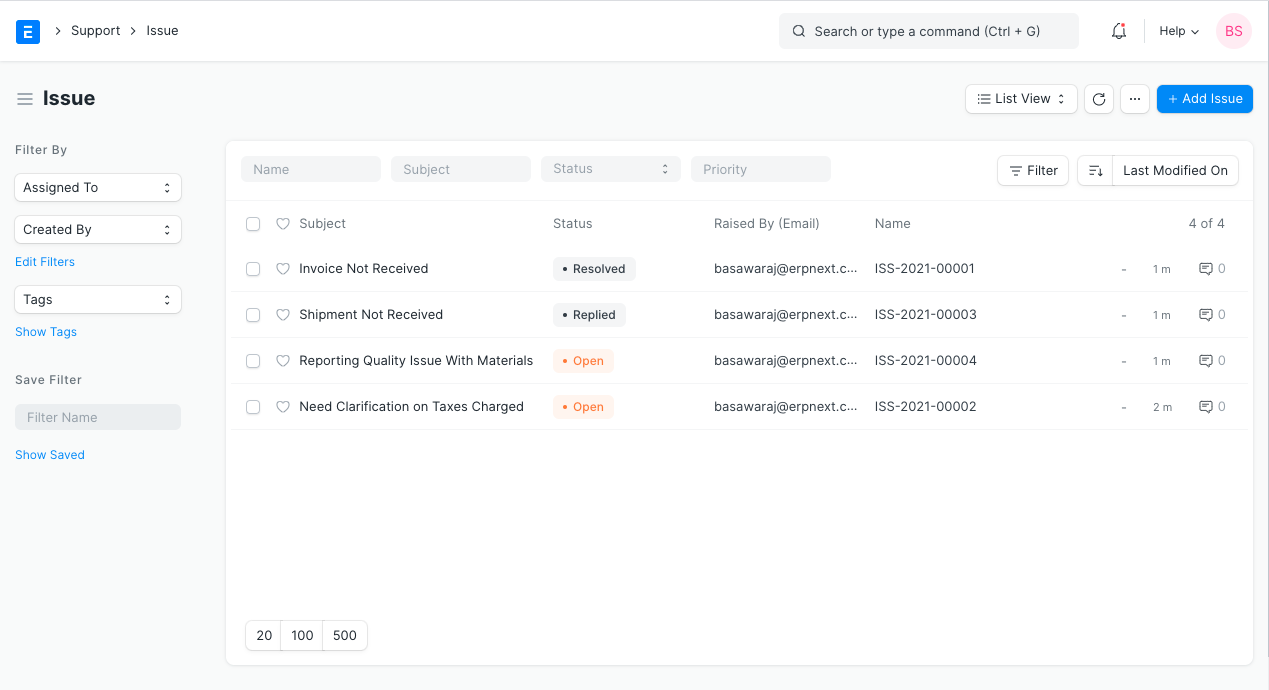
To access the Issue list, go to:
Home > Support > Issues > Issue
1. Prerequisites
It is recommended that you first build the following things before creating and using Issues:
- Customer
- Email Account
2. How to Create Issue
If you use the Email Account's append to feature, problems are immediately created.
In order to manually create an issue, follow these steps:
Click New from the Issue list.
the Issue's description, who raised it, and the Topic
2.1 Additional Options when Creating an Issue
Status: A new Issue will have a "Open" state when it is first created, and after it receives a response, it will have a "Replied" status.
Open: A response has not yet been made to the opened issue.
A response to the issue has been sent.
Hold: For some reason, the problem is on hold.
Resolved: When users are confident they have given a customer a solution to their issue, but they have not yet gotten a confirmation from the client that the issue has been resolved.
Closed: The issue was resolved satisfactorily for the customer, who acknowledged the closure with an acknowledgment.
The status changes back to "Open" if the sender responds to the thread. By pressing the Close button on the top right, the user can "Close" the issue manually.
The fulfillment status of the SLA will be updated on both the Closed and the Resolved statuses if a SLA has been established.
Customer: A customer link will show up in this section if the email was sent from a customer you have stored in your ERPNext account.
Priority: According to the needs, priority can be set. There are three priority by default: Low, Mid, and High. When needed, you can remove some of these or add more.
Issue Type: Issue Type is a categorization tool for issues. Problem Categories include things like "Functional," "Technical," "Hardware," etc.
Raised By (Email): This page will display the email ID used to send the issue.
3. Features
3.1 Details
- This text area contains information about the Problem that can be seen. In addition, a table or a picture may be included.
3.2 Service Level Agreement
The degree of service anticipated from the service provider is specified in a contract between the service provider and the end user.
The Service Level Agreement (SLA) can be chosen by the user from a list.
Every issue will have a response and resolution time that the support team must adhere to.
The Problem can be escalated by changing the Priority. The Service Level Agreement must include the priorities.
By selecting the Reset Service Level Agreement button in Problems as illustrated below, the Service Level Agreement may be reset if necessary.
3.3 Response
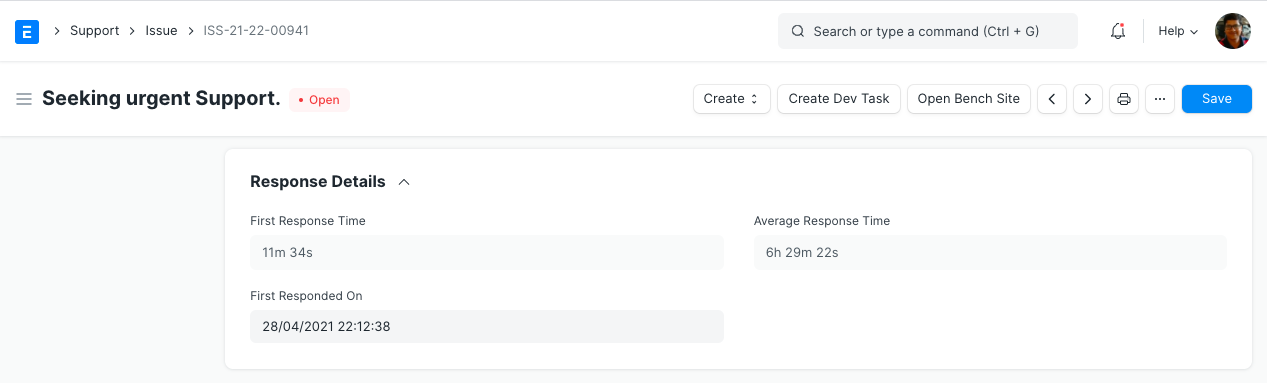
Mins to First Response: Time in minutes between the creation of the Problem and the sending of the initial response.
First Responded on: The first response date and time will be updated when a Support team member responds to the issue for the first time.
Average Response Time: The typical turnaround time for a response to a customer. The average of all the times between received and sent communications is used to compute this. Every time a customer is given a response, this field is updated.
3.4 Reference
These fields associated with the issue can be used by the user to filter the issues:
- Lead
- Contact
- Email Account
- Project
- Company
3.5 Resolution
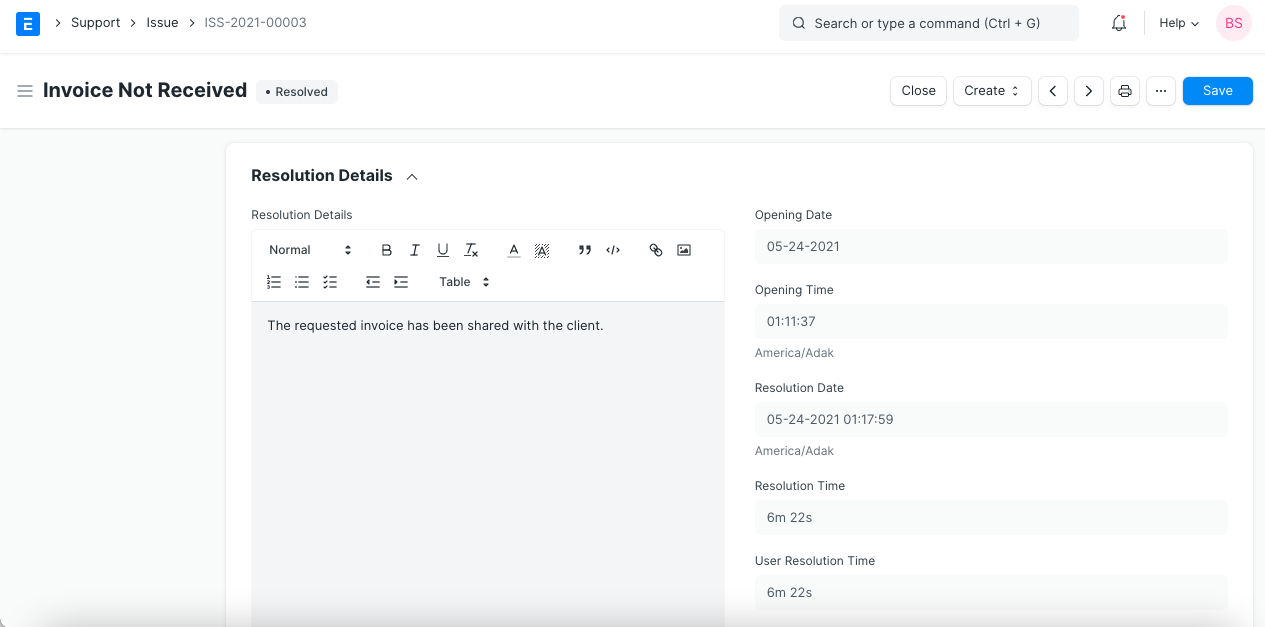
Opening Date: The date should be posted when the issue is created or logged.
Opening Time: The precise time will be immediately displayed when the issue is created or logged.
Resolution Date: Date and Time in this field will be updated once the user has fixed the problem.
Resolution Details: Once the problem has been fixed, the user can enter the details. This field is for text. Moreover, the user has the option to enter data or build a table.
Resolution Time: time required overall to close the ticket (from Issue creation to closing).
User Resolution Time: A user frequently needs to wait for a customer's response in order to resolve a problem. This wait time shouldn't be used for assessing a user's productivity. So, user resolution time, which can be computed as follows, is the entire amount of time a user spends closing a ticket.
Resolution time is the total amount of time it took the user to receive a response from a customer.
The metrics for User Resolution Time and Resolution Time are both set to "Close". Whenever an issue splits or is reopened, these metrics are immediately reset.
Via Customer Portal
This checkbox will be checked to show that the customer submitting the issue is a website user (with no access to modules).
4. After Saving
4.1 Add Comments
Members of the support team may contribute comments for the issue once it has been registered. This field can be changed. Problem comments are for internal discussion only; customers will not see them.
4.2 New Email
Users can write a letter to the individual who first brought up the issue. A thread on the issue contains every email—both those sent and those received.
4.3 Discussion Thread
The email discussion thread for an Issue keeps track of every email exchanged on that Issue in the system so you may follow what was said between the sender and the recipient.
Your message and the support ticket number are automatically delivered to the sender of any new emails you send from your mailbox.
To this email, the sender may add more information.
This Problem thread will be expanded by any subsequent emails that include this Issue number in the subject line.
Emails can also have attachments added by the sender.
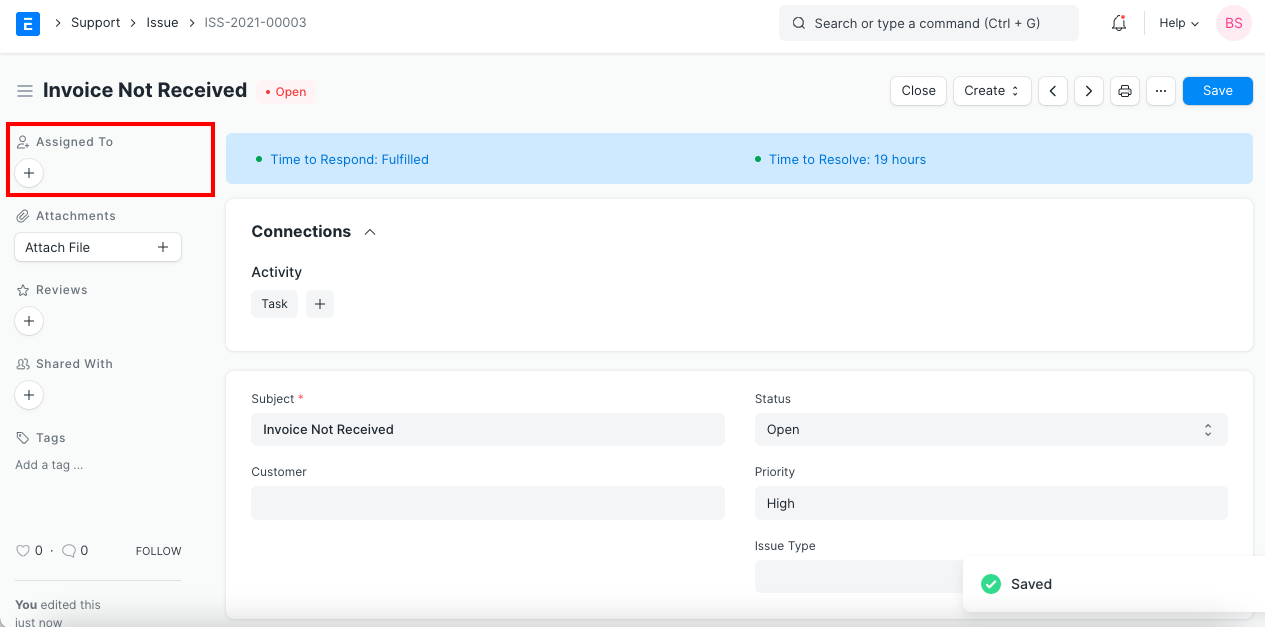
4.4 Assigning Issues to Users
Issues can be assigned automatically among Users using Assignment Rule.
By selecting the "Assign" option in the left sidebar, you can assign an Issue to a certain User. This will give the user a new To Do and deliver a notification saying that this Issue has been assigned.
4.5 Closing
By selecting "Close" from the toolbar, you can manually close the Problem.
The issue is automatically closed if the sender doesn't respond within 7 days.