Student
Student
The Student document will hold all the data of any Student in your Academy like their Personal Information, Photo, Date of Birth, Address, etc.
This form will also contain any additional details like the Student's Guardian and Sibling details.

When the application is accepted, the student is enrolled in a Program. The student applicant status is updated to Admitted once enrollment is complete.
Go to: to access Student.
Home > Education > Student > Student
1. Prerequisites
It is recommended to first create the following before creating a student:
- User(If Applicable)
2. How to create a New Student
Choose New from the student list.
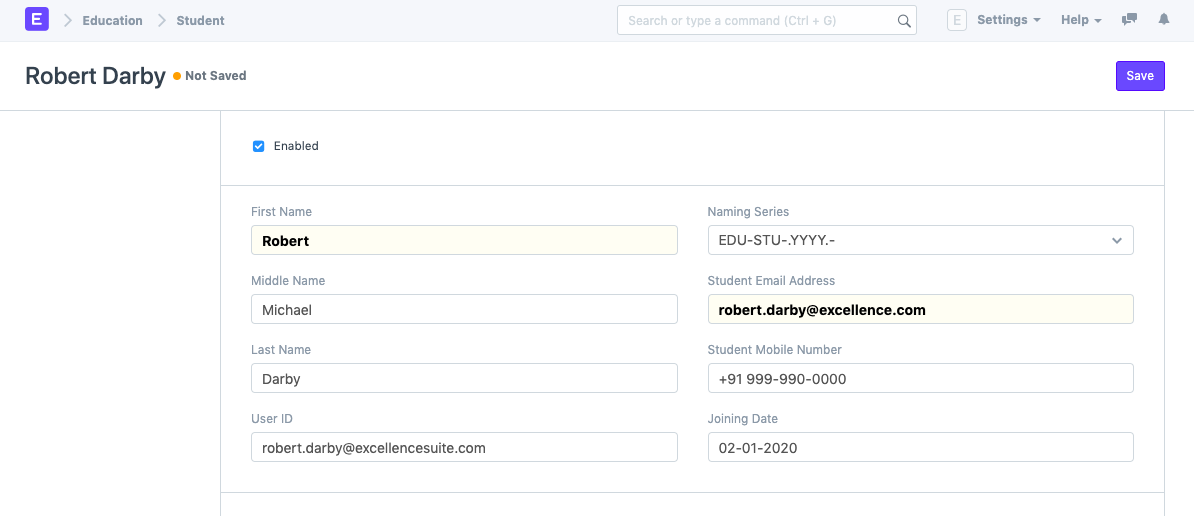
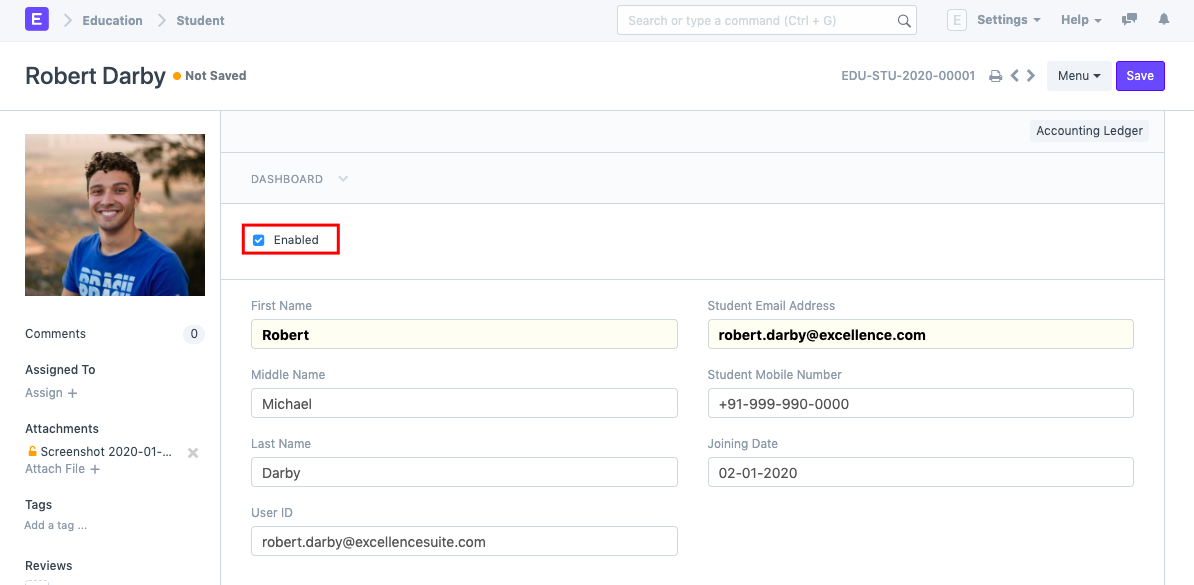
Enter the student's first name, middle name, and last name.
Provide other information, such as the joining date, user ID (if applicable), and student email address.
Save.
3. Features
In addition to the information already mentioned, the following details about the student can be recorded:
3.1. Personal Details
You can enter here the student's personal information, including their date of birth, gender, blood type, and nationality.

3.2. Home Address
Here, you can record the student's address as well as their city, state, and pincode. Each student's address can be captured twice.

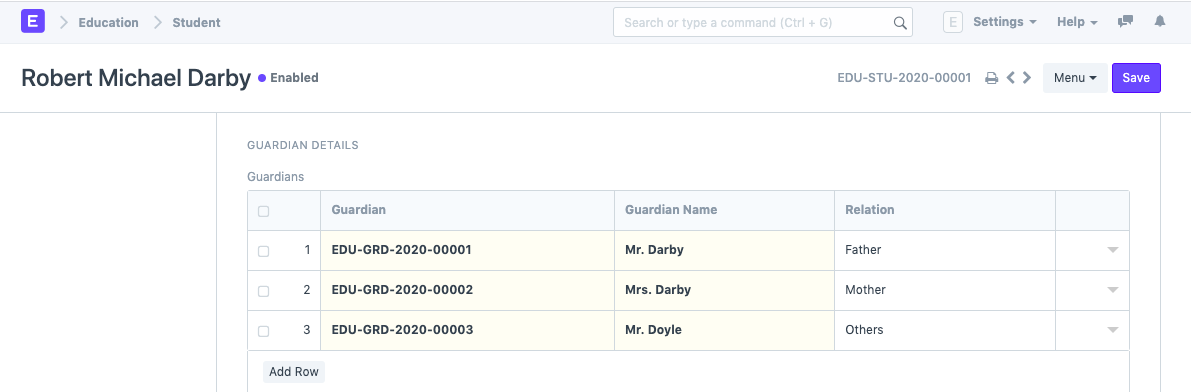
3.3. Guardian Details
This document contains information about the student's guardian and their relationship to the student. You can create a Guardian right here, or you can first create a Guardian and then a Student.
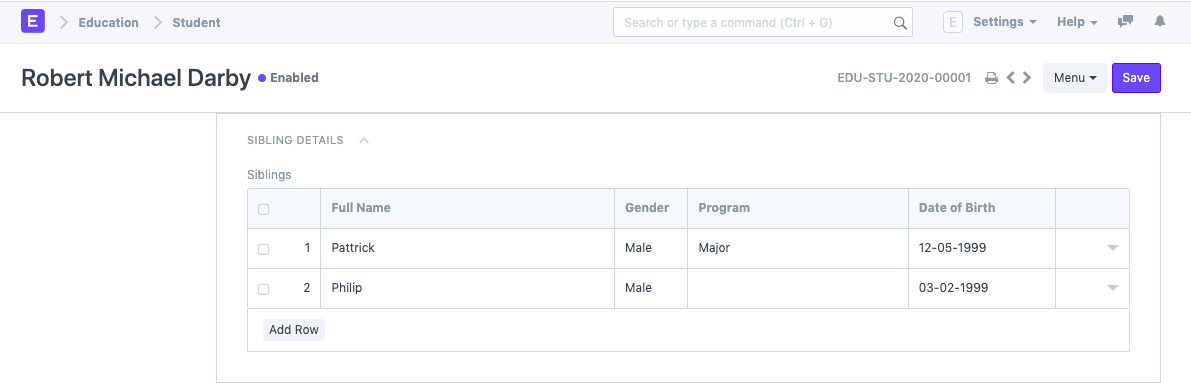
3.4. Sibling Details
The student's siblings will be fully described in this section. You can choose whether the sibling is enrolled in the same institution as you or not. You must input the Sibling's student ID if they are also enrolled at your institute; otherwise, you can enter the name of the institution they are affiliated with. Their academic information, such as Program, and personal information, such as Gender and Date of Birth, can both be recorded.
3.5. Exit Details
Here, you can record the student's exit information, including their date of departure and their leaving certificate number as it appears in your institute's records. Also, you can enter your reason for leaving here.

The student will always be enabled by default if the "Enabled" checkbox at the top of the student form is checked. To disable the student after recording their exit information, you must uncheck this box.
3.6. After Saving
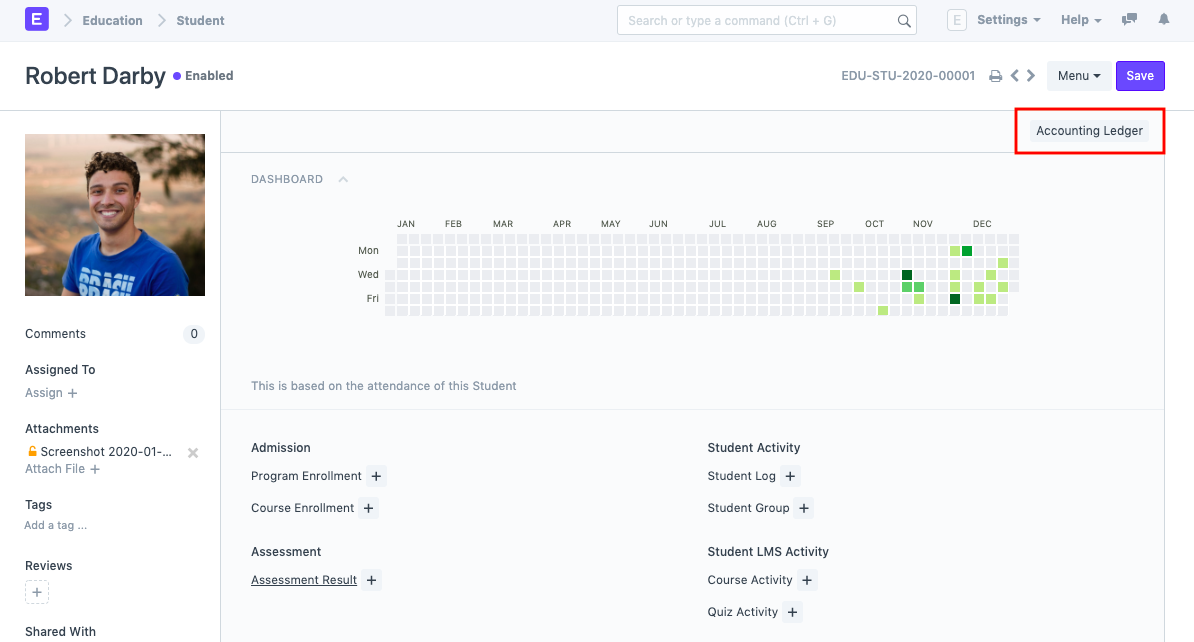
You can link this document to additional documents pertaining to Admission, Assessment, Attendance, Student Activity, Student LMS Activity, and Fees once you save the Student Form. This creates the student in the system. Also, you will be able to see a dashboard that will show their year activities.
4. Other actions
Once a student has been added to the system, you may also access the Accounting Ledger to see a summary of all the payments the student has made.