Purchase Receipt
Purchase Receipt
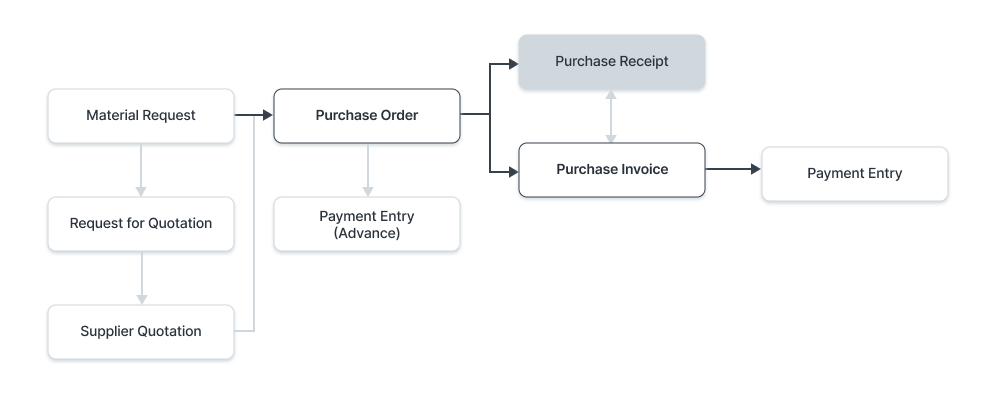
Purchase Receipts are made when you accept Items from your Supplier usually against a Purchase Order.
You can also accept Purchase Receipts directly without the need for a Purchase Order. To do this, set Purchase Order Required as “No” in Buying Settings.
To access the Purchase Receipt list, go to:
Home > Stock > Stock Transactions > Purchase Receipt
1. Prerequisites
It is suggested that you first generate the following before making and using a purchase receipt:
- Purchase Order
Note: Starting with version 13, we included an immutable ledger, which modifies the guidelines for erasing stock entries and publishing transactions for stock that was purchased in the past. Find out more here.
2. How to create a Purchase Receipt
Often, a purchase order is used to establish a purchase receipt. Click Generate > Purchase Receipt in the purchase order.
Use these procedures to manually construct a purchase receipt (not advised):
Click New in the Purchase Receipt list.
By selecting "Get Items from > Purchase Order," you can retrieve the Supplier's name and the Products from the order.
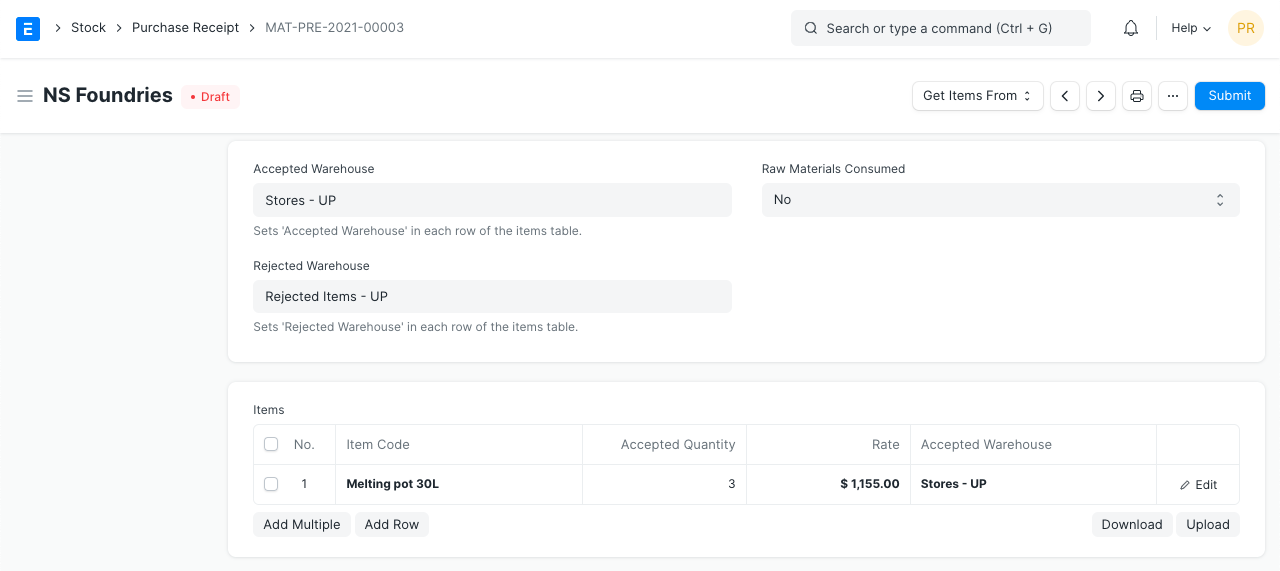
For every item in this purchase receipt, you can specify the Acceptable Warehouse.
If specified in a purchase order, this is obtained.
Set the Rejected Warehouse as the location for storing any defective items.
On the Items table, choose the item and enter the quantity.
The amount will be automatically computed after the rate has been retrieved.
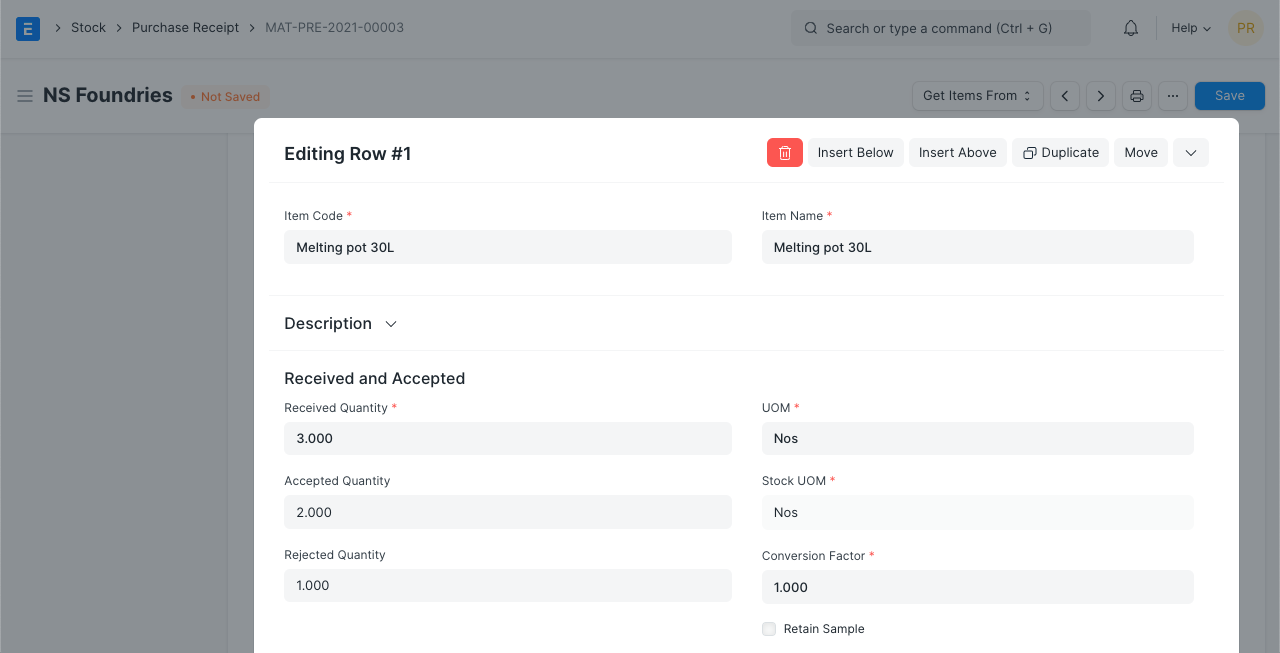
To modify an item's accepted warehouse, expand the item row.
Publish and save.
If your supplier has included any notes, you can additionally add a "Supplier Delivery Note" to the purchase receipt. The Purchase Receipt's posting time and date can be changed by checking the box labeled "Change Posting Date and Time." When you click the New button, the date and time are automatically configured.
The Return: If you're returning items to your warehouse that weren't accepted, tick this box.
2.1 Statuses
The following statuses are possible for a purchase receipt:
Draft: The system has not yet received a draft that has been stored.
To Bill:not yet been charged with a purchase invoice.
Completed: All the items were submitted and received.
Return Issued: The items have all been received back.
Cancelled: The purchase receipt was canceled.
Closed: The Close's goal is to control short-closing. Say you bought 20 quantities but the store only had 15 available. The final five are not to be accepted or charged.
3. Features
3.1 Currency and Price List
This part displays the purchase receipt's currency, which is retrieved from the purchase order. The set Price list will be used to retrieve the item prices. The Pricing Rules established in Accounts > Pricing Rule will be disregarded if Ignore Pricing Rule is checked.
If you have ordered an item in another currency, it is crucial to convert it into your base currency because the incoming item affects the value of your inventory. If necessary, you must alter the currency conversion rate.
To learn more, read about Price Lists and Multi-Currency Transactions.
3.2 Warehouse details
All of the items listed in the Purchase Receipt's Items table will be covered by the following Warehouses set. With the table, you can modify the Warehouses for certain Goods.
Accepted Warehouse You will receive and store the incoming Goods in this Warehouse. This is typically the "Stores" Warehouse.
Rejected Warehouse: This is the warehouse where you'll store the goods that were returned because they were either defective or didn't meet quality standards.
Subcontracting
Raw Materials Consumed: If you are subcontracting, click "Yes" to take the vendor's raw materials. Learn more by reading Subcontracting.
3.3 Items table
Barcode: By employing barcodes, you may track Things.
Scan Barcode: If you have a barcode scanner, you can add items to the items table by scanning their barcodes. For further information, consult the barcode tracking documentation for products.
The item master will be queried to retrieve the item code, name, description, image, and manufacturer.
Received and Accepted: Set the quantity for received, acceptable, and rejected goods. The item master is queried for the UoM. If your purchase order for an item is in a different Unit of Measure (UOM) than what you stock, you will need to alter the "UOM Conversion Factor" (Stock UOM).
Rate: If the Rate is specified in the Price List, it is obtained, and the total Amount is computed.
Item Tax Template: A specified tax amount can be applied to this specific item by using an item tax template. Please visit this page to learn more.
If specified in the item master, the item's weight data per unit and weight UOM are obtained.
Warehouse and Reference: As mentioned in the next section, you can specify the accepted and rejected warehouses as well as include a quality inspection.
Serial No, Batch No, and BOM: You must enter the Serial Number and Batch in the Items table if your item is serialized or batch-produced. Each Serial Number must be entered on a separate line, and you may enter as many Serial Numbers as the amount in a single row.
Serial numbers for both accepted and rejected items can be entered in different fields here. If, for instance, you are storing a batch of plastic medications, a batch number can also be established.
By selecting "Accept Zero Valuation Rate," you can submit the purchase receipt even if the item has a zero valuation rate. This may be a result of a mutual understanding with your Supplier or a sample item.
- In this case, a BOM can be linked if the item is being outsourced. By linking the BOM here, the Supplier Warehouse will lose its raw material stock, which will have an impact on the Stock ledger.
Note: For these functionalities to function, the Item must be serialized or batch processed. A popup where you can enter the serial numbers will display if the item is serialized.
Accounting Dimensions make it possible to assign several Dimensions to each transaction without having to add new Cost Centers. To get started, you must first construct Accounting Dimensions; for more information, see this page.
When printing, Page Break will insert a page break just before this item.
3.4 Tracking Quality Inspection
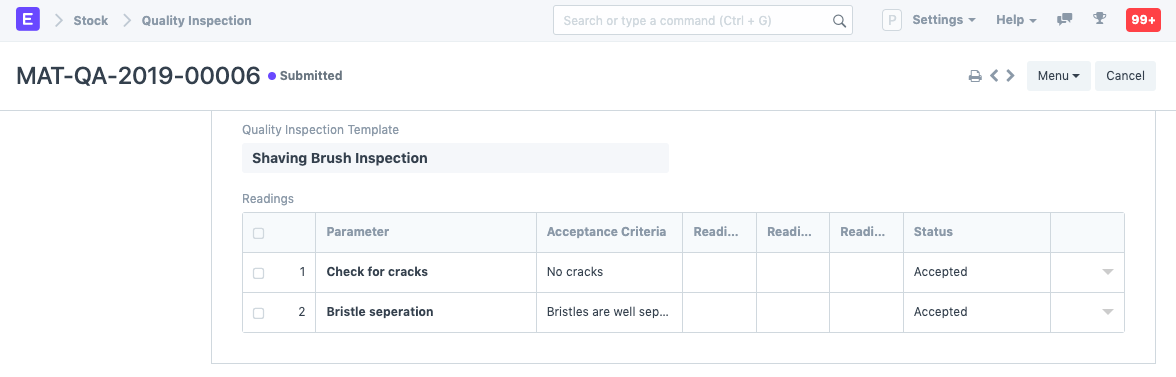
You must change the "Quality Inspection" field if you have specified in your item master that certain Items must have Quality Inspections recorded. If you don't update the "Quality Inspection," the system won't let you "Submit" the purchase receipt.
Quality Inspections can be documented in Purchase Receipts if Inspection Criteria are enabled in the Item form for Purchase and a Quality Inspection Template is attached there.
Visit the Quality Inspection website to learn more.
3.5 Raw Materials Consumed
The raw materials that the supplier used up before receiving the finished item are listed in the Consumed Items table.
The Consumed Products' current stock will be fetched from the Supplier Warehouse by the Get Current Stock button.

3.6 Taxes and Valuation
The Purchase Order will be used to retrieve the Taxes and Charges.
To learn more about taxes, go to the Purchase Taxes and Charges Template page.
Below the table, the total taxes and fees will be shown.
Visit this page to learn how to automatically add taxes using a Tax Category.
For a correct valuation, ensure that all of your taxes are accurately marked in the Taxes and Charges table.
Shipping Rule A shipping rule aids in determining an item's shipping cost. The price will often rise as shipping distance increases. Visit the Shipping Rule page to learn more.
3.7 Additional Discount
This area can be used to set any additional discounts that apply to the entire order. For further information, see Applying Discount.
3.8 More Information
Here and at the top, the Purchase Receipt's Status is displayed. Draft, To Bill, Finished, Canceled, and Closed are the different statuses. Moreover, this column displays the proportion of the total amount for which sales invoices are generated, or% Amount Billed.
3.9 Printing Settings
Letterhead
Your purchase receipt can be printed on the letterhead for your business. Find out more here.
The option "Group same things" will group identical items added more than once to the items table. When you print, this will be evident.
Print Headings
When printing the document, you can also alter the heads on the purchase receipt. This can be accomplished by choosing a Print Heading. Go to Home > Settings > Printing > Print Heading to add new print headings. Learn more here.
3.10 After Submitting
Each time a new item is added to the warehouse, a stock ledger entry is made using the "Accepted Quantity." A Stock Ledger Record is created for each rejection if you have them. The Purchase Order is updated with the "Pending Quantity."
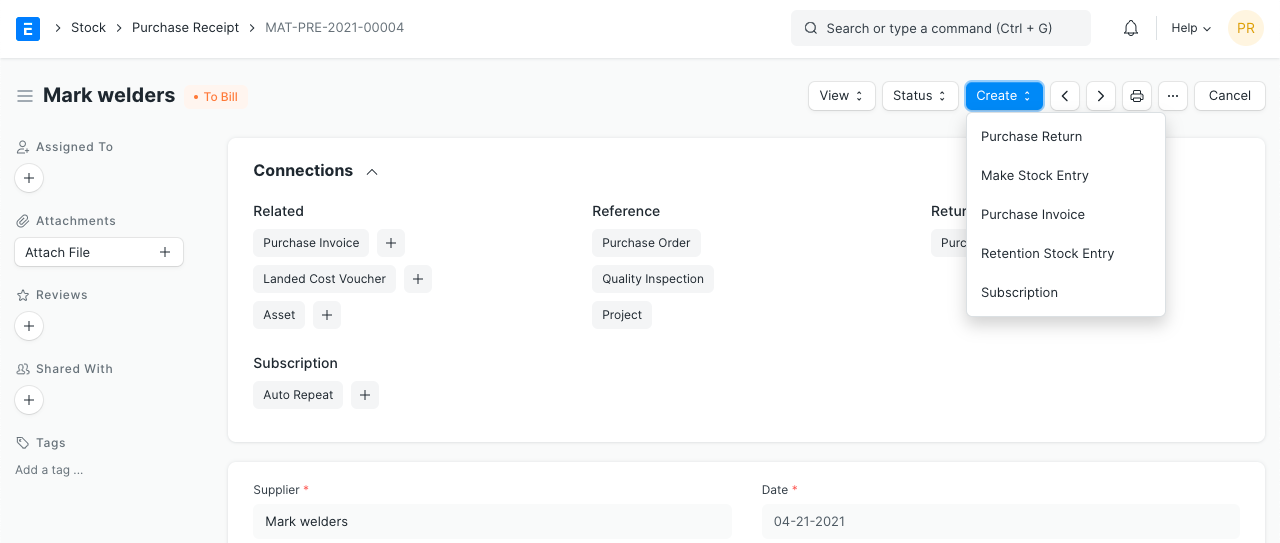
The following can be produced following the submission of the purchase receipt:
- Purchase Return
- Stock Entry
- Purchase Invoice
- Retaining Sample Stock
3.11 Returning a Purchase Order
If an item needs to be returned to the supplier after you have received a purchase order using a purchase receipt, you can generate a return entry. Visit the Buy Return page for further information.
3.12 Skipping Purchase Receipt
Enable the feature in Purchasing Settings if you prefer to create a Purchase Invoice instead of a Purchase Receipt following a Purchase Order.
Changing the value of Items post Purchase Receipt:
Certain costs that go into the total of the Products you purchased are occasionally unknown until much later. A typical illustration is that if you are importing the items, you won't learn about Customs Duty or other fees until your "Clearing Agent" sends you a bill. You must utilize the Landed Cost Voucher to assign this expense to the items you purchased. How come "Landed Cost"? because it is a representation of the fees you spent to acquire it.