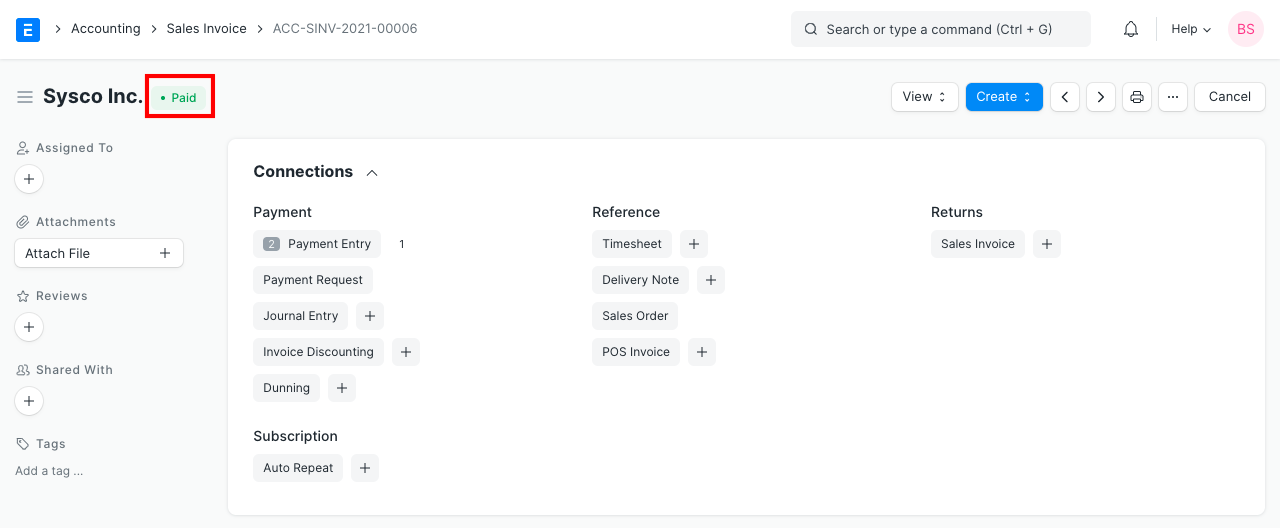
Payment Entry
A Payment Entry is a record indicating that payment has been made for an invoice.
Payment Entry can be made against the following transactions.
- Sales Invoice
- Purchase Invoice
- Sales Order (Advance Payment)
- Purchase Order (Advance Payment)
- Expense Claim
- Internal Transfer
There are two ways for the user to capture the payment in Geer ERP:
- Payment Entry (Default)
- Journal Entry
Here are some flowcharts to help you understand:
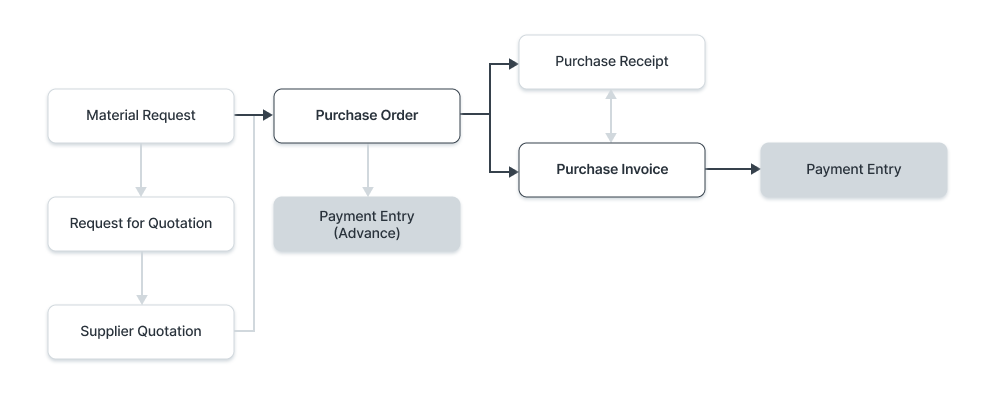
In sales:
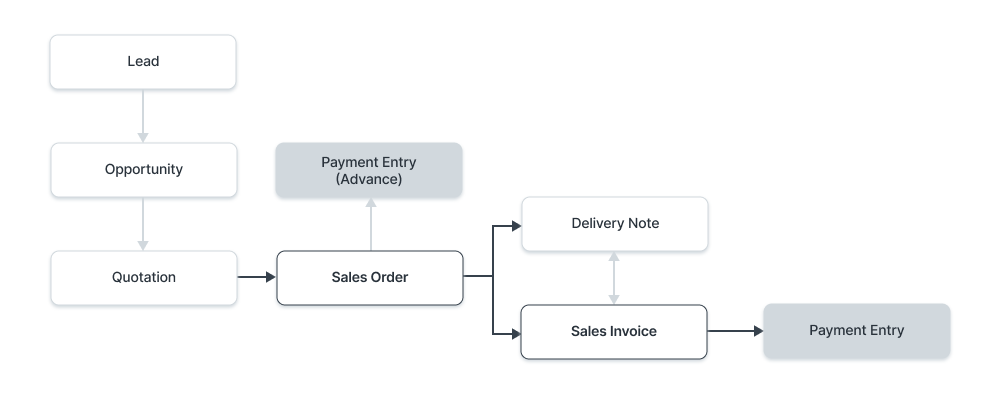
In Purchase:
To access the Payment Entry list, go to:
Home > Accounting > Accounts Receivable/Payable > Payment Entry
1. Prerequisites
Another option is to establish a Payment Entry directly and afterwards attach it to an order or invoice. It is recommended to first create the following before establishing and using Payment Entry:
- Customer
- Supplier
- Bank Account
You would require the following to follow the Sales/Purchase Cycle:
- Sales Order (Advance Payment)
- Purchase Order (Advance Payment)
- Sales Invoice
- Purchase Invoice
Set up:
- Chart Of Accounts
- Company (for default accounts)
2. How to create a Payment Entry
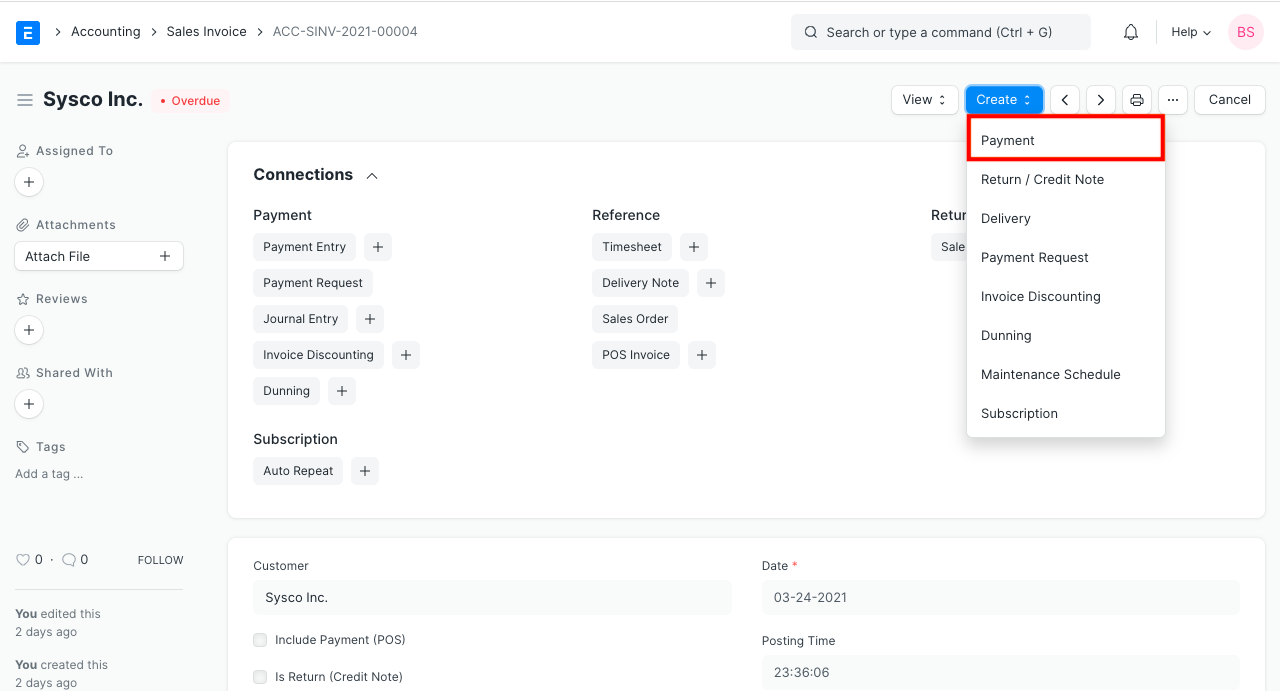
When you submit a document for which a payment entry can be made, the payment option will be located under the Create button.
- Incorporate a new posting date.
- Depending on the transaction from which you are coming, the Payment Type will be determined. Receive, Pay, and Internal Transfer are the available types.
- It will automatically retrieve the Party Name, Party Type, and Party.
- As specified in the Company form, the Account Paid To and Account Paid From will be retrieved.
- The invoice will be queried for the Paid Amount.
- Publish and save.
2.1 Creating a Payment Manually
A manually entered payment entry won't have an associated order or invoice. The Customer's/account Supplier's will receive a record of the payment, which may later be reconciled using the Payment Reconciliation Tool.
- Click New from the Payment Entry list.
- Choose the appropriate Customer or Supplier and Party Type.
- Choose the Cash Account or Bank Account that will be paid from and to. If making a bank transfer, include the date and cheque number.
- Submit the Amount Paid.
- Publish and save.
3. Features
3.1 Setting Mode of Payment
Mode of Payment: By entering this, you can categorize Payment Entries according to the payment method utilized. Payment methods include cash, checks, wire transfers, and others.
Tip: In the Mode of Payment master, default Account can be set. This default payment Account will be fetched into Payment Entries.
3.2 Payment From/To
- Party Type: Whether a client, vendor, employee, shareholder, student, or member of an NGO.
- Party: the particular person or entity for whom the Payment Entry is made.
- Party Name: The party's name is automatically retrieved.
- Company Bank Account: The bank account of your business.
- Party Bank Account: the bank account of the party.
- Contact: A Contact person may be kept here if the Party is a company.
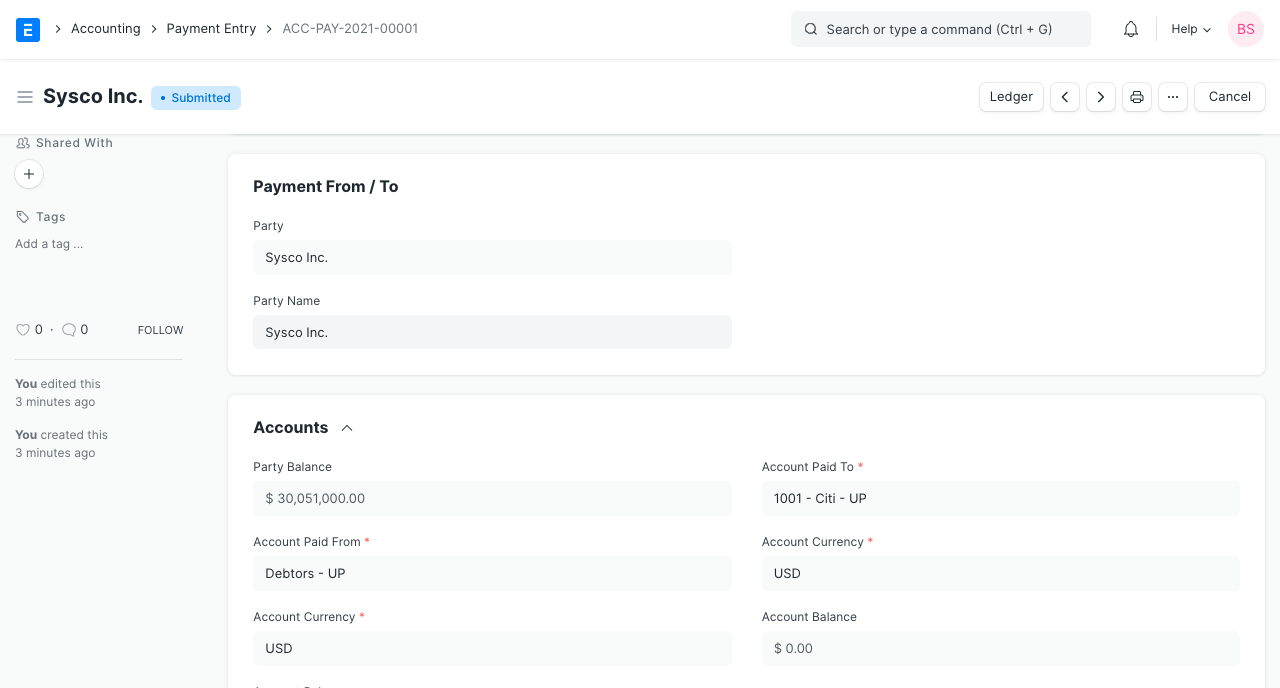
3.3 Accounts
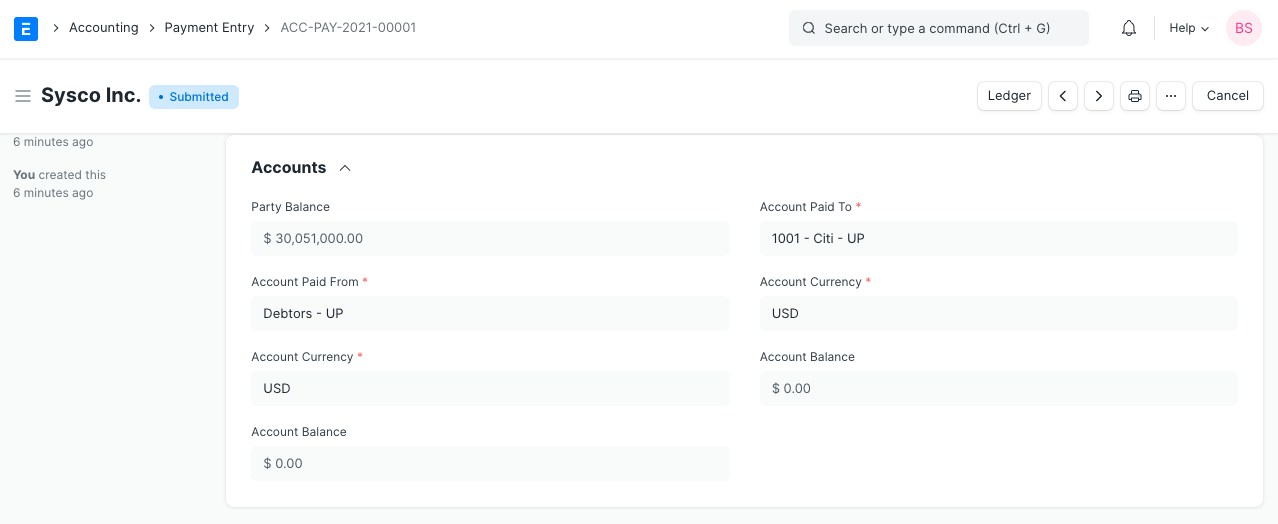
- Party Balance: The total amount from Invoices given forth in the current Payment Entry that is due or payable to the Customer or Supplier. Sums paid will be positive, and amounts paid in advance will be negative.
- Account Paid From: the account that will be used to deduct the money when a payment is made.
- Account Paid To: the CoA account that will be used to make the addition when the payment entry is made.
- Account Currency: These accounts' currencies will be fetched in the manner specified in the account; they cannot be changed here. Visit this page to learn more about transactions using several currencies.
- Account Balance: The total amount balance from all the invoices of the selected accounts. Paid Amount: This section displays the total amount paid for the current Payment Entry.
Note: When making Payment Entries, the default bank account will be fetched in the following order if set:
- Company form
- Mode of Payment default account
- Customer/Supplier default bank account
- Select manually in Payment Entry
3.4 Reference
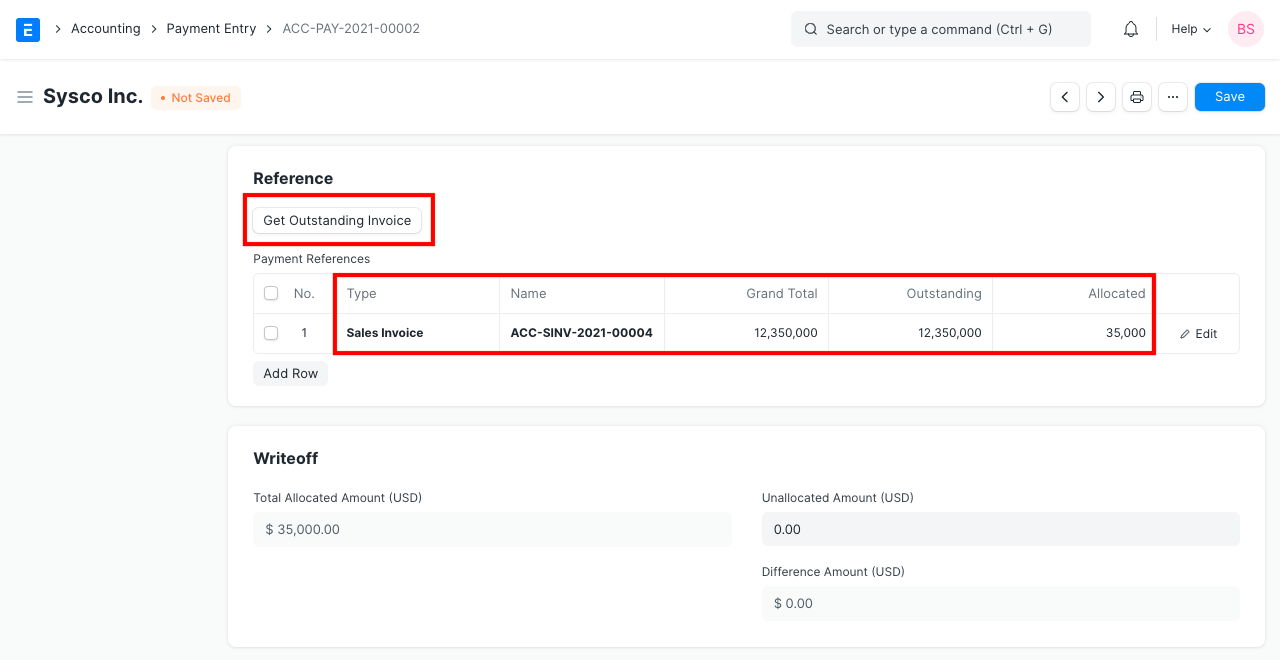
Fetching outstanding Invoices
With just one Payment Entry, this can be utilized to pay several Sales Invoices. When creating a new payment entry, all open orders and outstanding invoices for the party will be fetched when you select the Get Outstanding Invoice button. To see this button, you must first enter the "Paid Amount." Here, you can choose the date range and the invoices you want to fetch.
Enter the amount paid in the "Allocated" section if the Party hasn't paid the full amount due.
The Payment Amount will be applied to a Sales Invoice when generating a Payment Entry for a Customer. Along the same lines, the Payment Amount will be applied to a Purchase Invoice when a Payment Entry is created for a Supplier.
Payment References table
- Type: Whichever of a sales order, sales invoice, or journal entry is being paid for.
- Name: Here, the specific transaction ID is retrieved or chosen.
- Total Amount: The total of one journal entry or invoice in a row.
- Outstanding: The sum to be paid or received for this invoice.
- Allocated: Only the paid amount will be allotted to the invoice(s) fetched in the Payment Entry if the Paid Amount is less than the invoice amount. The payment may be done in installments; for instance, if there are three invoices with values of 20, 20, and 20, the total payment of 60 will be divided equally. There may also be a role for payment terms.
What is Unallocated Amount?
Geer ERP stores a payment entry when the Paid Amount is more than the entire invoice amount and the payment entry is made. Therefore, this amount is still "Unallocated." Unallocated funds may be applied to upcoming invoices.
For instance, the customer paid $1,500 and you created a sales invoice totaling $1,000. The 500 that was already paid can be applied to a future 1,000-item invoice for this customer.
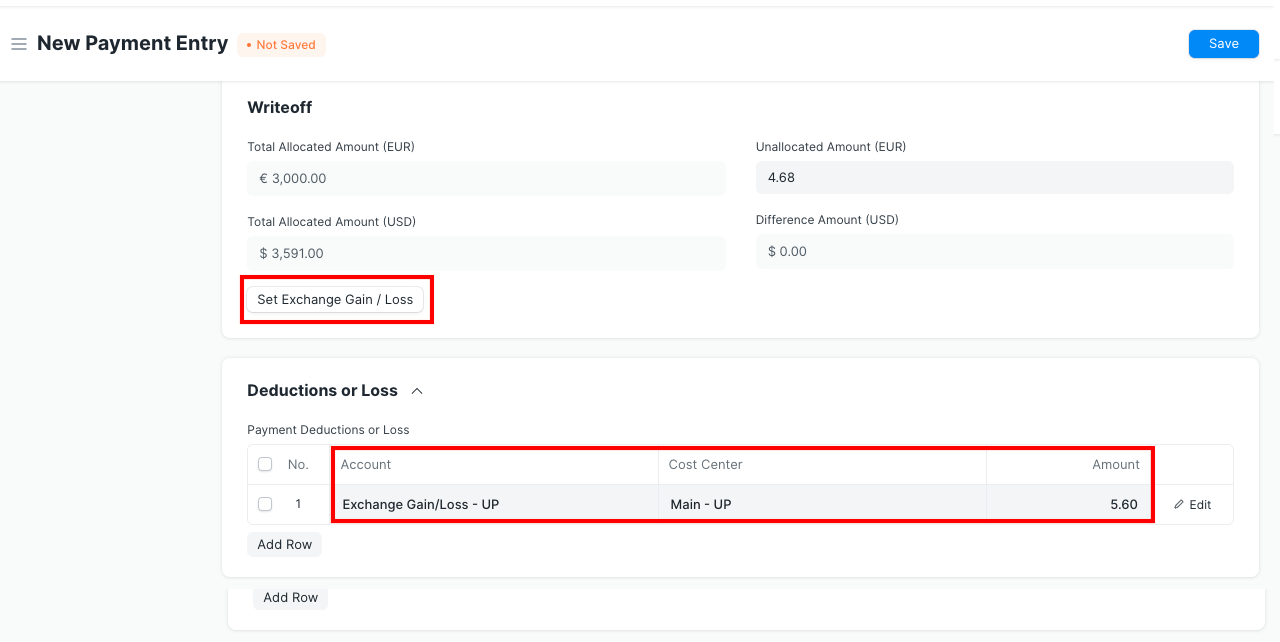
3.5 Deductions or Loss
The actual Paid Amount and the invoice outstanding amount may fluctuate somewhat when a Payment Entry is created against an invoice. Rounding errors or changes in the currency exchange rate could be to blame for this discrepancy. Here, you can set up an account where the difference will be recorded.
It is possible to write off the loss or deductions. Let's look at an example where 25 was paid but 30 was allocated because it is the amount that should have been collected according to the invoice. In this instance, the 'Difference Amount' will be 5. Discounts or currency exchanges may be to blame for this amount of difference. To submit the Payment Entry, the Difference Amount must be zero. Using the Make Difference Entry button, this can be changed. The Write Off account will be updated with the new amount.
3.6 Write Off
When the amount paid is less than the amount allotted, a write-off occurs. In other words, the balance is either not going to be paid or is regarded as lost to incidental expenses. This represents a loss.
3.5 After Submitting
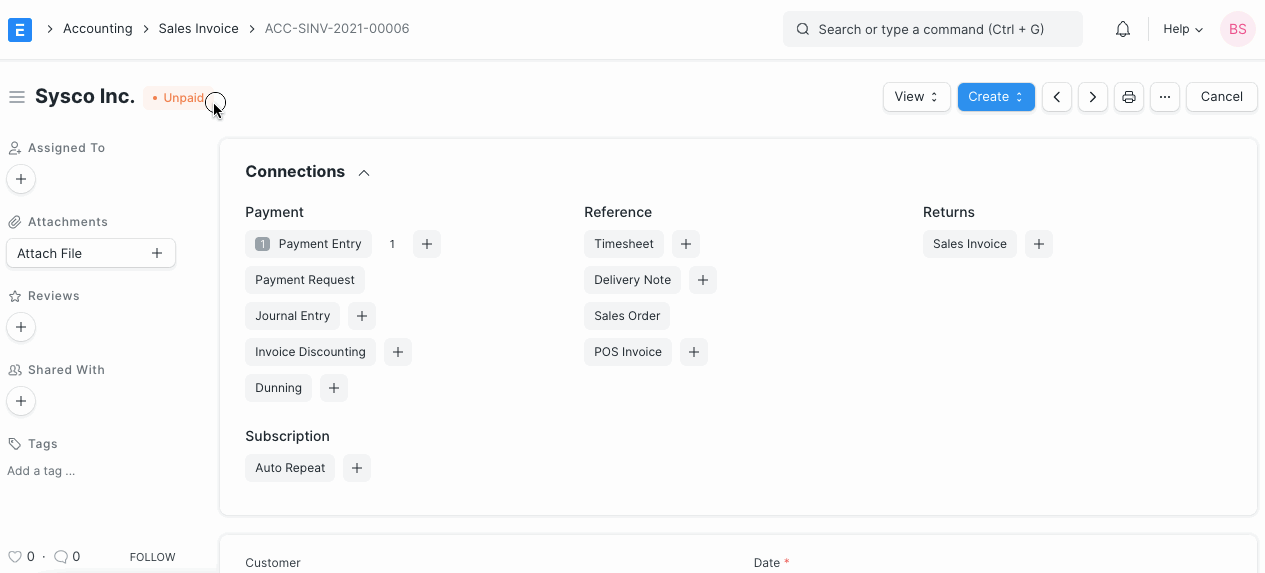
Entered payment is saved and submitted. Outstanding will be updated in the invoices after submission.
The field "Advance Paid" in either a sales order or a purchase order will be changed if a payment entry was made against one of them. Payment Entry will automatically update in the invoice you create in relation to those transactions so you can allocate invoice amount against advance payment entry.
For incoming payment, the accounts posting will be done as follows.
- Debit: Bank or Cash Account
- Credit: Customer (Debtor)
For outgoing payment:
- Debit: Supplier (Creditor)
- Credit: Bank or Cash Account
4. Other cases
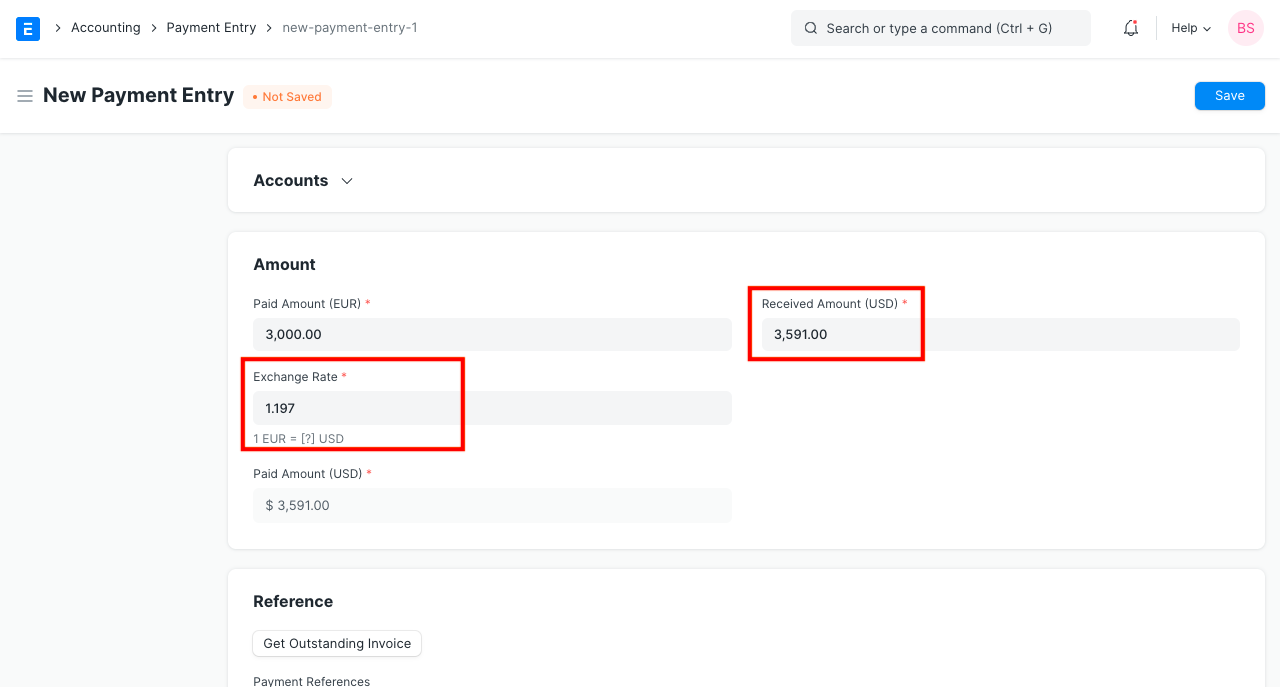
4.1 Multi Currency Payment Entry
If you want to keep a payable/receivable account in a different currency from the company's, create the account in the foreign currency and link it to the party account. For instance:
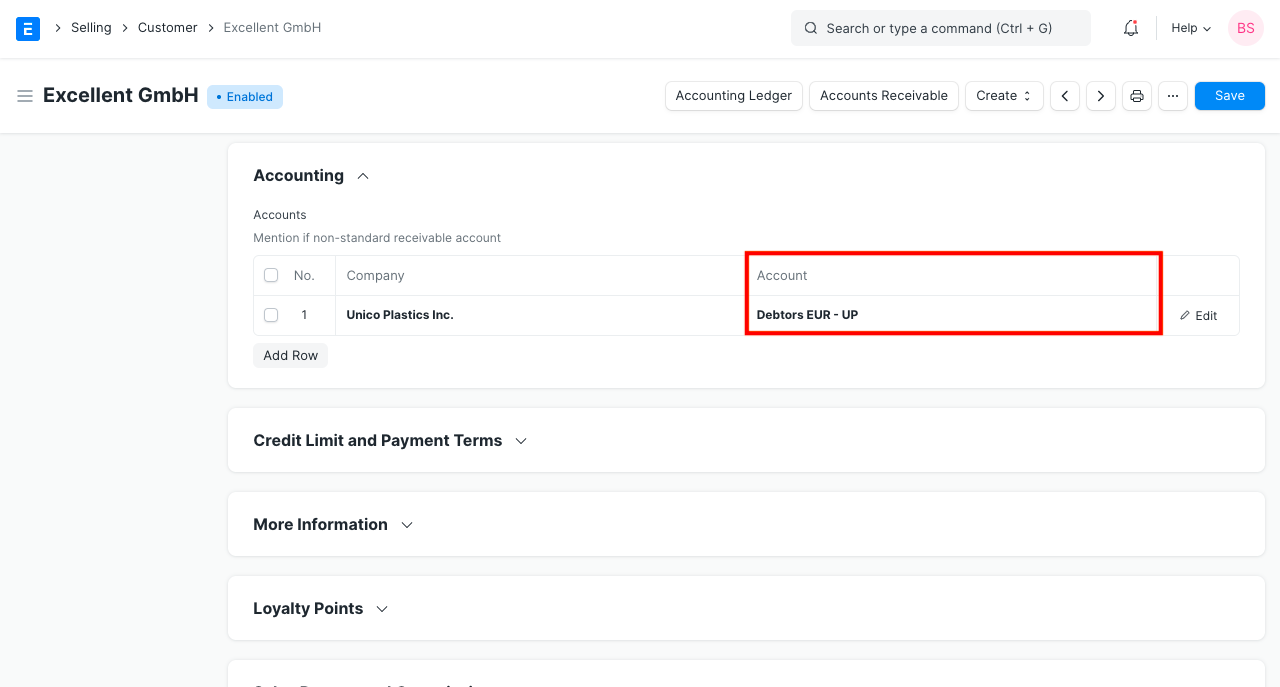
You may manage accounts and invoices in many currencies using Geer ERP. The currency exchange rate between the company's base currency and the party currency is also entered in the invoice if it is made in the party currency.
Note: A separate Debtor/Creditor account needs to be created and selected in the Sales Invoice/Order for currency exchange to work correctly. For example, if the Customer is from the US, create a receivable account called 'Debtors US'.
The current exchange rate will be fetched when you create a payment entry against that invoice, however you can adjust the Currency Exchange Rate at the Time of Payment to fit your records.
To add a row to write off the difference amount automatically, click on the Set Exchange Gain/Loss option.
The constant fluctuation in currency exchange rates can cause a discrepancy between the payment amount and the invoice total. This difference might be recorded as a gain or loss on the currency exchange.
By generating a new Payment Entry, payments can also be made without reference to invoices.
Visit this page to learn more about controlling transactions involving different currencies.
4.2 Internal Transfer
When money needs to be moved between the accounts of the same company, internal transfers are employed. If a US customer uses PayPal, for instance, sending money from PayPal to a bank account may be regarded as an internal transfer.
Following internal transfers can be managed from the Payment Entry.
- Bank - Cash
- Bank - Bank
- Cash - Cash
- Cash - Bank

4.3 Managing Different Payment Scenarios
Outstanding amount = entire amount due on an unpaid invoice. The value of the balance due will decrease while establishing Payment Entries.
Billing and payments are often two distinct operations, with the exception of retail transactions. These payments can be made in a variety of combinations. Both sales and purchases are covered under these situations.
- They might be really upfront.
- after delivery. either when it arrives or a few days after it does.
- Part before and part after delivery are acceptable.
- A number of bills can all be paid at once.
- For a number of bills, advances may be made all at once (and can be split across invoices).
You may manage each of these circumstances using Geer ERP. A sales invoice, purchase invoice, or payment entry for an advance payment can be used as the basis for all accounting entries (GL Entry) (in special cases, an invoice can be made via a Sales Invoice too).
The aggregate of all accounting entries made "against" (or associated with) a particular invoice represents the total amount still owing. Under order to manage the scenarios, you can combine or split payments in Payment Entry.
4.4 Difference between Payment Entry and Journal Entry
- Understanding which Account will be Credited or Debited is necessary for using journal entries. It is easier for the user because the Payment Entry is managed in the backend.
- When handling payments in several currencies, Payment Entry is more effective.
- Using the Cheque Print Format, cheques can be produced from Payment Entries.
- You can still utilize a journal entry for:
- Updating the accounts' opening balance.
- Entry for fixed asset depreciation.
- In the event that no payment is made at all, for modifying Credit Note against Sales Invoice and Debit Note against Purchase Invoice.
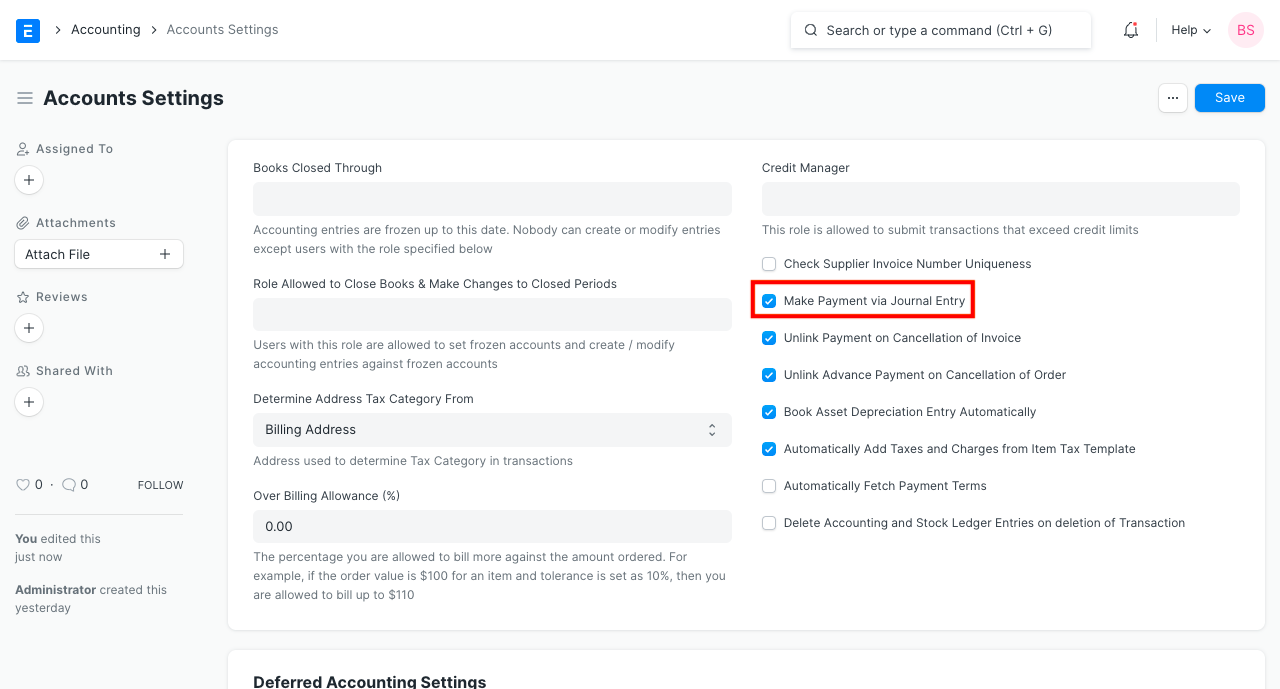
4.5 Payments Using Journal Entry
Follow these steps to pay via a journal entry:
- Enable Payment Through Journal Entry. To make a payment using a journal entry, go to Accounting > Accounting Masters > Accounts Settings and click the box.
2.When submitting a document for a journal entry, the Payment will be located under the Create button.
3.In order to register the payment against the invoice, save and submit the journal entry.