Project
Project
A project is a deliberate effort that is planned to learn more about something, create something fresh, or enhance something.
Project management in ERPNext is task-driven. You can make a Project and break it up into different Tasks.
A project can be broken into tasks because it has a wide scope. Consider developing a new smartphone as a project for the upcoming year. Afterwards the project's tasks include designing, prototyping, testing, delivery, etc.
Each task within a project may be given to a single person or to a team of people, but the assignment may also be made at the project level.
These Tasks may be created directly from a Project or they may be created separately.
Go to: to access Projects.
Home > Projects > Projects > Project
1. How to Create a Project
Click on New in the Project list once there.
the following information:
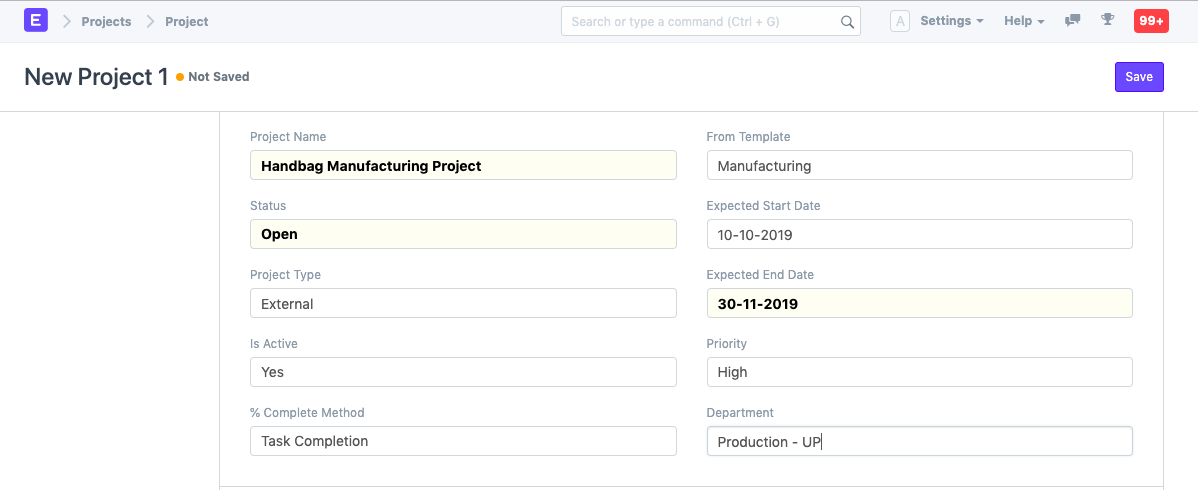
- Project Name: The project's name.
- Status: A project's default state is "Open," which can later be altered to "Completed" or "Cancelled."
- Expected End Date: Specify the target completion date for the project.
- Save.
1.1 Additional Options while creating a Project
From Template: You can select to create your project using an existing Project Template if you have one.
Expected Start Date: If a timeline for the project has been established, you can include the expected Start Date and Expected End Date in the form.
Project Type: Your initiatives can be categorized into many sorts, such as internal or external.
Priority: The Project's priority level can be chosen based on how important it is. Other priority levels are also an option.
Department: You can add this if a Department in the organization owns or controls the project.
Is Active: There is a Yes/No tab that enables you to modify the project's active state at any time.
Completion Method: You can monitor the progress of your project's completion percentage using one of three methods: manual, task completion, task progress, or task weight.
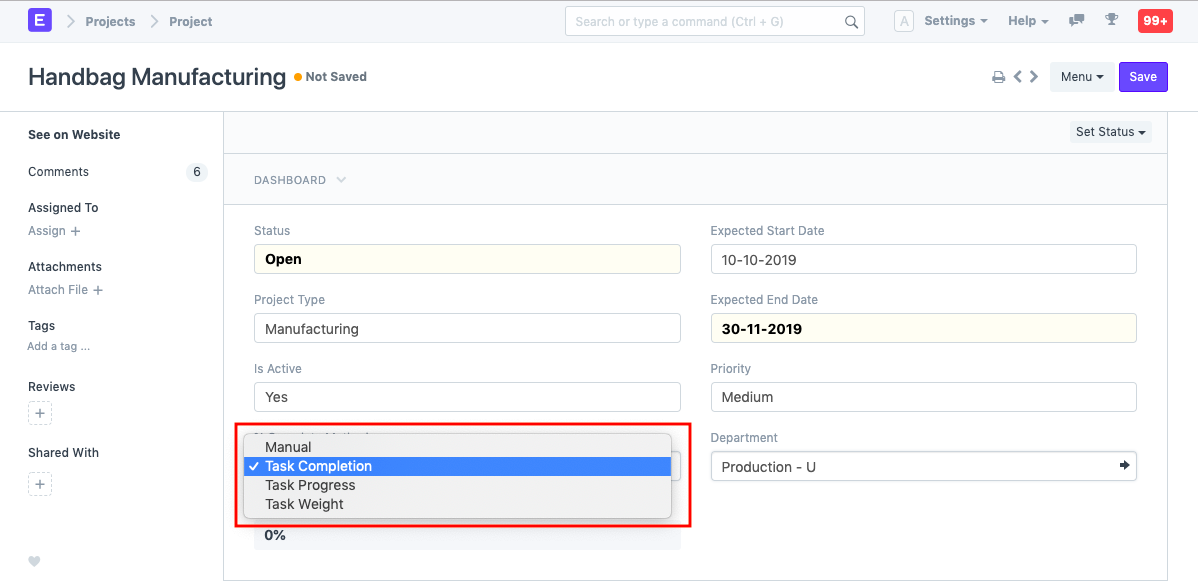
These are some illustrations of how tasks are used to determine the % Completion:
Note: The estimated result will be divided by the total weight if the sum of the weights of the Tasks is less than 100. For instance, if all the task weights add up to 70, the percentage of tasks done is (70/0.8)%, or 87.5%.
2. Features
2.1. Customer Details, Users and Notes
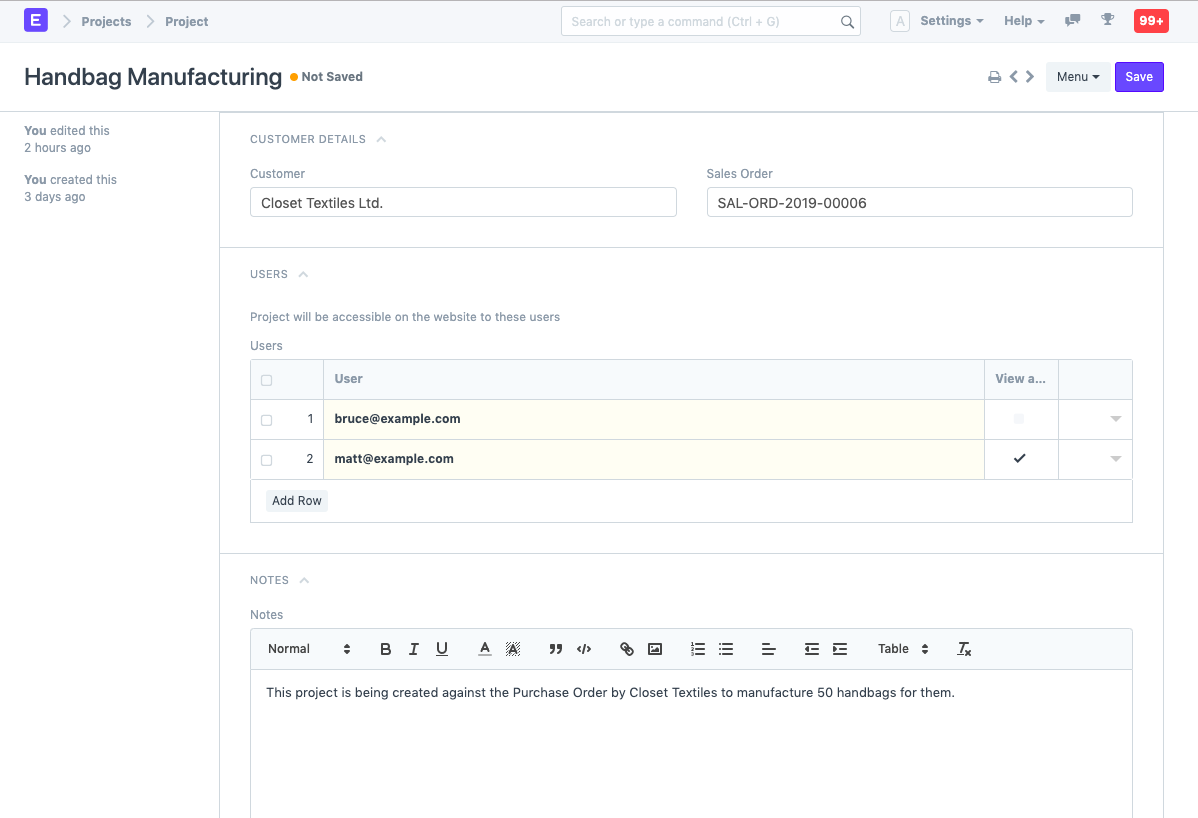
Customer: Details about a Project that is being completed for a specific Customer can be entered here.
Sales Order: You can retrieve the information here if a project is founded on a sales order received from a client. You would then be able to inform the customer of the project's progress in accordance with the sales order that was given.
Users: To grant someone access to this Project, you can add any website user. For instance, you can add your client as a website user to allow them access to your project so they can check on its progress and/or offer any suggestions or comments. Similar to this, you can add a Supplier or a Contractual Employee/Freelancer who is associated with the Project as a User.
Also, you may open the window and decide whether you want to send a Welcome Email to a specific user or provide them access to view attachments.
Further information on enabling users to view projects is available here.
- Notes: You are free to include any further notes with the project.
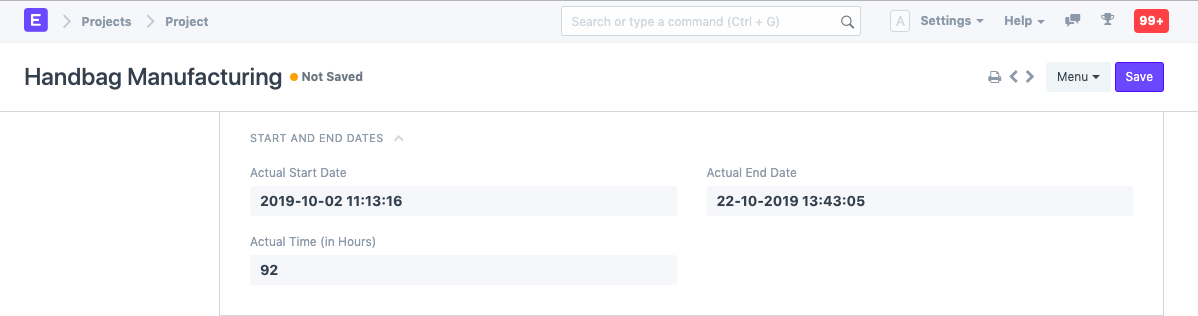
2.2. Start and End Dates
Actual Start Date: The Real Start Date and Time of the Project will be automatically recorded based on how the project was actually started as noted by timesheets.
Actual End Date: The Actual End Date and Time of the Project will be automatically recorded based on the Actual End of the project, which was monitored via the most recent update of the Timesheet. Click here to learn more about timesheets.
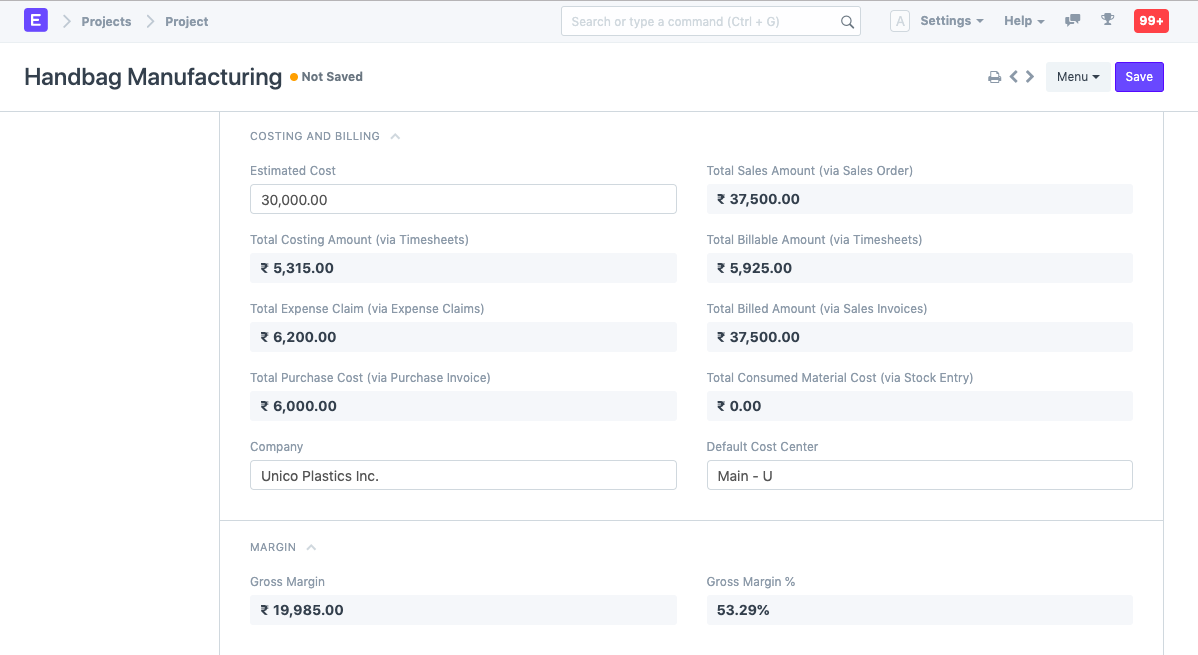
2.3. Costing and Billing
Estimated Cost: Type in the project's estimated cost.
Total Sales Amount: The Total Sales Order Amount will be pre-populated here if the Project and a Sales Order have already been linked.
Total Costing Amount:All of the timesheets connected to this project's total costing amount will be automatically fetched by the system.
Total Billable Amount: The Total Billable Amount for all Timesheets connected to this project will be automatically fetched by the system.
Total Expense Claim: The Overall Cost Claim will be determined automatically based on the costs that an Employee has claimed for completing the Project.
Total Billed Amount: he Sales Invoice generated in response to the Sales Order is used to automatically populate the Total Billed Amount in the system.
Total Purchase Cost: The price obtained from the Purchase Invoices generated in response to a Purchase Order issued for the delivery of Materials necessary for a Project is the cost of the project as a whole.
Total Consumed Material Cost: The Overall Consumed Material Cost is recorded using the Stock Entry created in accordance with the Project's Material Requirements.
2.4. Margin
- Gross Margin: You might calculate your gross margin by looking at the difference between your total costing and total billed amounts.
Gross Margin = (Total Sales Amount + Total Billable Amount) - Total Costing Amount + Total Billable Amount + Total Expense Claim + Total Purchase Cost + Total Consumed Material Cost)
- Gross %: The Gross% is the proportion of the Total Billed Amount spent in the Total Costing Amount.
((Total Sales Amount + Total Billable Amount) - Total Costing Amount + Total Billable Amount + Total Expense Claim + Total Purchase Cost + Total Consumed Material Cost) / Total Sales Amount)* 100
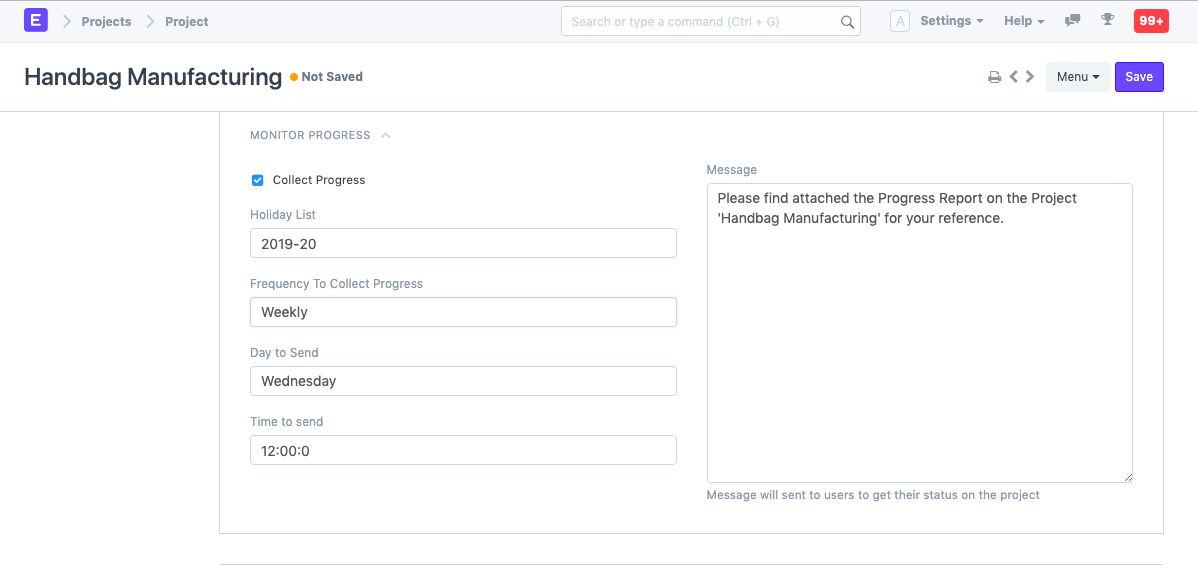
2.5. Monitor progress
You can add monitoring information to the project if you click the box to activate the "Collect Progress" option. All project stakeholders will receive a report on the project's development.
Holiday List: The holiday list can be chosen for your business. As a result, you will be able to gather Progress Reports only during working days.
Frequency: You can choose how frequently you want to get the reports. It can be configured to a weekly, daily, twice-day, or hourly basis.