How to process Payroll in Geer ERP
How to process Payroll in ERPNext
Payroll processing in ERPNext is challenging for the majority of customers, however it is more tiresome during initial setup than challenging. Once the setup is complete, the subsequent months' process is simple. Please follow the steps below for a short guide:
1) Create Payroll Period You specify a time frame here for which you want to perform the payroll. Depending on the calendar year your organization uses, it could be January through December or April through March.
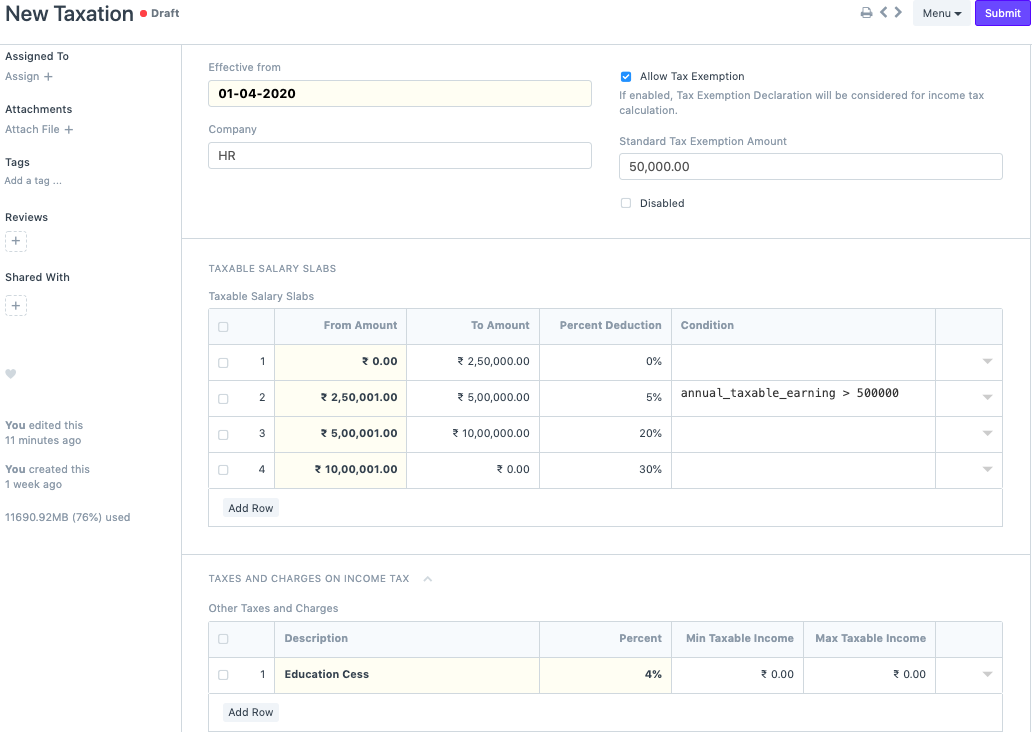
*2) Create Income Tax Slabs If you follow the Indian income tax system over here, you might make various income tax slabs. Define the slabs in accordance with the law. If necessary, you can also add more tax in the section below, modify the conditions in the table, and select "Grant Tax Exemption" if a standard deduction is appropriate.
3) Submit Employee Tax Exemption Declaration If an employee has investments, they can file tax returns to take advantage of tax breaks and lower their income tax burden. They may invest in a number of 80C, 80D, and other subcategories (Applicable for Indian Taxation).
4) Define Salary Components You can designate whether a component is an earning or a deduction component when creating salary components. Depending on the type of component, you can check particular checkboxes. Choose a default ledger account and the company. Now, these salary components may be fixed or may be depending on a certain formula. You must select the "Variable based on Taxable Salary" checkbox only for the income tax component. At the backend, this will guarantee that the Income Tax is calculated automatically.
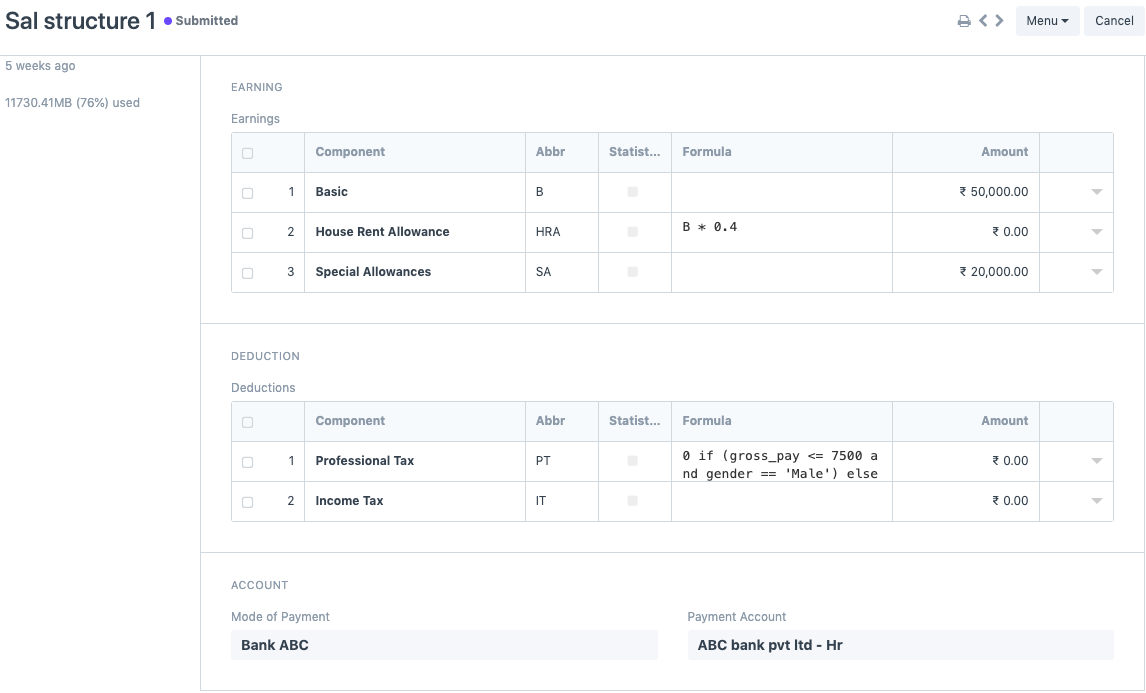
5)Create a Salary Structure You can define a salary structure after all the salary components have been created. You can specify if the pay is based on timesheets as well. Depending on your preference and the method of payment, you can add earnings and deductions.
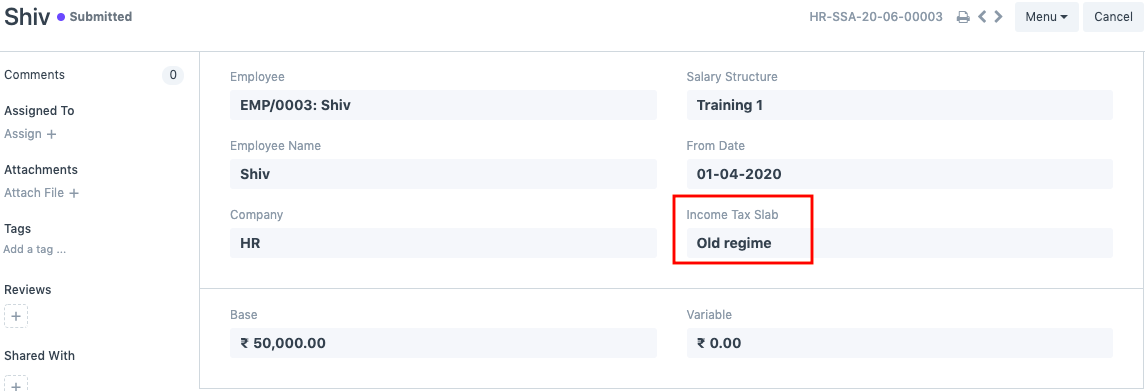
6) Assign the Salary Structure
You must allocate the wage structures to the employees once they have been formed. You won't be able to move on if you don't complete this step. Since the percentage deduction of income tax will be determined depending on the chosen Income Tax Slab (if you have numerous slabs), you must choose it while completing the assignment. If your salary structures are based on formulas, you can additionally specify a base amount.
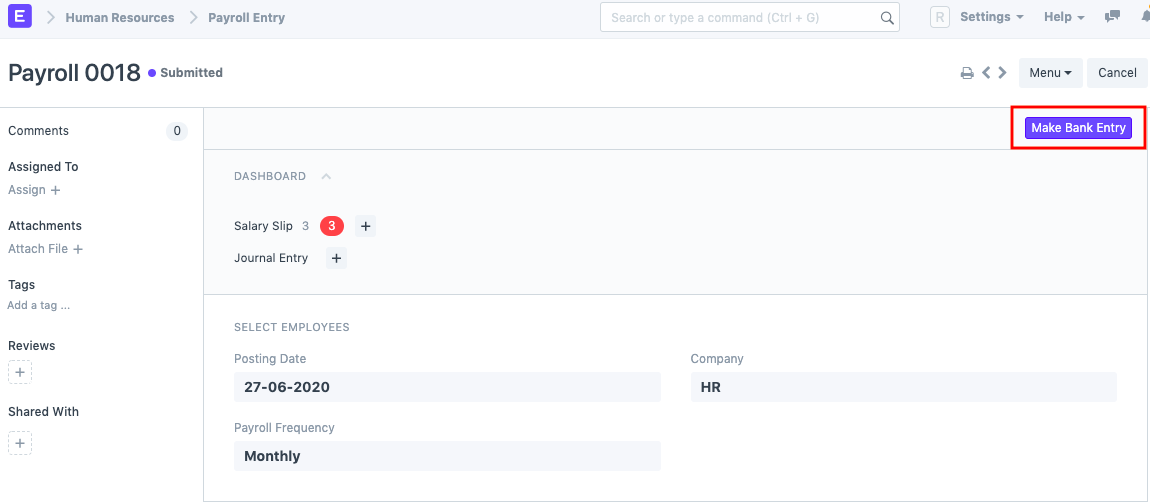
7) Create a Payroll Entry & Salary Slips After completing the aforementioned steps, you must generate a payroll entry. You can filter personnel based on department, classification, and branch after choosing the payroll date, frequency, and adding the payment account. You can click "Get employees" straight if you don't want to do that. The Employee Information section will then be filled with a list of all the employees. The salary slips will all be generated in draft form when you click "Generate Salary Slips" to continue.
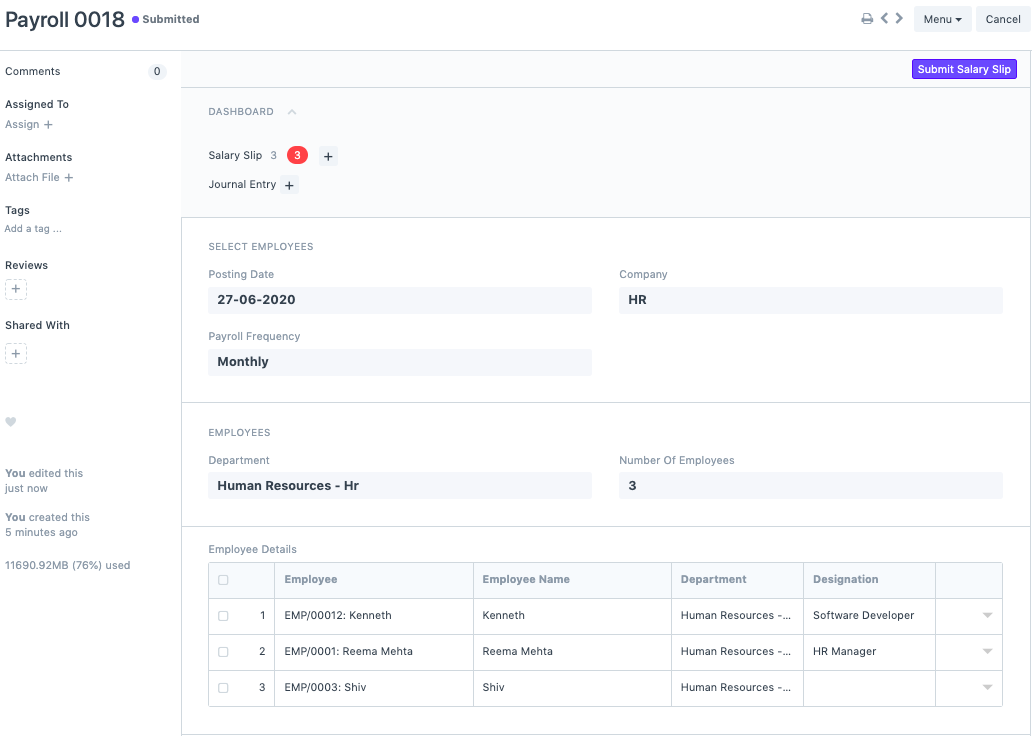
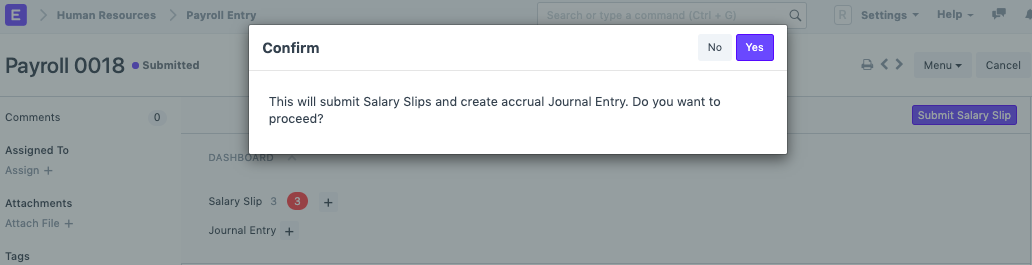
The draft salary slips can be reviewed before being submitted through the payroll entry. An accrual journal entry will be made after the salary slips are submitted. This indicates that rather than paying the payroll charges, we are recording them in the system.
8) Bank Entry Making a bank entry is the last step after booking the collected salary slips. Your payroll procedure is finished with this final step, but the salaries have not yet been sent to the bank. Such quick process must be carried out manually.